If you are completing documents that have sensitive data, you may want to hide this data from the agent. This feature enables the agent to send, preview, and download a completed document PDF that blacks out all sensitive information.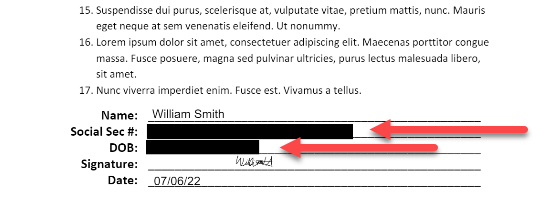
Outline
Here is an outline of the steps for masking sensitive data in a PDF:
- Enable masking sensitive data in System Settings
- Create sensitive attributes
- Bind sensitive attributes to document fields
- Configure document settings to mask sensitive data
These steps are detailed in the sections below.
Enable masking sensitive data in System Settings
Without this setting, even PDF templates with sensitive fields will not mask data.
Go to System Settings > Security > General and make sure the Mask Sensitive Data From Agent toggle is on.
Create sensitive attributes
- From the Lightico Administration Screen, go to Attributes mapping and click Add custom attribute.
- Fill in all the fields (see Create basic attributes).
- In the Sensitive data field, select Yes.

- Repeat these steps for any other sensitive attributes you need for your PDF template.
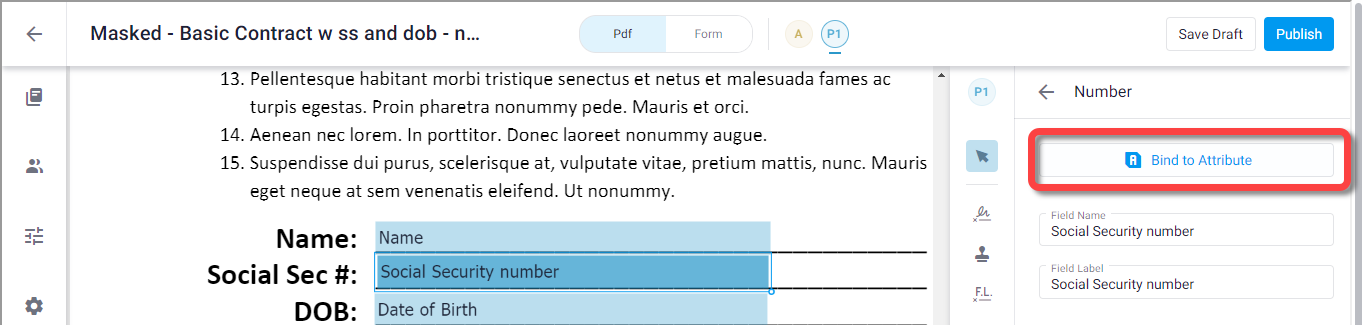
Bind sensitive attributes to PDF fields
- Open a PDF template in the PDF Builder.
- Select a field, click Bind to Attribute, and select an attribute that you defined as sensitive.
Configure document settings to mask sensitive data
- In the left panel of the PDF Builder, open the settings tab and turn on the Mask sensitive fields toggle.
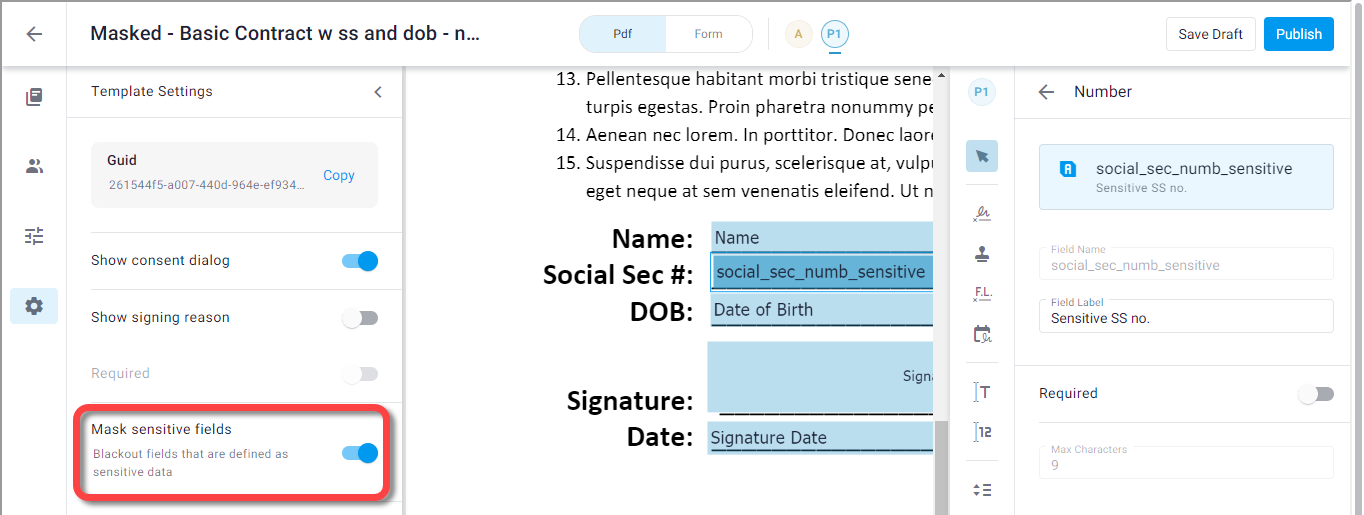
- Click Publish.
The template is ready to use in a session.