A case consists of a series of tasks for an agent to complete. Each task can have multiple parts including filling out forms and other actions. Once the case is completed, the agent submits it for review to a supervisor.
This article explains how to work with case types that have already been configured by an administrator.
To create or edit a new type of case see, Configure a case type.
Filling in forms
A large part of completing a case is filling in forms with the information you obtain from a customer.
From the Case Manager home page, open a case.
The case opens to the first task.Complete the fields in the form.
Use the left navigation to go to a different page of the case.
.png)
Click Save draft to save changes.
.png)
Taking notes
Notes are a way of adding comments to a case. This enhances the collaboration between different agents and supervisors as the case is being processed.
Unlock notes
Notes are locked by default, preventing note creation. Unlocking the notes is a permission typically reserved for a user with a supervisor role.
See Create a user with Case Manager permissions.
To unlock notes:
Click the notes icon.
.png)
The notes panel opens.Click the lock icon to unlock or lock the notes.
.png)
Notes can be unlocked regardless of what state the case is in.
Take notes
In the Notes panel, type your note.
Click the + to add the note.
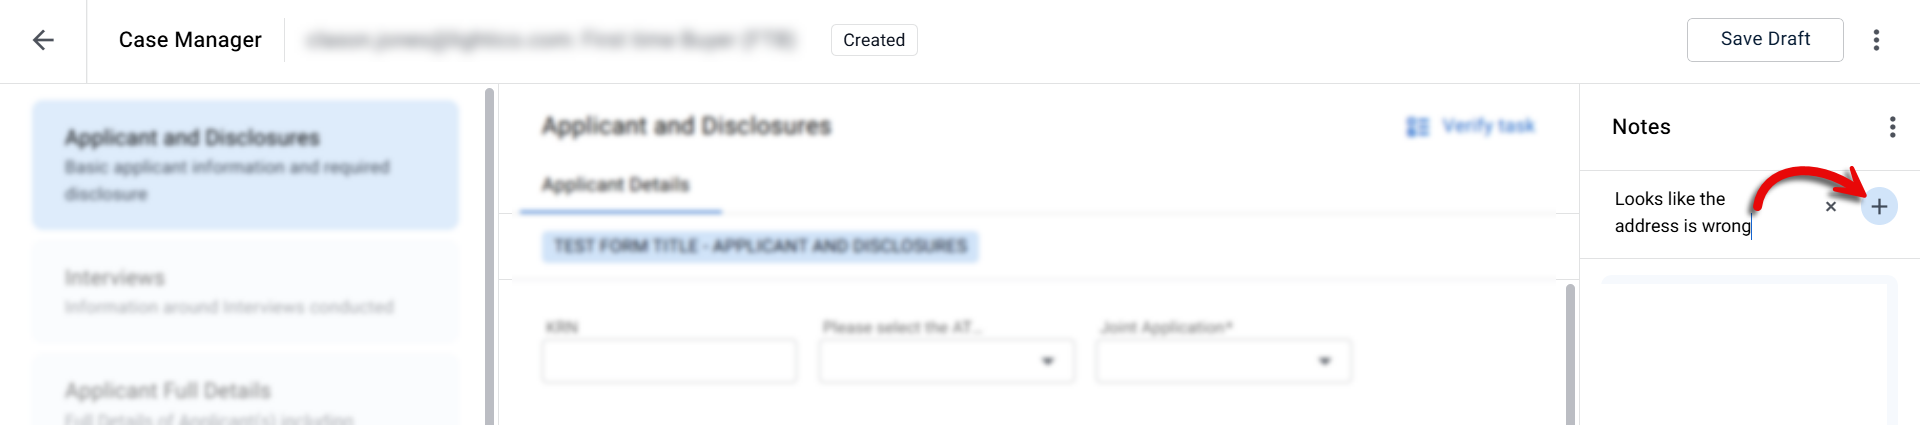
The note is saved in the panel with the name of the author of the note.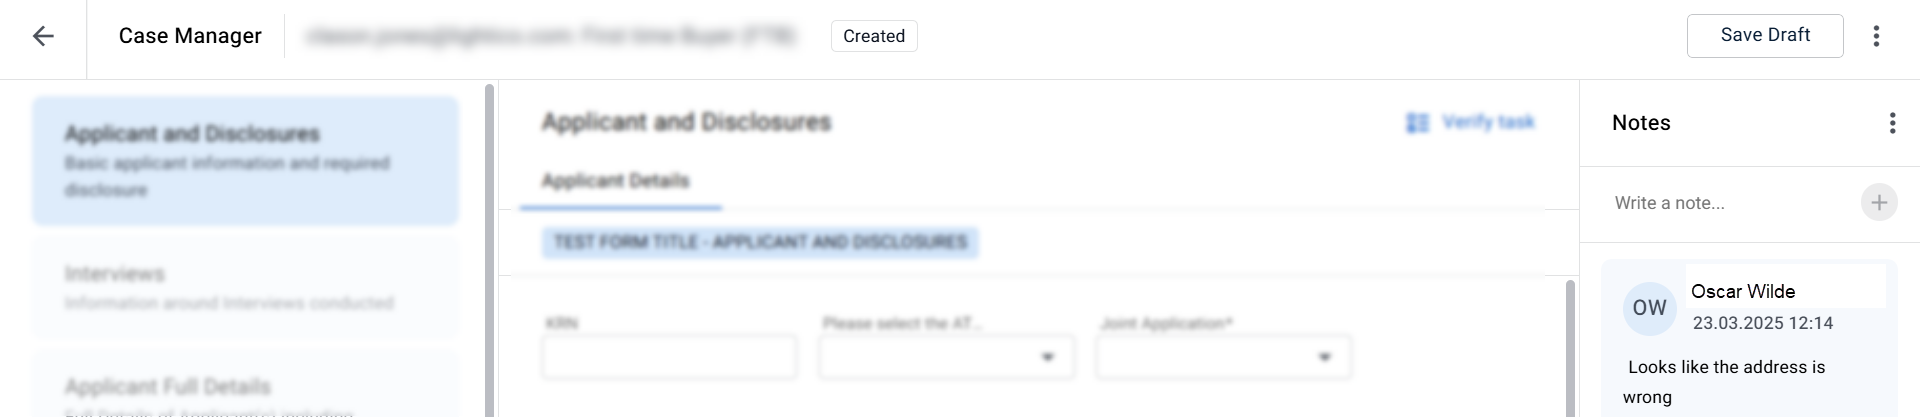
Generate a document
Some tasks in a case enable you to generate a document that uses data from the case to populate fields in the document.
To generate a document:
Click Generate document.
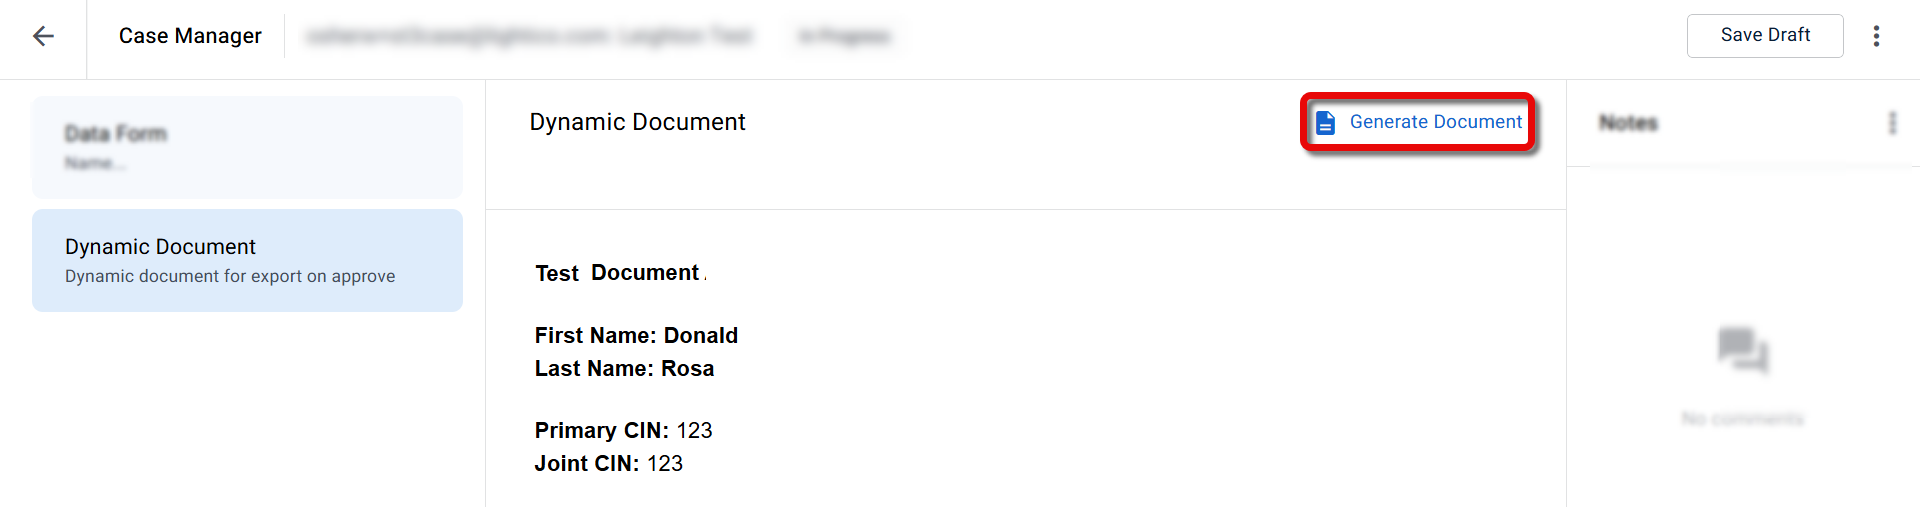
A document preview appears.Click Download and save using the file browser.
.png)
The document is downloaded to your computer.
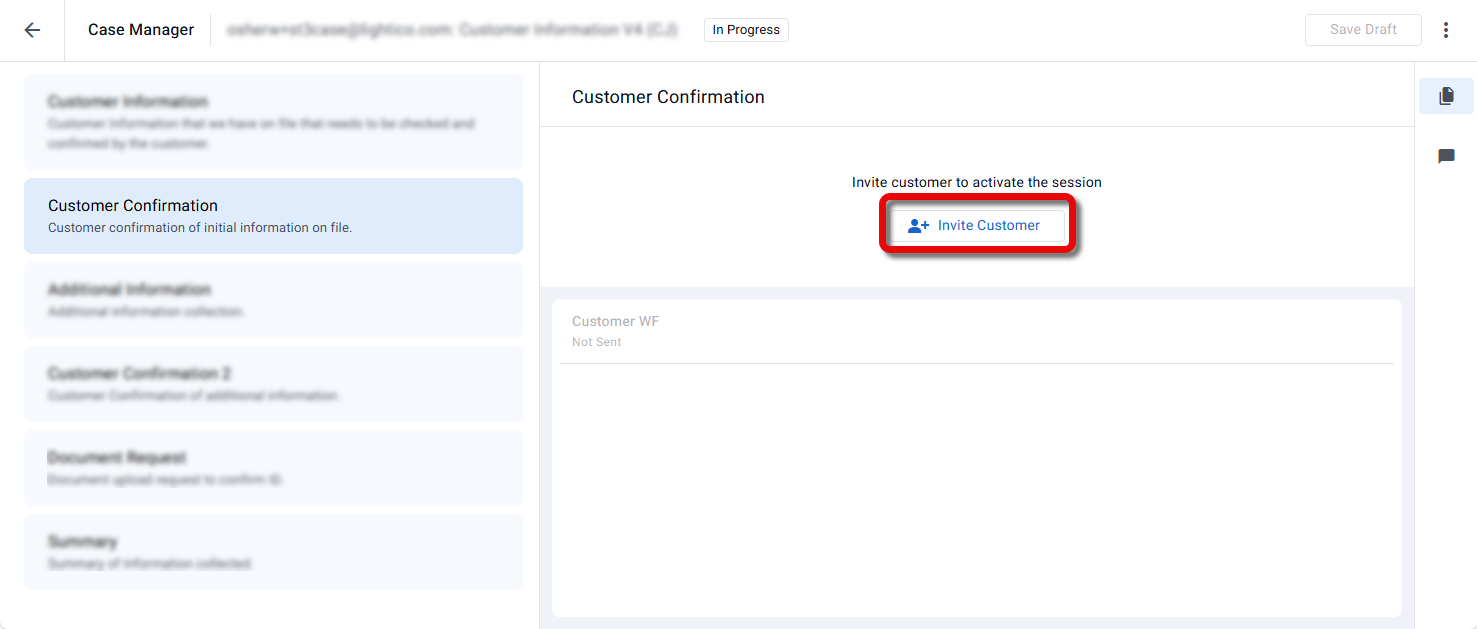
Invite customer to a collaboration session
Case Manager allows agents to initiate a customer-facing collaboration session directly from a case. This enables customers to complete tasks such as confirming information, signing documents, submitting forms, or uploading files in real time. Agents can monitor the session’s progress and access completed documents directly from the case.
When a customer is invited to a collaboration session, they receive an email or SMS with a secure link to join a live chat environment where they can complete the actions assigned to them.
How to invite a customer
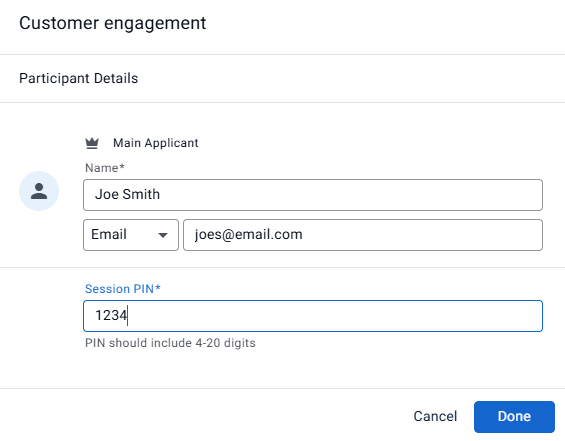
Click Invite Customer on the task page.
In the Customer engagement dialog, enter the participant details, including name, phone or email, authentication information for session access PIN (if enabled), and a second communication channel for sending and OTP (if enabled).
Note
If there are additional participants needed for the customer engagement - for example cosigners on a contract - you will be requested to provide their contact details as well. For more information, see Send a Workflow that requires agent input.
Click Done.
The name of the Workflow and the list of steps appear on the task page.
Click the documents icon on the right side.
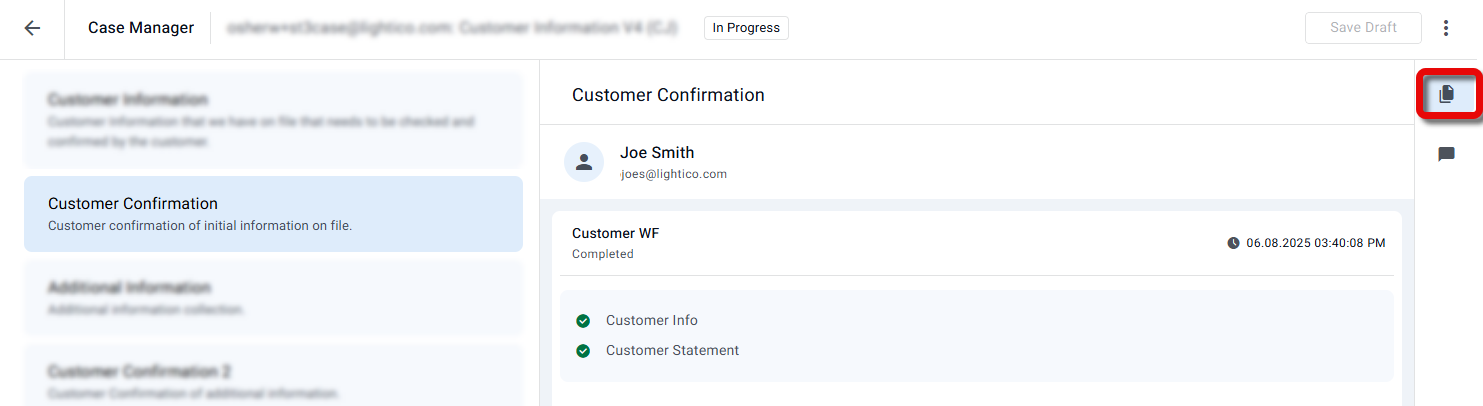
Links to completed documents and uploaded documents appears in the pane on the right..png)
Additional customer-facing tasks
If there are additional collaboration tasks in the case:
Open the task and click Add to Session.

The customer-facing Workflow for that task is added to the session that was already started.
Re-send a task
If a customer submits incorrect, incomplete, or outdated information, you can re-send the task instead of creating a new one.
Click Re-send on the task
.png)
The task is sent again to the customer in the Collaboration Room
The customer completes the task again and submits updated information
What happens when you re-send:
The same task is reused (no new task is created)
The latest submission becomes the active one
Previous submissions remain available for reference
Note
The Re-send option appears only if the task was configured by your administrator as re-sendable.
Re-engage a customer
If a customer hasn't accessed the collaboration room because their contact details were entered incorrectly, you can correct the details and resend the invite without ending the session.
Re-engage is only available while the customer has not yet joined the session.
In the case view, click the arrow next to the customer's name.
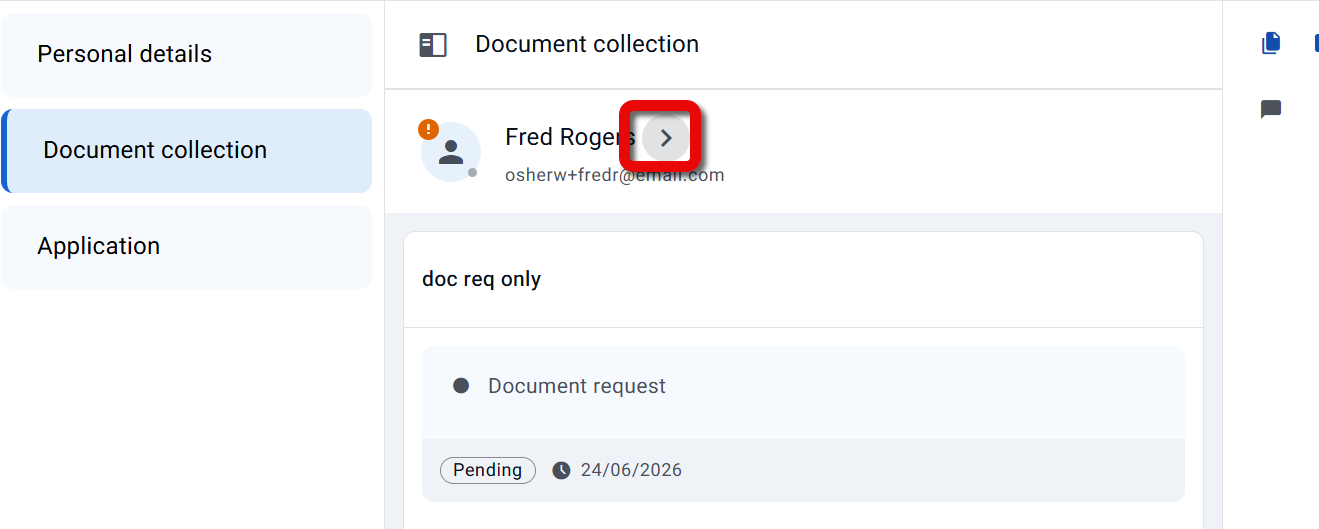
The Participant details panel opens.Click Re-engage.
.png)
In the Re-engage dialog, update the customer's name, email, or phone number.
At least one field must be changed before the invite can be sent.Click Send.
.png)
A fresh invite is sent to the updated contact details. The existing session and all its content are preserved.
Note
Re-engaging resets the Workflow expiration timer from the beginning, even if it had already expired.
Changing the case status
Agents can move a case from its current state to any of the next available states in the lifecycle. The options you see depend on the case's current state and the transitions defined by the administrator.
To change the case status:
Click the options menu at the top of the case page.
Under Change status, select one of the available next states.
Notes about state changes
State options are contextual. The menu only shows valid transitions. For example, from the New state, you may only be able to Start a case or Cancel it.
Required fields may block transitions. Some transitions are only available after all mandatory fields in the case have been completed.
Some states are read-only. Moving a case into certain states may lock the case for editing. Admin-level permissions may be required to make changes after that.
Status changes do not transfer ownership. Changing the case status does not update the case owner.
To change ownership:
Open the options menu.
Under Assigned to, click the edit icon.
Select a new case owner.
.png)
Q & A
How do I know if a task has been completed?
Click Verify task to check for missing mandatory fields.
Incomplete fields will be highlighted in red and flagged in the left panel.
A success message appears if all mandatory fields have been completed.
Can I generate a report of the case?
Yes. If the case includes a document generation task, you can click Generate document, preview it, and download it.
How can I enable/unlock notes in a case?
Notes are locked by default and can only be unlocked by users with the required permission—typically supervisors.
To unlock:
Select Unlock notes from the options menu in the Notes panel.
For more information, see Create a user with Case Manager permissions.