This article explains a type of Workflow that requires you, the agent, to provide input as you are adding it the session. For other examples, see, see Send a Workflow that requires agent input.
Providing customer contact information
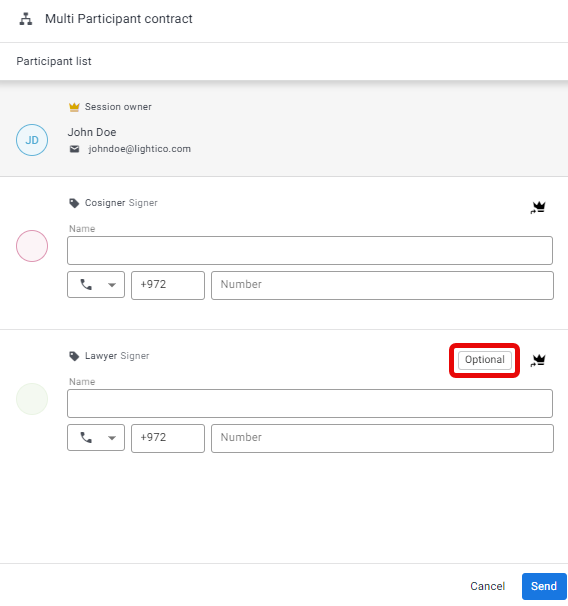
When you, as the agent, send a Workflow that includes multi-participant eSign documents, the Participant list pop-up appears that enables you to provide contact information for the additional participants.
Note
Your Administrator may have disabled text messages (SMS), in which case the phone number option will not appear.
You’ll need to provide contact information for all participants not marked Optional. In the example below, the first additional participant (Cosigner) is mandatory and the second (Lawyer) is optional.
For each participant, enter a name and a phone number or email address for sending the session invitation.
No contact information
If you do not have the contact information for a participant and you’d like the customer to provide it, see below.
Tip
If a document requires two signatures with different labels but the same person holds both roles (e.g., CEO and CTO), you can use the same name and contact details. Separate sessions will be created, and the person will receive two messages with unique session links for each role.
Providing an alternate communication channel for OTP
If your administrator has configured OTP (one-time password) for entry in a session, you may need to provide an alternate communication channel for cosigners to receive the code. This field will appear beneath the invitation communication channel.
If you provide an email for sending the invitation, you’ll need to provide a phone number for sending the OTP and vice versa.
For more information about working with OTP sessions, see Invite to a session with OTP.
Enabling the customer to assign participants
If you do not have the contact information for a participant that you need to add, you can enable the customer/primary participant to assign them and provide their contact information.
To enable the customer to assign participants:
In the Participant list pop-up, click the assign icon.
If the assigned participant is mandatory, the customer must provide the contact information to proceed.
If the assigned participant is optional, the customer will have the choice whether or not to include this participant (see below).
To define an optional participant as mandatory, click Optional and select Make mandatory.
Customer assigning experience
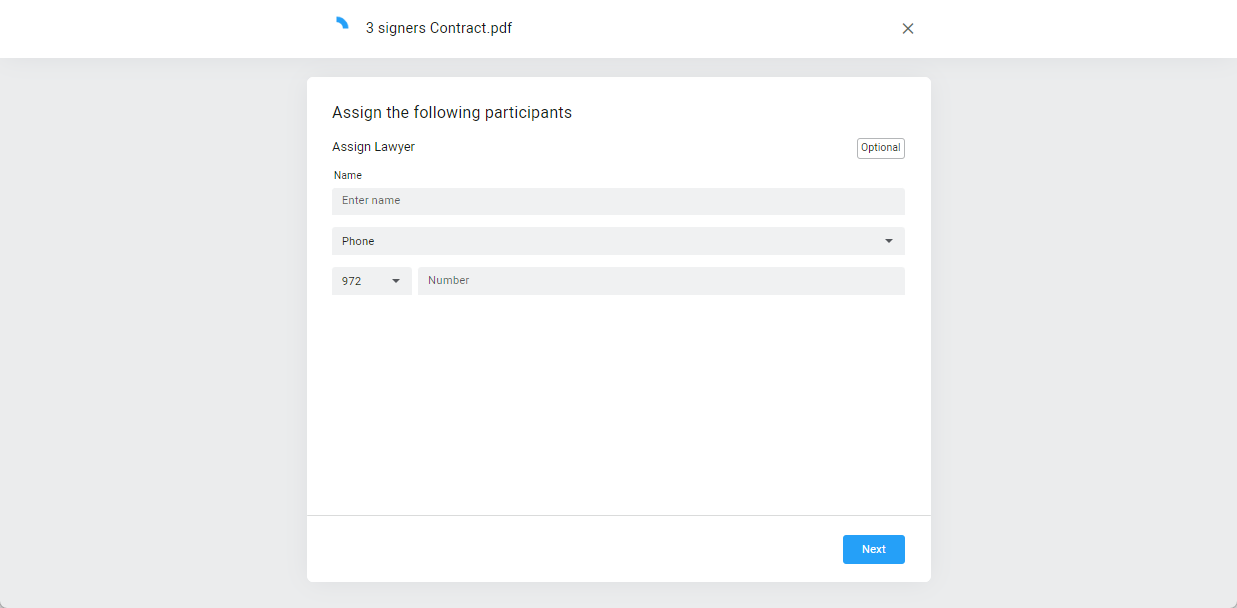
When the customer opens the Workflow, an Assign window opens.
The customer provides the contact information for all missing mandatory participants and clicks Next to proceed with the Workflow.
Note
Your Administrator may have disabled text messages (SMS), in which case the phone number option will not appear.
Viewing participant status and changing contact info
Agent
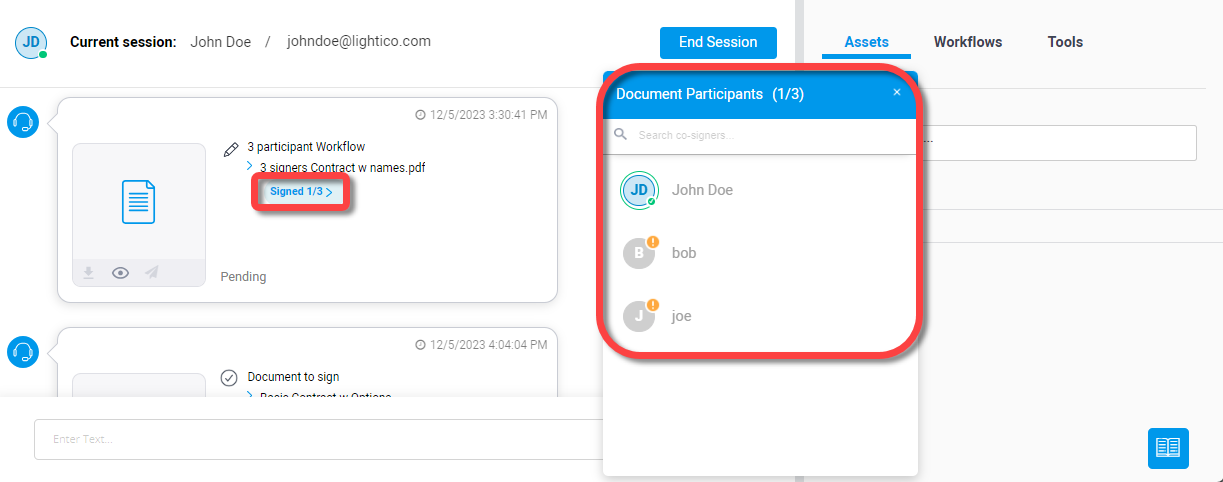
The agent can view the additional participants by clicking in the interaction tile to reveal the Document participants list.

Hover over a participant icon to view any of the following:
Participant consent status
Participant authentication status
OTP code (if your admin allowed the agent to see it)
You can also:
Start a private session with the additional participant
Re-engage this participant by providing a email or phone number
Customer
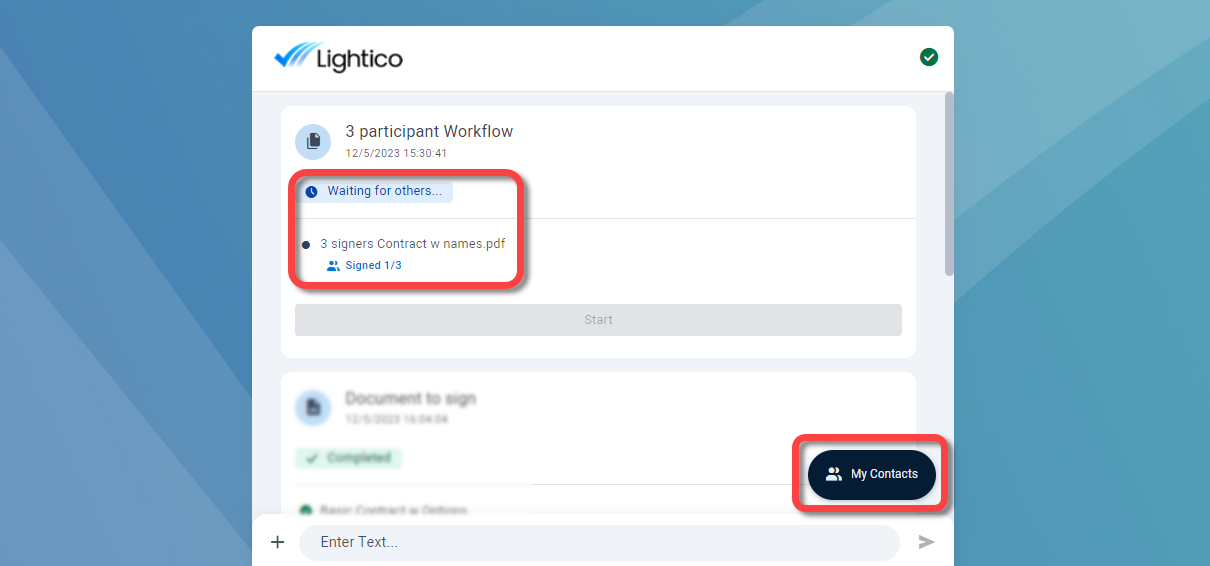
The customer can view the status of the additional participants in the interaction tile.
If he has assigned participants, he can view the contact information that he provided by clicking My Contacts.

A window with the additional participants appears.
If necessary, the customer can click Re-engage to change the contact information.

Q and A
Can I use the same contact details for a participant who holds multiple roles?
Yes, the same name and contact info can be used, and separate sessions will be created for each role.
What happens if I don’t have contact information for a required participant?
You can enable the customer to assign the participant, but they must provide the contact info to proceed. See above.
Can I re-engage a participant if their contact info changes?
Yes, as long as the participant has not yet entered the session, both agents and customers can update contact details and re-engage participants from the interaction tile. See above.
Do I need to provide two communication channels when OTP is enabled?
Yes, one channel is used for the session invite and the other for sending the OTP.


