When you send a Workflow that requires your input as an agent, a pop-up dialog box appears before the Workflow is added to the session, enabling you to provide the input.
Types of input that may be required are:
For other types of agent input scenarios not listed here, see the other articles in the Send a Workflow section.
A Workflow may require more than one type of input. For example, a Workflow may require you to provide your signature and to fill out a Form. See the sections below for more information about each of the types of input.
To send a Workflow that requires agent input:
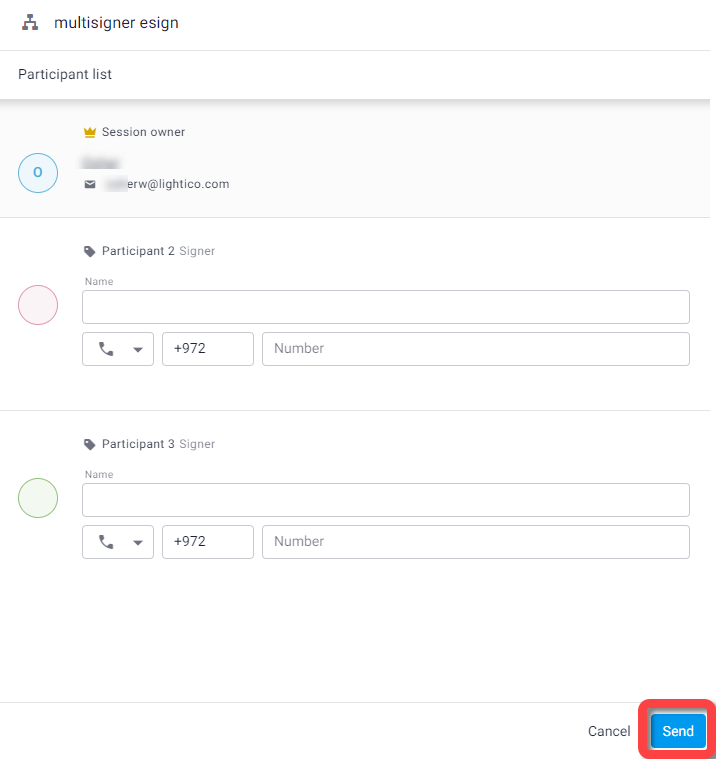
Add the desired Workflow to the session.
A pop-up appears.
Provide any information required in the pop-up.
Click Send.
Providing signature or initials
When you send a Workflow with one or more eSign documents that require an agent's signature or initials, a pop-up appears that requires you, the agent, to draw or type your signature.
You may be required to sign before or after the customer and additional participants. You’ll be given an opportunity to review each of the documents in the Workflow before applying your signature. You can draw or type your signature once and apply the same signature and/or initials to each of the eSign documents in the Workflow that require it.
.png "image(37).png")
Filling in a form
When you, as the agent, send a Workflow that includes an agent form, a pop-up appears that enables you to fill in the fields. The data you provide may be used later on in the Workflow. For example, if you provide a date of purchase in the form, and the date of purchase is required in a document in this Workflow, this field is automatically populated with the data you provided.
.png "image(40).png")
Providing a URL
You may send a Workflow that includes a Dynamic Document or Tick-box Document with an URL placeholder. In this case you will need to provide a URL address before adding the Workflow to the session.
Note for BC
To place an embedded URL in a Dynamic Document or Tick-box Document, see Add dynamic elements to a Dynamic Document.
To provide a URL address:
When you add the Workflow to the session, a dialog box appears.
Enter a URL and click Send..png)
Providing an alternate communication channel for OTP
You may send a Workflow that requires the customer to enter an OTP (one-time password). In that case, you’ll need to provide a communication channel for the customer other than the one used to send the session invitation link.
For example, if the session invitation was sent to the customer’s email, then you will be required to provide the customer’s telephone number for them to receive the OTP password and vice versa.
.png)
If you already provided an OTP communication channel when you created the session or for a previous Workflow you will not be required to do so again for this Workflow.