This article is an explanation for the agent to understand what happens when a customer reassigns a document in a Workflow.
What does it mean to reassign a document?
There may be a document in a Workflow that the customer is not authorized to sign. In this case, the customer may choose to reassign the document to another person. This means that they will provide the contact information for the new participant. Once they provide the information, an invitation is sent to the new participant to join a separate session to complete the document.
How to reassign a document
The following are instructions for a customer to reassign a document. This information can be helpful to an agent in guiding the customer through their journey.
To reassign a document that has been sent to you, the customer, as part of a Workflow:
- Click Open on the interaction tile in the collaboration UI.
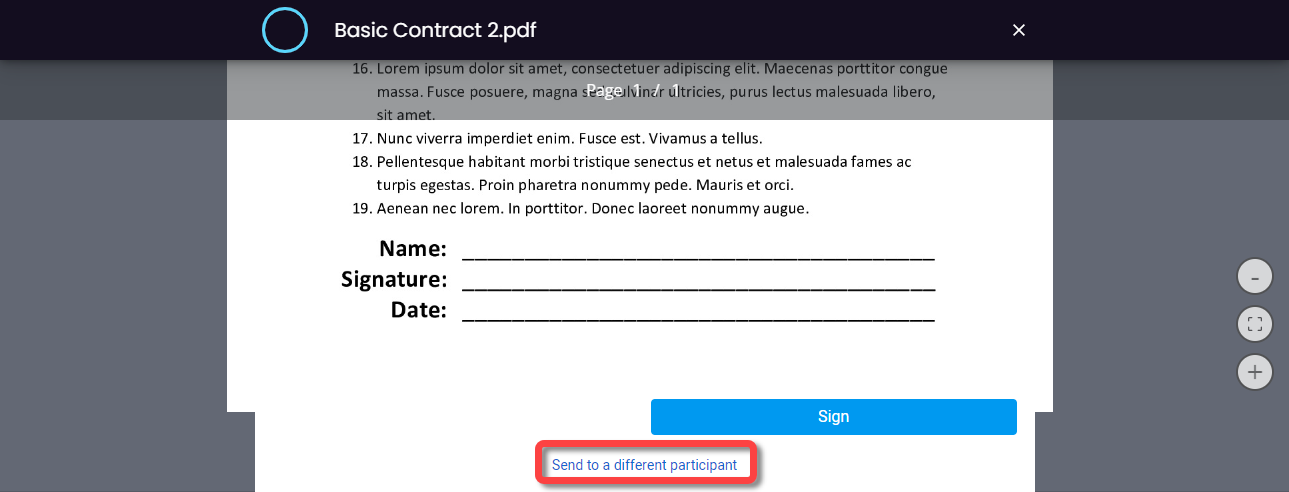
The first step in the Workflow opens. - When you reach the document step in the Workflow, you can review the document and, if required, click Send to a different participant at the bottom of the screen.
 The Reassign participant screen opens.
 - Enter the contact information for the new participant.
The information will be used to send an invitation to the contact to join a session. You can choose to provide a phone number to send an SMS invitation or an email address to send an email invitation. - If relevant, enter a session PIN for the new participant.
Click Send.
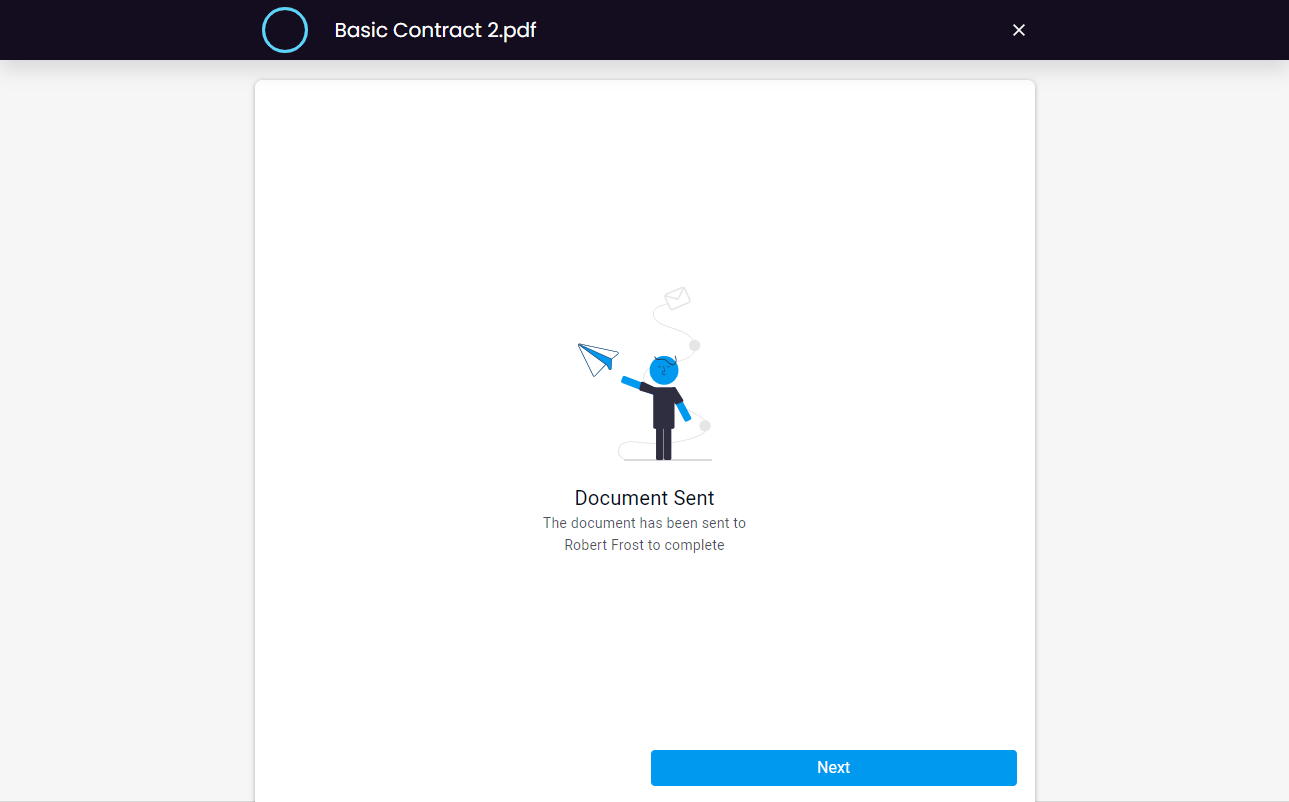
 The Document sent confirmation screen appears.
Click Next or close the screen.
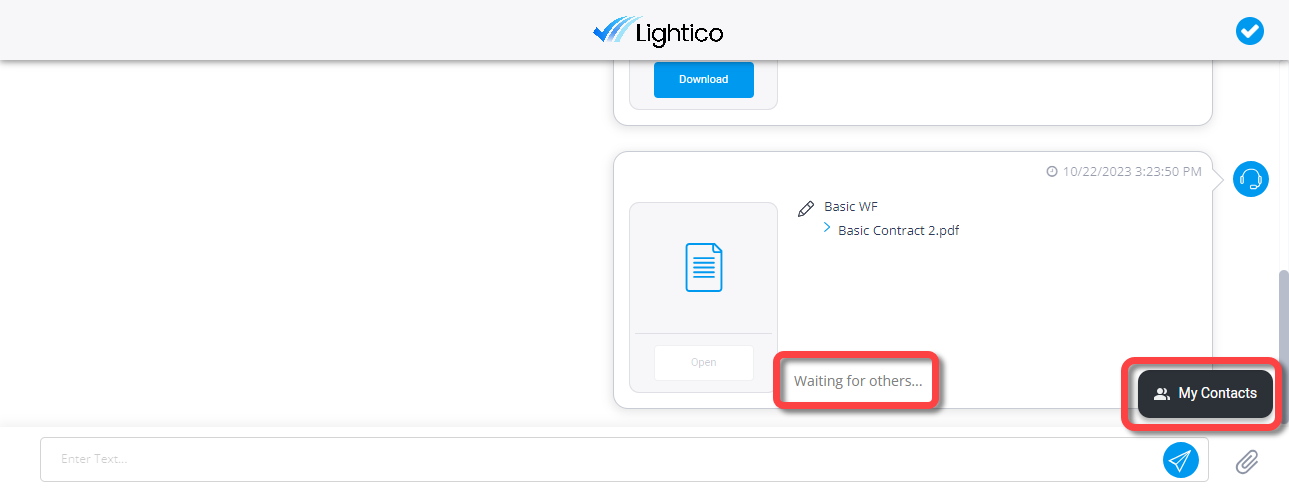
 The collaboration UI appears.
View the progress of the Workflow in the interaction tile. Waiting for others... will appear in the tile until the new participant completes the document.
To correct the contact information for the new participant, click My Contacts.
The My Contacts page opens.Click Re-engage next to the participant name.
Note:Re-engage is only possible if the participant has not yet connected to the session.
The Edit Contact Details page opens.Change the contact information and click Send.
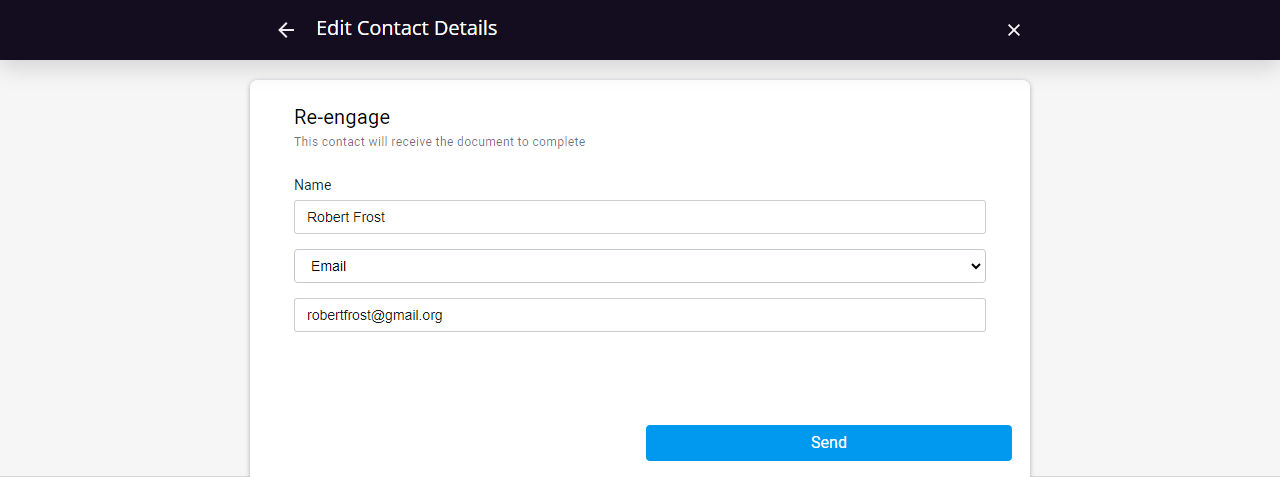 The invitation is sent using the corrected information.
When the reassigned participant has completed the document, the document and Workflow show a completed status.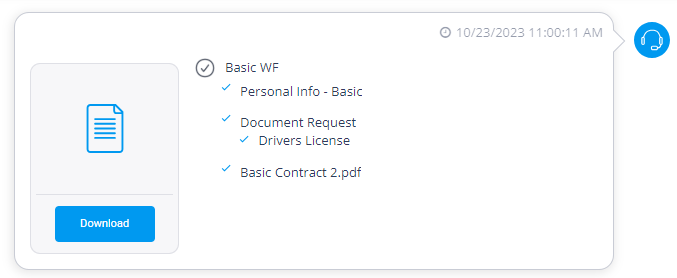
The agent side
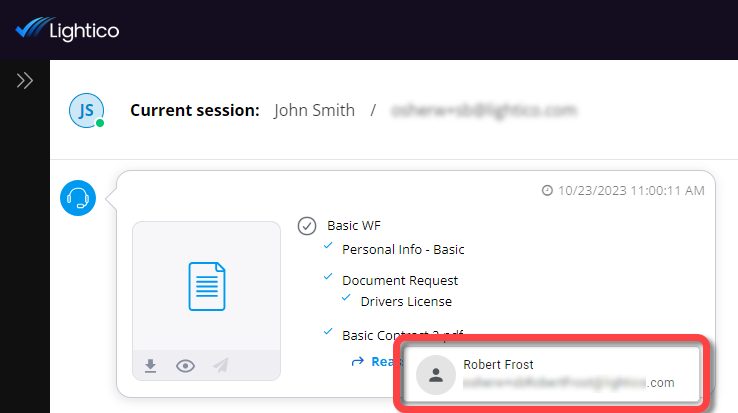
You, the agent, can monitor the reassigning process in your collaboration UI.
When the document is reassigned, an indication appears on the interaction tile.
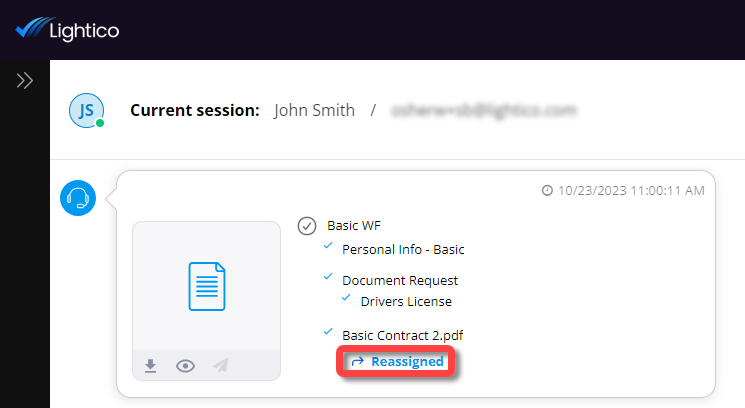
Click Reassigned to show the information of the new participant.
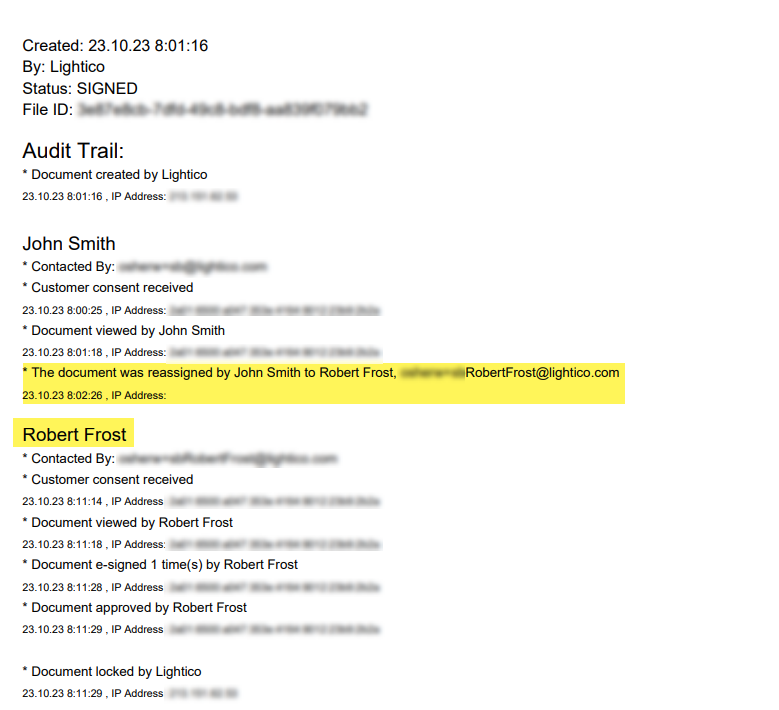
Audit trail record of reassignment
The audit trail of the document includes information about the reassigment and any actions that were taken by the new participant.