This article explains how to use the custom integration hub for configuring settings that are essential for using the Lightico API and consuming events.
For full documentation of Lightico API and events, see Lightico developer center.
You can find the Custom hub on the Built-in integrations tab of the Integrations page in the Lightico Admin Center.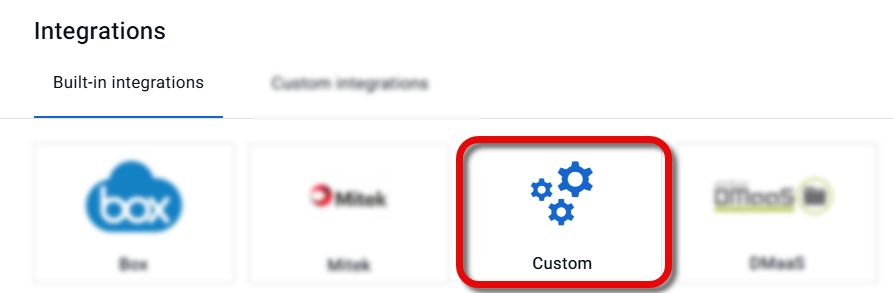
Note
If you are looking to create a custom integration with an external service, please go to Build a custom integration.
Overview
The main sections in this article are as follows:
Set up a custom integration hub
In the admin center left navigation panel, click Integrations.
The Integrations page opens.Under Add New Integration, click Custom.
.png)
The Custom integration hub opens.Enter a Name (only lower case letters and underscores) and a Description for this hub.
Click Save.

The Lightico Integration hub is set up and activated.
Generate API credentials
Before sending an endpoint from your system to Lightico, you’ll need to generate credentials for authorization purposes.
To generate API credentials:
In the custom integration hub, click Generate API Credentials.
You are prompted to enter your Lightico login credentials.Enter your Lightico Username and Password and click Apply.
.png)
The API credentials appear.Click Save.
.png)
Note
Take note of the Client ID and API Key, for authenticating API calls.
Tips
To see the API Key, you'll need to provide your Lightico login credentials.
For the API Password, you'll need to click the refresh button, enter a new password, and use this new one in your system.
Map fields to Attributes
Mapping fields from your app/platform to Lightico Attributes enables you to do the following:
Fill in digital forms and PDFs with pre-existing data from your platform.
Use your data to affect conditional actions in Workflows.
Update fields in your app with the data obtained during a session.
Enhance intelligent document analyzing.
Note
Field mapping is only supported when creating a session using the API and not with a session initiated by an agent from the agent console. See Defining a data source below.
Methods of field mapping
There are two ways to map fields. You can choose one or the other, depending on your needs:
Dynamic mapping - for collaboration session endpoints.
Schema mapping - for Document Analyzer endpoints.
Dynamic mapping
Dynamic mapping is where you establish a link between your app/platform and import objects and fields into Lightico.
Advantages of dynamic over schema mapping
Automatic and accurate import and updates of your fields.
Supported for all Workflows sent by API
Two step process
Dynamic field mapping is accomplished in 2 steps:
Import objects and fields from your app into the custom hub
Requirement
Importing objects and fields requires you to develop an API response to the import request. This can be done with the help of your Lightico customer service rep.
Map the imported fields to Attributes in the Attributes mapping page of the admin center
Import objects and fields into the custom hub
In the Connectivity tab of the custom integration hub, enter the URL, username, and password for your app.
(optional) To enable the system to check for specific headers (for example, simple authorization), click Add headers and define the headers.
.png)
In the Import objects tab, click Import now.
.png)
When the import is complete, all the imported objects are shown in the Connectivity tab.
Map the imported fields to Attributes
Go to the Attribute mapping page in the admin center and find (or create) an Attribute to which you would like to map one of your imported fields.
Click the edit icon for the Attribute.
.png)
The Update Attribute window appears.At the bottom of the window, click Add source.
.png)
The source settings appear.Define the following:
Source - Name that you gave to the custom integration hub.
Object - Select the name of the object that contains the field you are mapping.
Field - Name of the field from your app that you are mapping.
Updatable - Select this checkbox to use changes made in a Lightico session to update the data in your app. For example, if the customer changes their email address during a Lightico session, the email field will be updated in your app.

Click Save.
The Attribute is mapped to your app field.
Repeat the steps for all relevant fields that were imported from your app.
Schema mapping
Schema mapping is where you manually provide the objects and fields from your app in the form of a JSON schema.
Note
Currently, schema mapping is only supported for Document Analyzer endpoints and not for running a Lightico session.
Advantages over dynamic mapping
Provide and update fields without a live connection to Lightico
No development required
Map Attributes directly from the custom hub
Map Attributes with a JSON schema
You can build a data schema by uploading a JSON file, building one directly in the UI, or a combination of both.
Set up a schema
If no schema exists, an Import schema button appears in the Data schema tab. If a schema already exists, schema actions are available in the three-dot menu.
To upload a JSON file as your schema:
Click Import schema and select the file. The objects and keys appear in the tab, with an Attribute dropdown next to each key.
.png)
To build or extend a schema directly in the UI:
To add an object, click + Add object and enter a name.
To add a key within an object, click + Add key beneath that object, enter a key name, and select an Attribute from the dropdown.
To rename a key or object, click its name and edit the text.
To delete a key or object, click the x next to it.
Deleting an object also deletes all its child keys — a confirmation shows which keys will be removed.
.png)
When done, click Save at the top of the integration hub..
Note: Each key can be mapped to only one Attribute, and each Attribute can be mapped to only one key.
Export and import a schema with mappings
To save a schema together with its Attribute mappings — for backup or to move it to a different environment — click the three-dot menu and select Export schema.
.png)
To restore an exported schema, click the three-dot menu, select Import schema, and select the file. The imported schema replaces the current one entirely. Any mappings that reference Attributes not present in the current environment are dropped.
View the schema as JSON
To see the schema in JSON format, turn on the See Json toggle in the top right of the Data schema tab.
.png)
Defining a data source
By default, Lightico identifies data in a session by its Attribute name. If you have mapped your fields to Lightico Attributes, you need to let Lightico know that you want your field names to be the source of the data/field names. Lightico will then translate data coming from your app into Attribute names that can be used in the session.
This is done using one of the following API endpoints, depending on what type of action you are performing:
Adding Dynamic Workflow v28.1 - in the Set Attributes for a session endpoint, enter the custom hub name in the
sourceparameterAdding Workflow template - In the Create new session endpoint enter the custom hub name in the
sourceNameparameterStarting document analysis - In the Create document analysis endpoint enter the custom hub name in the
sourcenameparameter
Define the value of the
sourceorsourceNameparameter as the name of the custom integration hub where you configured the field mapping.For example:
"sourceName": "my_custom_mapping_hub"
Define event destinations
Events are Lightico's way of letting you know when something significant occurs in your Lightico account and providing you with information about that occurrence. See Events in the Lightico developer center for an explanation of all events. Each type of event notification can be sent to a different destination URL (webhook). In the integration hub, you can define a URL for each of the different events.
Warning
Lightico permits the use of client-controlled endpoints for integration purposes. Please be aware that Lightico reserves the right to remove any endpoints that utilize free or open webhook site services. This measure is in place to ensure the security of callback data.
To configure event destinations:
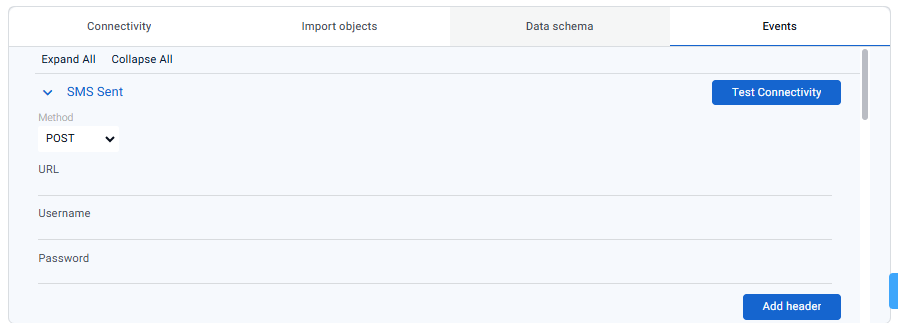
Open the Events tab in your API integration hub. This tab shows all supported Lightico API events.
Click Expand All and enter a URL and, where applicable, a Username and Password for each event.
You can click Test Connectivity to verify that each event URL is valid.
Event destinations are configured.
Send events to multiple destinations
If you need to send events to multiple URLs, you can create more than one API integration hubs and define different webhooks for each one. Each event will be sent to all defined URLs.

Send events to specific destinations
If you need events for a session to be sent to the webhooks in only one of your configured hubs, you can do so using one of these endpoints:
For a session - v21.1 Create new session
For dynamic Workflows - v28.1 Create new session
For Workflow templates - v21.3 Add Workflow template to a session
In the hubs object, define events as the name of the hub with the relevant webhooks.
For example,
"hubs": {
"events": "hub_2"
}