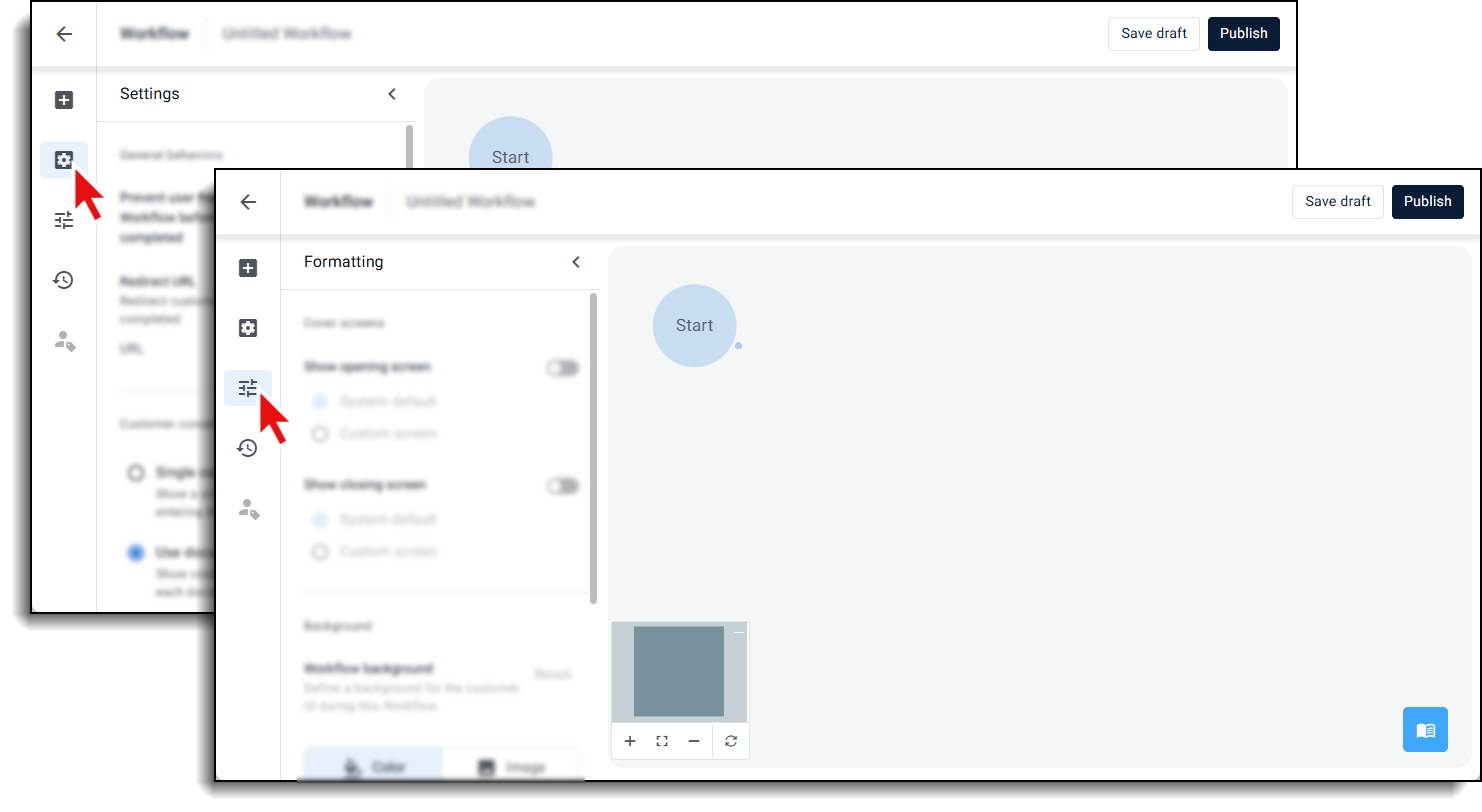
This article describes how to configure settings that affect the overall functioning of the Workflow. These settings are found in the Settings and Formatting tabs in the right pane of the Workflow builder.
Define customer consent policy
You may have a Workflow that includes multiple documents with different customer consent settings. You can define a global policy for the Workflow that dictates how customer consent settings are applied. This policy overrides consent settings for individual documents included in the Workflow.
To define a customer consent policy for a Workflow:
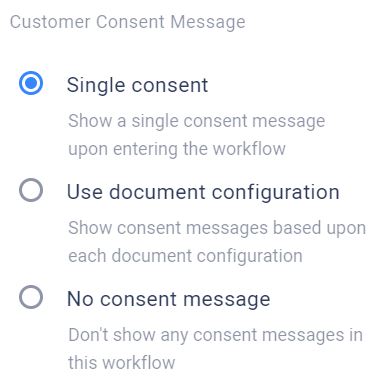
In the Settings tab, under Customer Consent Message, choose one of the following options:
Single consent - Show a single consent message upon entering the Workflow.
Use document configuration - Show consent messages according to the customer consent settings of each document in the Workflow.
No consent message - Do not show any consent messages in this Workflow.
Workflow expiration
The Workflow expiration setting lets you define a time limit for participants and agents to complete all required actions in a Workflow. This setting ensures time-sensitive processes stay on track.
When the Workflow is added to a Lightico session, the expiration date and time are displayed for the agent, primary participant and all additional participants.
.png)
Once the expiration time is reached, the Workflow is displayed as expired and becomes unavailable to all parties.
.png)
Even if a participant is in the process of signing, the Workflow becomes invalid when the time expires.
.png)
If no other open interactions remain in the session, an expired Workflow moves the session to Completed status, which stops any further customer reminders.
To set a Workflow expiration date and time:
In the settings tab, under Workflow expiration date, turn on the Add expiration time toggle.
.png)
The Set expiration time dialog appears.Set the days and hours until the Workflow expires and click Done.
.png)
The expiration date is set and displayed in the settings tab..png)
Customize opening and closing screen
You can display a custom opening or closing screen for your Workflow.
To customize the Workflow opening or closing screen:
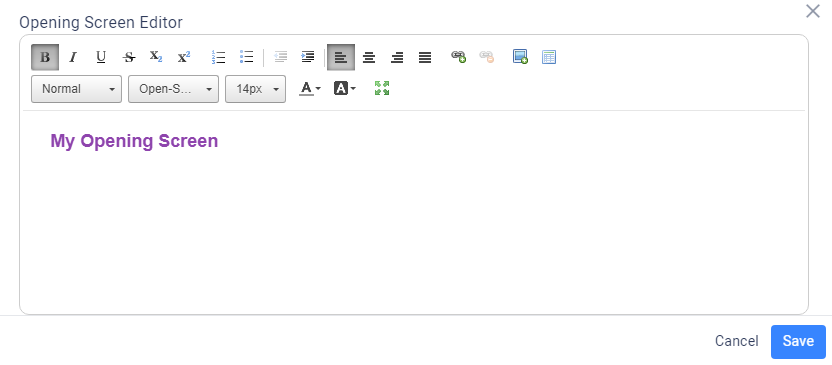
- In the Formatting tab, turn on the Show opening screen or Show closing screen toggle.
- To customize the screen, select Custom screen and, in the Screen Editor, customize your screen using the built-in WYSIWYG editor.
- Click Save.
Define workflow background
Add a background that appears behind customer forms when they participate using a laptop or desktop device. The background can be an image or color.
To define a color for the workflow background:
- In the Formatting tab, under Workflow background, click Color and enter the Hex color code in the field below.
The defined color is displayed in the preview box.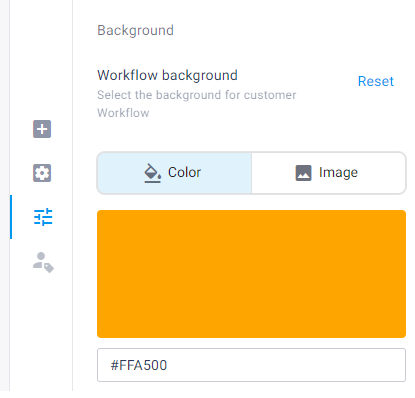
To define an image for the workflow background:
- In the Formatting tab, under Workflow background, click Image.
The default image appears in the preview box. - Click Replace Image and select an image from your files.Note:The image file size must not exceed 2Mb.
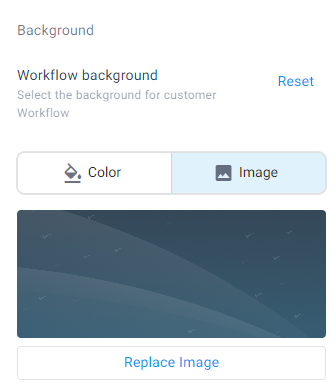
The selected image appears in the preview box.Note:Click Reset to return to the default color and image.
Send Workflow data to an email address
Lightico enables data obtained in the current session to be sent as a CSV file to an email address of your choice. You can capture the data that exists at the completion of a single Workflow step and/or the data that exists at the completion of the entire Workflow. In either case, the email is only sent at the completion of the Workflow.
Attention
This setting requires an email connection hub to be set up. See Send session data to an email address.
Send data per Workflow step
You can send a data email for the following types of Workflow steps: Form, Dynamic Document, PDF, Document Request, and External Document.
To send data per Workflow step:
Select the step element and, in the properties pane, turn on the Send step data to email toggle.
Select an email connector hub (see Send session data to an email address).
If required, click Attach document to attach any Dynamic Document to the email along with the CSV file.
Send data per the Workflow
In the Workflow settings tab, turn on the Send Workflow data to email toggle.
Select an email connector hub (see Send session data to an email address).
If required, click Attach document to attach any Dynamic Document to the email along with the CSV file.
Store draft in external storage
Use this setting to automatically save documents sent as part of the Workflow to your external storage. This ensures that documents are retained even if the Workflow is not completed, providing proof of the documents sent to your customer.
Workflows with only one document are saved as a single PDF. Workflows with multiple documents are saved as a zip file of PDFs.
Note
This setting relies on your current external storage setup. If you remove the integration later, original document copies will no longer be saved.
Tip
We recommend defining a watermark for all incomplete documents to make it clear that they are drafts and not completed. See Allow agents and customers to download incomplete documents.
To enable this setting:
In the Settings tab of the Workflow builder, turn on the Store draft in external storage toggle.
Confirm the activation in the dialog.