When a PDF template or overlay template (used with an external document) contains fields that need to be filled in by the customer, a digital form is auto-generated. The customer fills in all fields in this form and then the information is inserted into the document.
When you add a PDF template to a workflow, you have the option of hiding this auto-generated form and replacing it with a custom form. This enables you create a much better customer experience by:
- Branding and customizing the form using the Form Designer
- Combining fields from multiple forms in the workflow into one unified form
Note:
In order to replace the auto-generated form, fields in the PDF or overlay must be bound to attributes.
To replace the auto-generated form:
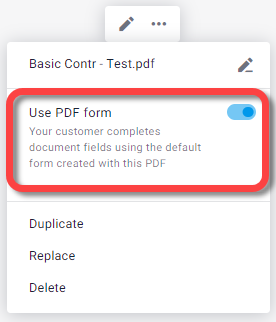
- In the workflow, select the PDF or external document item and click the three dots.
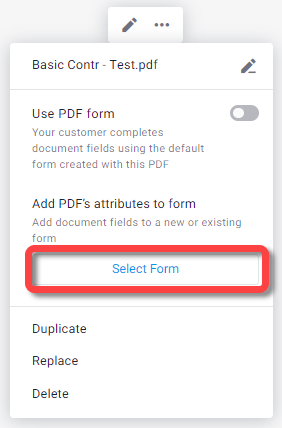
The context menu appears. - Turn off the Use PDF form toggle.
 An additional setting appears in the context menu.
 - Click Select Form.
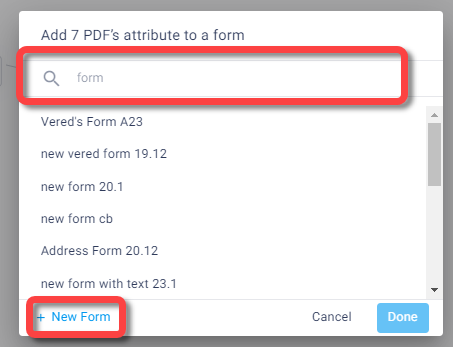
 The form selector window appears.
 - Select an existing form (including one of the forms already added to the workflow)
-OR-
Click +New Form. - Click Done.
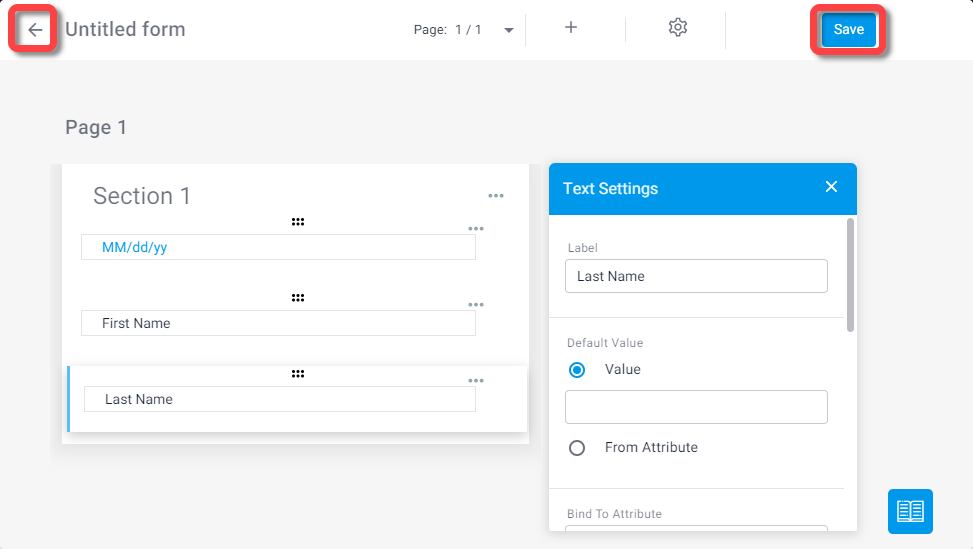
 The Form Designer opens:
- If you selected an existing form, all fields from the PDF appear in a new section added to the last page.
- If you selected New Form, all fields from the PDF appear in the first section of the first page of a new form.
- Edit the form as needed (see Create forms) and click Save.
- Click the back button to return to the workflow.
 If you created a new form, it is added to the workflow.