This article explains the most basic settings you’ll want to configure before agents start running a collaboration session.
Accessing Lightico settings
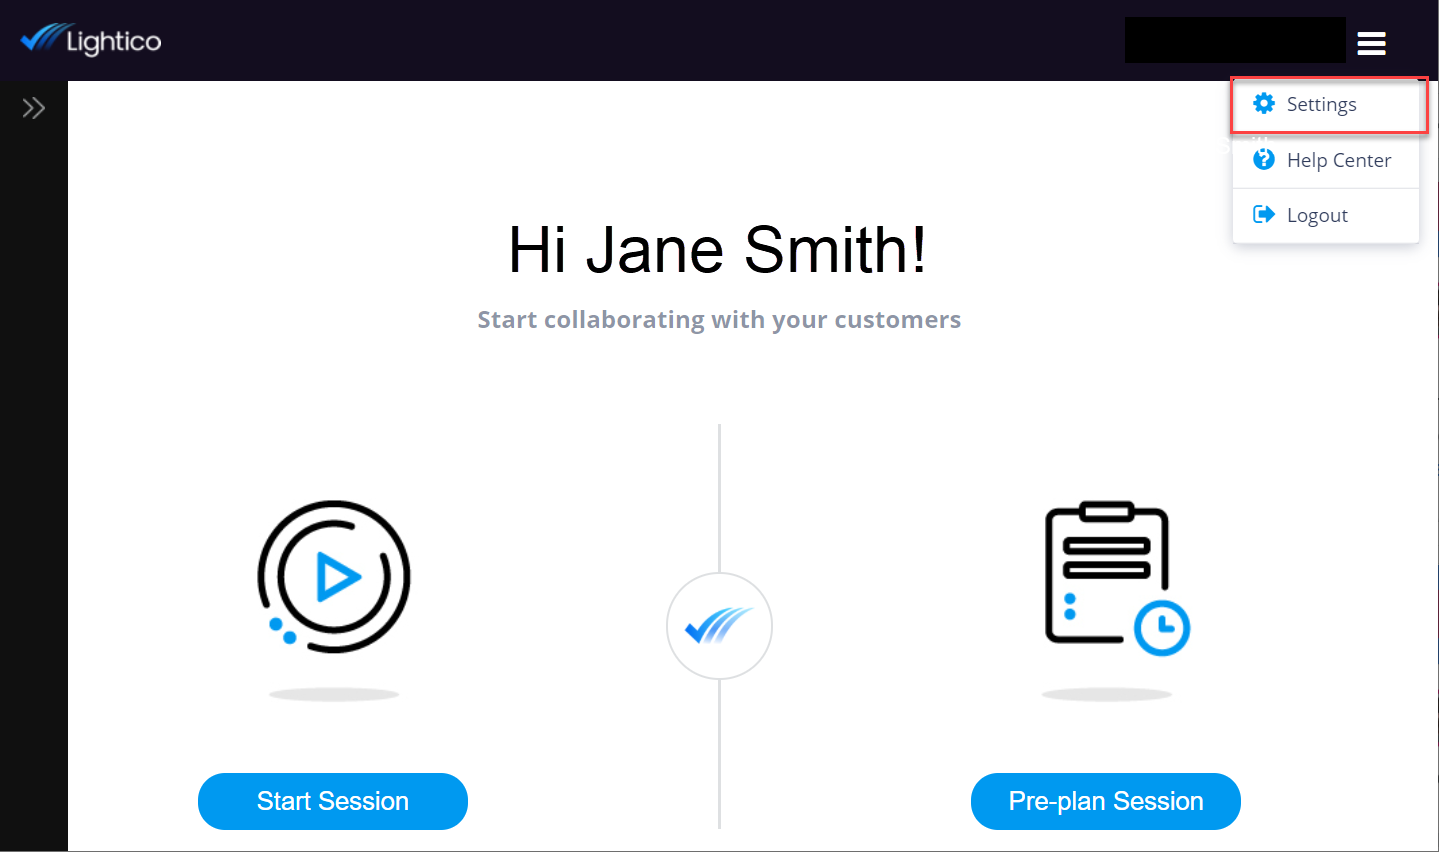
When you log into Lightico, you’ll see the agent screen. Click Settings from the menu in the upper right corner.
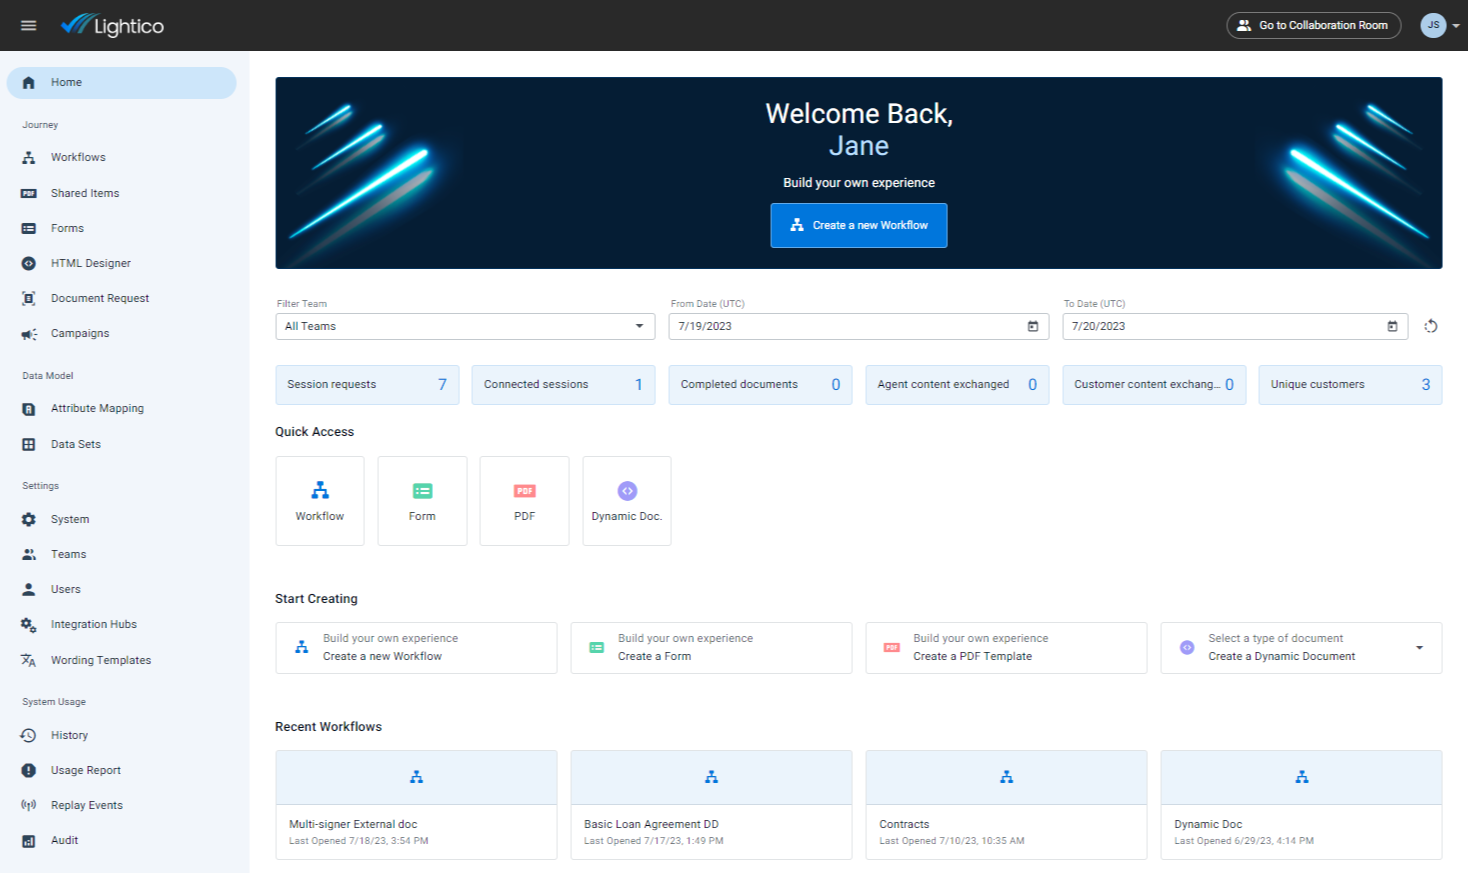
The Home page opens.
The navigation panel on the left enables you to open any of the settings pages.
The Home page contains the following:
Session analytics that you can filter according to team and date.
Quick Access links to open the most commonly used Administration pages.
Start Creating links to take you into the Designer pages of the main building blocks of a customer journey.
Recent Workflows links that open the automated Workflows that you most recently worked on.
Basic configuration before your first session
The following are some of the basic things you may want to configure before you or your agent run your first Lightico session:
Customize the Interface Branding
By default, the customer interface is blue and white with the Lightico logo. You can change this to your own company colors and logo.
.png)
To customize the interface branding:
On the Administration screen navigation, click System settings.
On the Settings navigation click Format and design.

Under Logo for customer session, click Replace file and select your logo file.
Under Colors for customer session, turn on the toggle, click the edit icon, and select a background and foreground color.
For more information about customizing your Lightico interface, see Branding and customizing a Lightico session.
Create a User
Add someone else as a user so that they can also configure settings and/or run Lightico sessions with your customers.
To create a user:
From the settings Home page, go to Users and click Create New User.
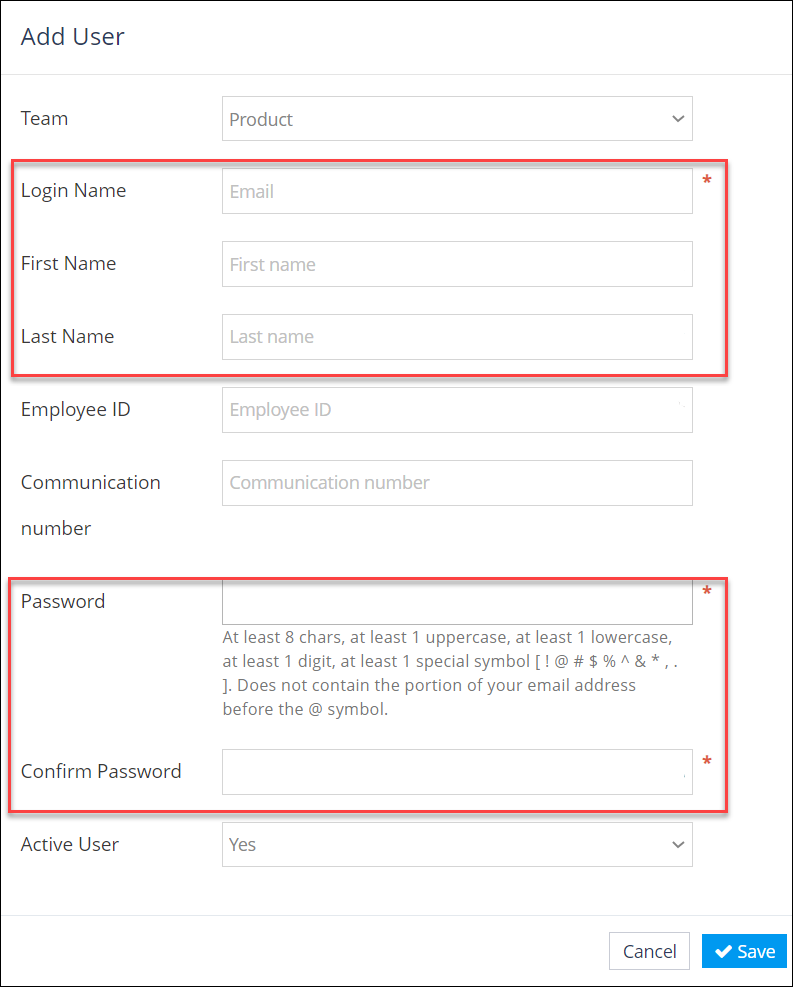
In the Add User window, fill in the new user’s email, first and last name, and password and click Save.
The new user is saved as an Agent.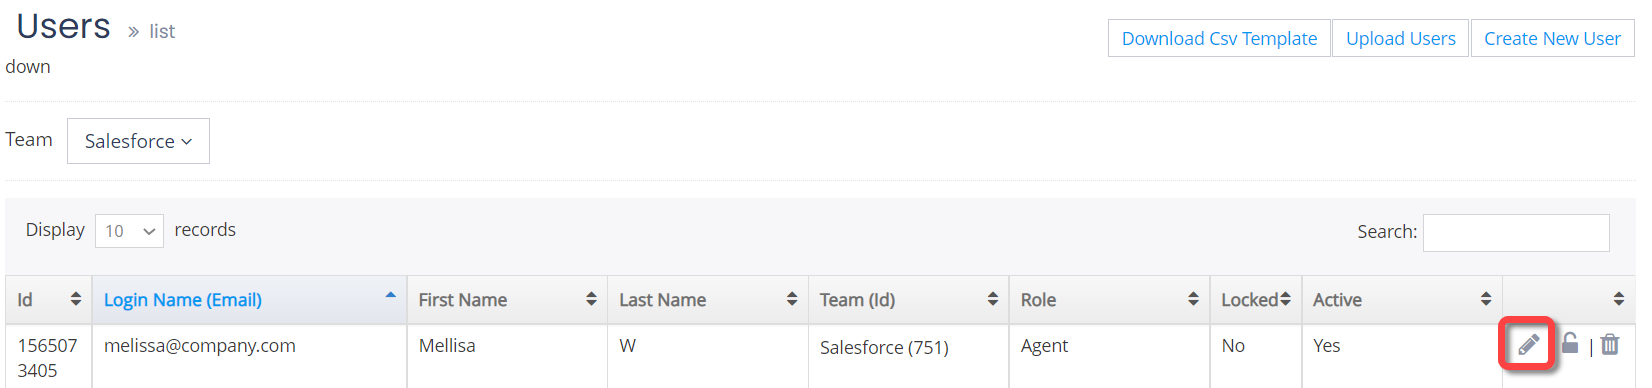
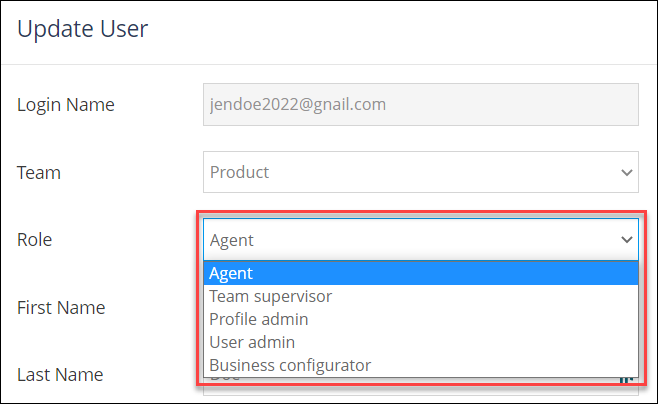
To change the permission level of the new user, click the edit icon for the user and, in the Update User window, select a new role from the Role dropdown.
For more information about creating users, see User management.
Create your first Workflow
Workflows are the framework for completing journeys with your customers. Workflows can be as simple or as complex as your business needs, and there is no way to present a Workflow that will serve all scenarios. The purpose of this section is to give you a taste of how to build a Workflow. After you’ve gotten the basic idea, you can experiment and create your own custom Workflow using our extensive Workflow documentation to guide you.
The following instructions explain how to create a Workflow that guides your customer through the following steps:
Providing a copy of their driver’s license as a form of identification.
Filling in a digital Form with their name and contact information.
Signing a contract that is personalized with the information they provided.
.PNG)
Before you start: You'll need to have a PDF file of a contract, or you can download the following sample contract.
We will build this Workflow according to the following steps:
Step 1. Start a new Workflow
The Workflow builder provides you with a canvas for connecting the elements of a customer journey. In this step, we will start a new Workflow and save it in the Workflow directory. As you add each element, it is added to the canvas and saved along with the Workflow.
To start a new Workflow:
On the Settings Home page, click Create a new Workflow.
.png "image(126).png")
The Workflow builder page opens.
.png "image(127).png")
Edit the name of the Workflow and click Save draft.
.png "image(163).png")
Note
You can only publish the Workflow for use in a collaboration session once it is completed. Until then, you can only save a draft.
Select the folder in which to save the Workflow and click Save.
Double-click to open a folder..png "image(166).png")
The Workflow is saved, and you are returned to the Workflow builder.Tip
If you leave the Workflow builder after saving the Workflow, return to the Workflows directory by clicking Workflows in the navigation pane.

Step 2. Add a Document Request
Now, you can start adding items to the Workflow canvas. We’ll start by adding the request for the customer to provide ID in the form of a driver’s license.
To add a Document Request:
Drag the Document Request item onto the canvas.
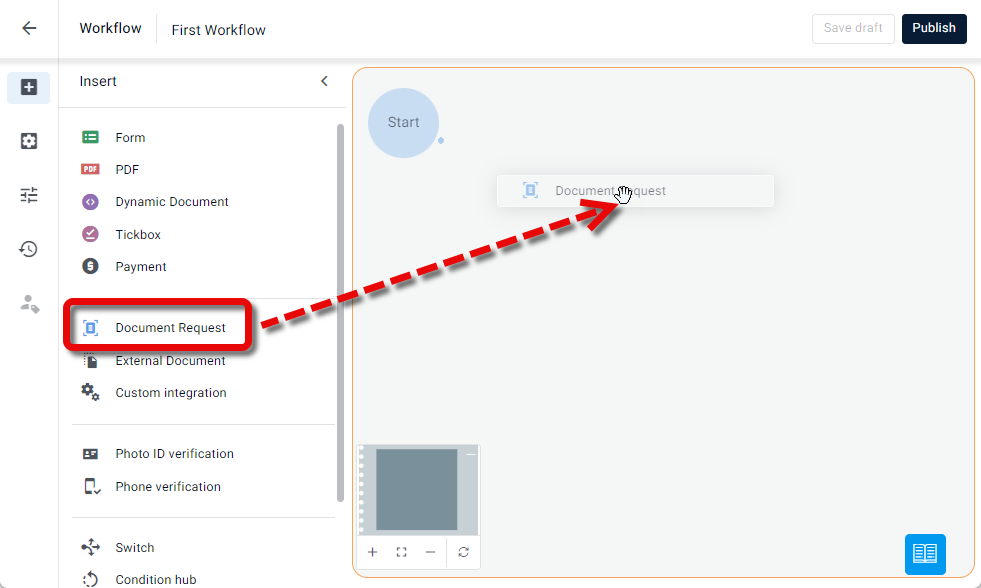
The Document Request window opens.Select the required Document Request type from the list. Start typing the name in the search bar to filter the list.

Click Done.
The Document Request item appears on the Workflow canvas.
Step 3. Add and build your contract
The next step is to place the contract onto the canvas and define the interactive fields for the contract.
To add and build your contract:
Drag the PDF element onto the canvas.

The Add item window appears.Click Create new.
.PNG)
A file browser opens.Select a PDF file of the contract from your computer.
Your contract opens in the PDF template builder.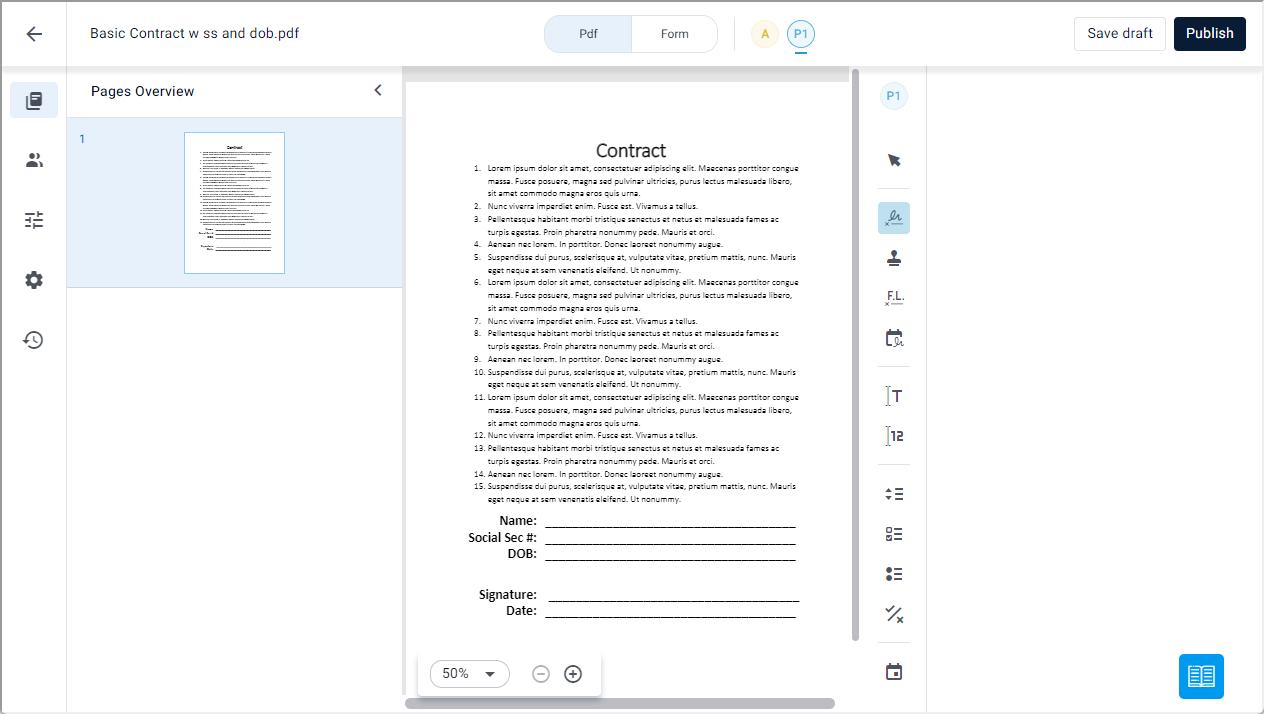
Place the fields in the following way:
Click an icon on the left side of the document preview to select a field type.
Then click and drag on the document to place and size the field.
.PNG)
Place the following fields:
Signature
Signature date
Text
Number
Date
.PNG)
Click Publish.
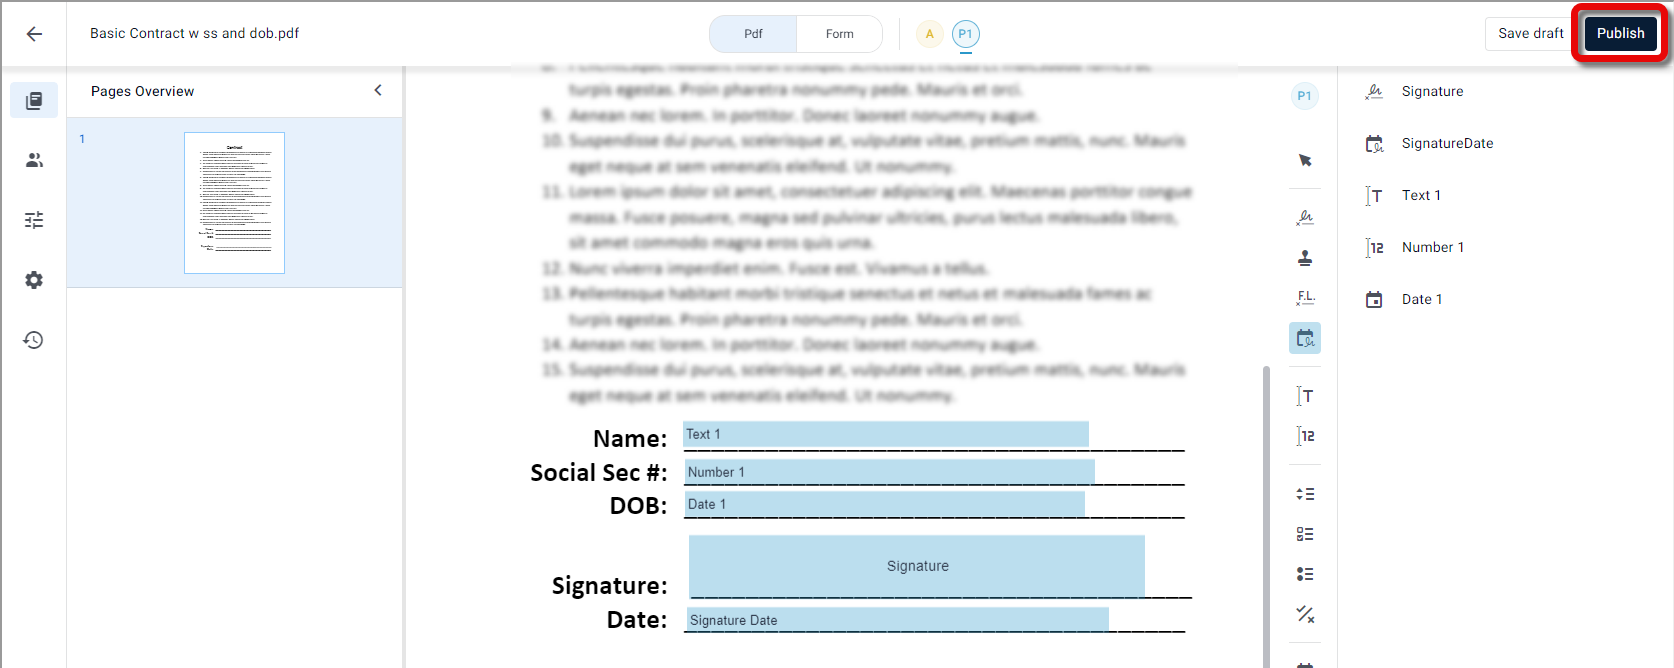
The contract is saved with all the interactive fields.
Step 4. Configure the customer form
Whenever you create an interactive PDF Template, a digital form is automatically generated. This form is presented for completion to the customer before they sign the contract in the session.
Here we will just change some of the names of the fields to help the customer fill in the required information.
To configure the customer form:
At the top of the PDF builder, click Form.

The form view opens. The customer will view the form with the labels that are shown in the form preview..PNG)
Click each information field to change its name and label in the right panel.
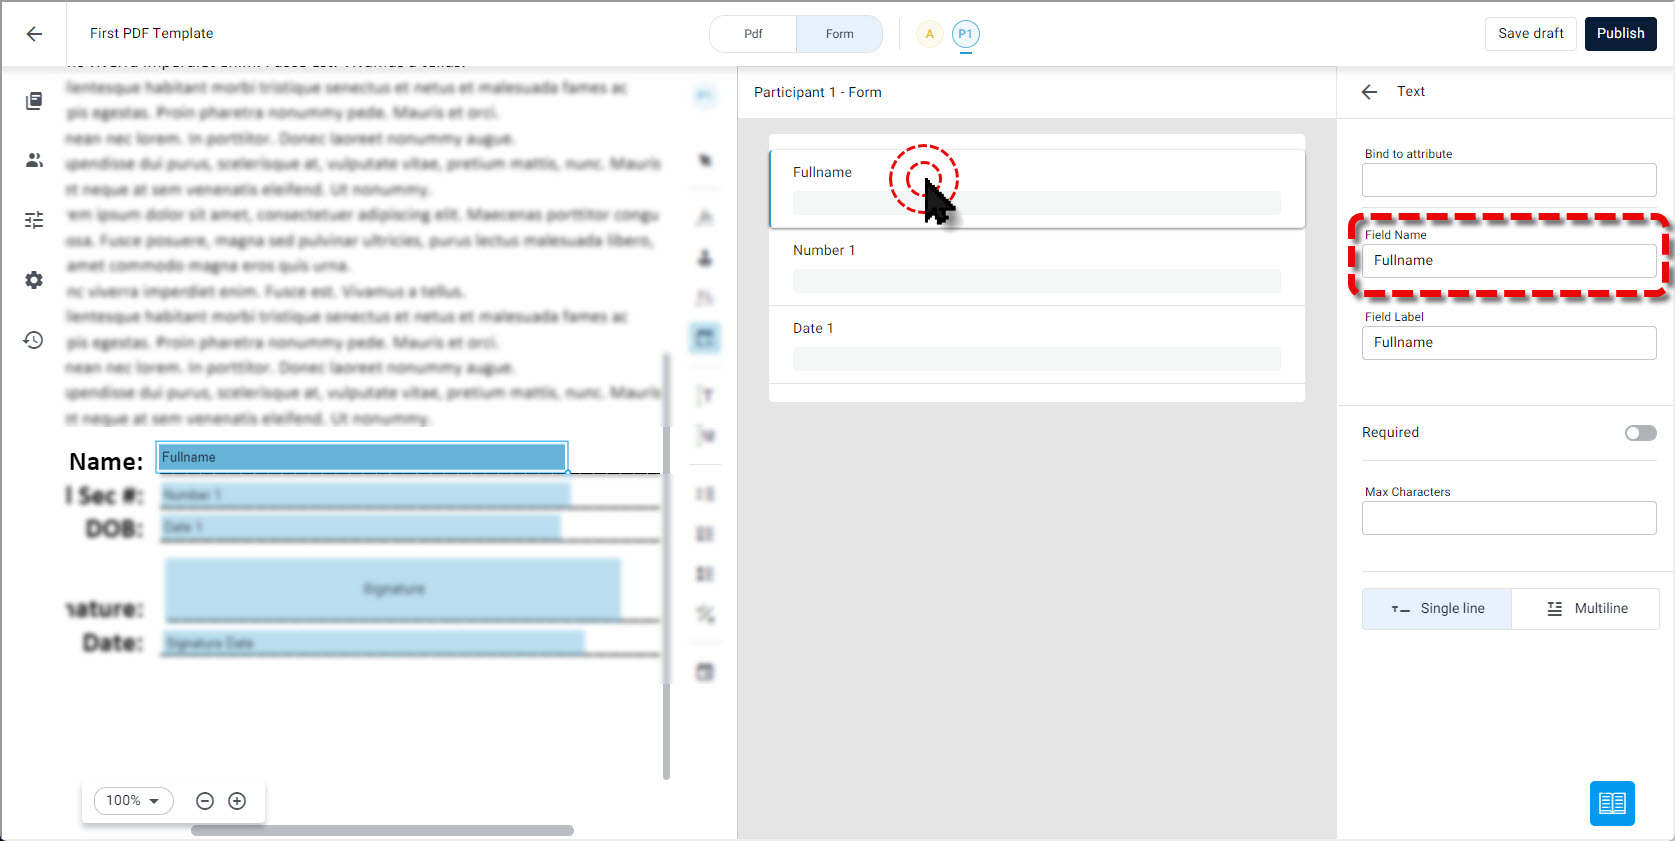
If desired, click and drag a field to change its position in the form.
Click Publish.
The interactive PDF Template is saved.Click the arrow to return to the Workflow.

The Workflow builder appears.
Step 5. Finish and publish the Workflow
Now all that remains is to finalize and publish the Workflow.
To finish and publish the Workflow:
Drag the End item onto the Workflow canvas.

Select each item and then drag one of the points to connect it to the next item.
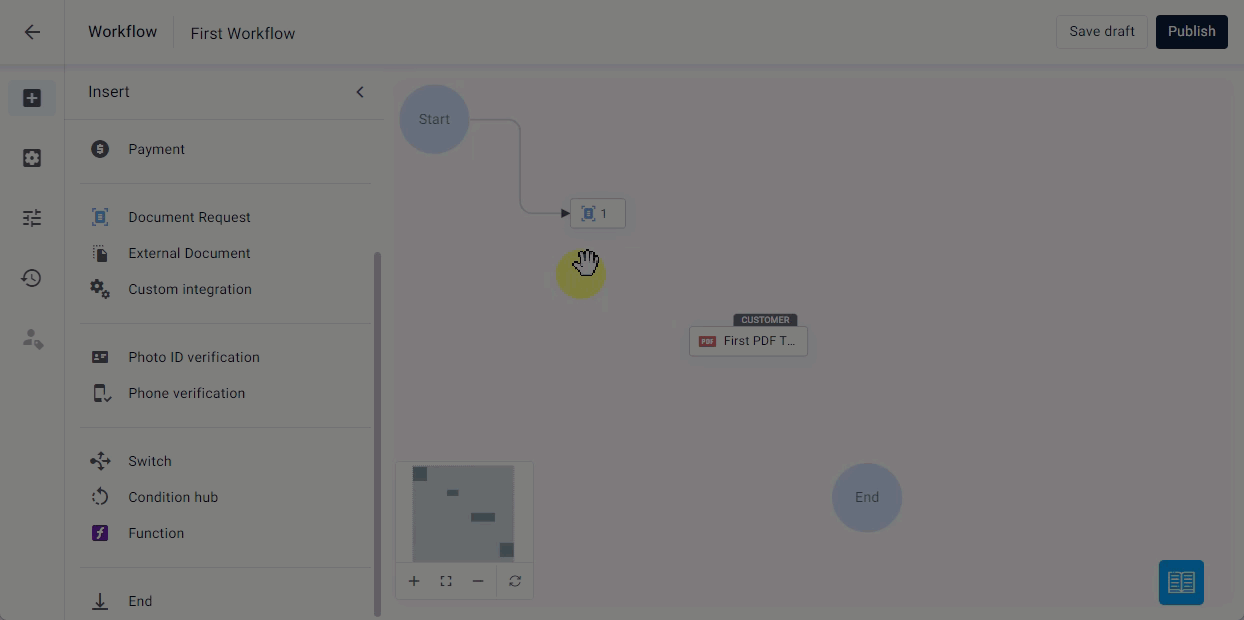
When all items are connected, click Publish.
The Workflow is now ready for sharing with your customer in a collaboration session.