Workflows unlock the real power of completing customer journeys, and it's important to be able to effectively manage your Workflows so that you can create, store, and later find the Workflows you need for each situation. In this article, we explain the options and some of the best practices for managing your Workflows.
For information about creating Workflows, see Create Workflows.
Creating Workflow folders
Before creating and saving a Workflow, it's helpful to create folders in your Workflow directory.
To create Workflow folders:
In the Lightico Admin Center, in the left pane, click Workflows.
The Workflows page opens.
Click the add folder icon in the top right.
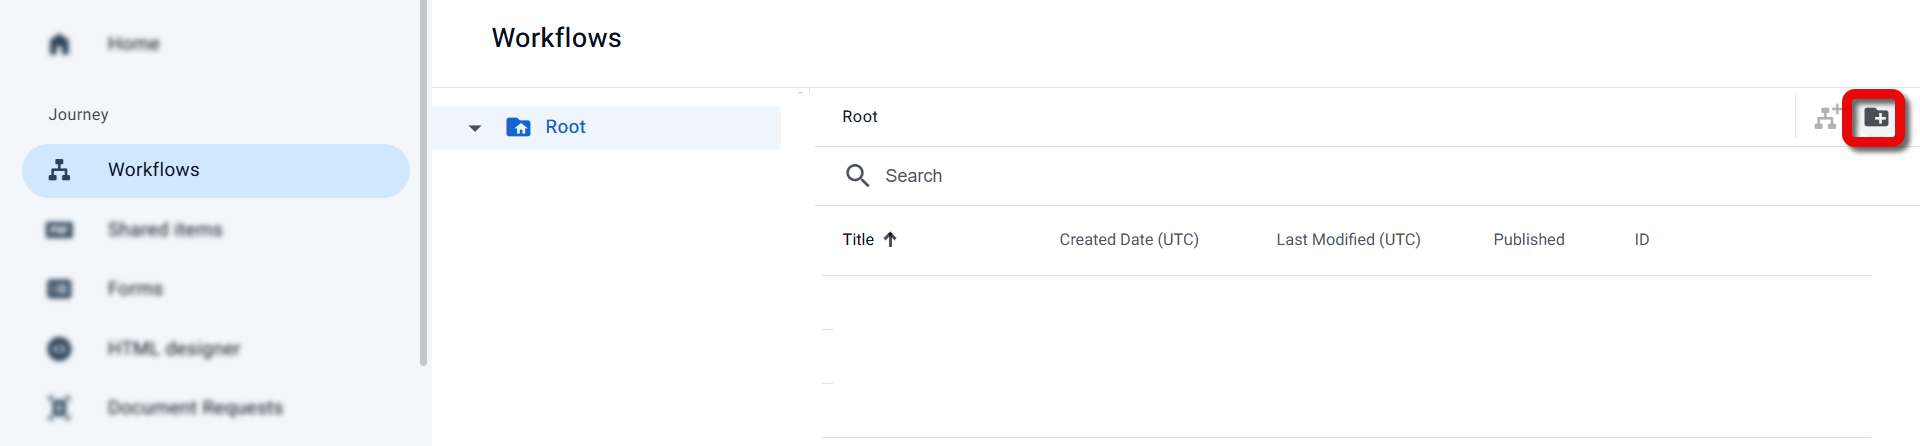
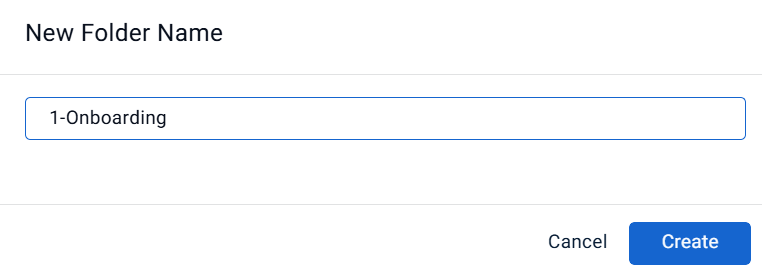
The New folder name window appears.Name the folder and click Done.
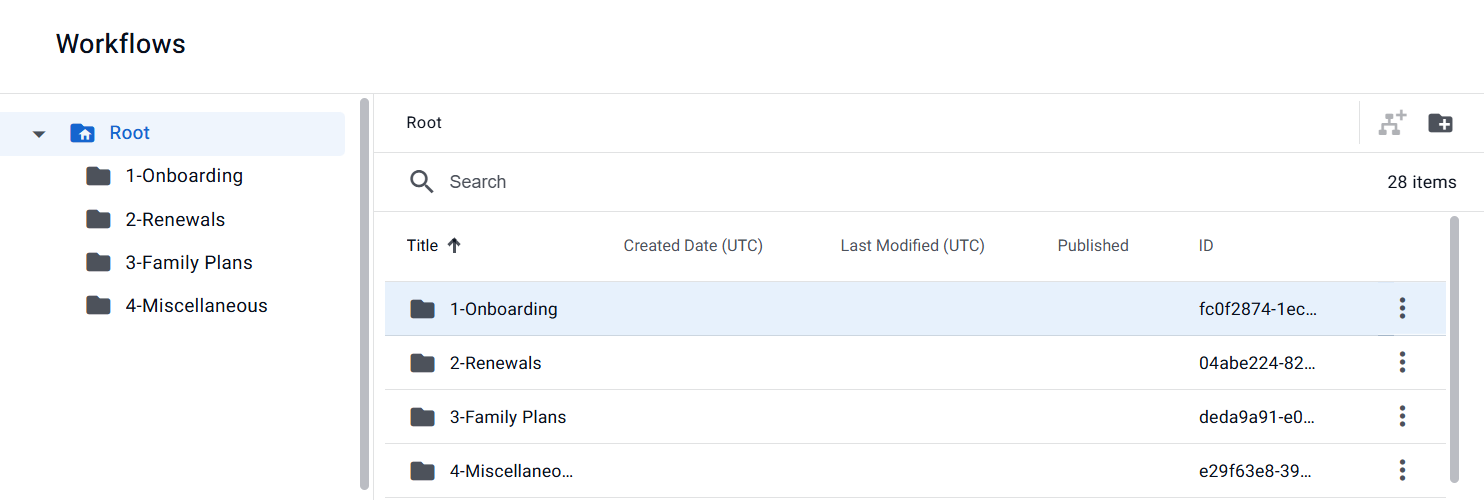
Create other folders as required.
To create a sub-folder:
Double-click the folder in which you'd like to create the sub-folder.
Click the add folder icon and name the folder in the New folder name window.
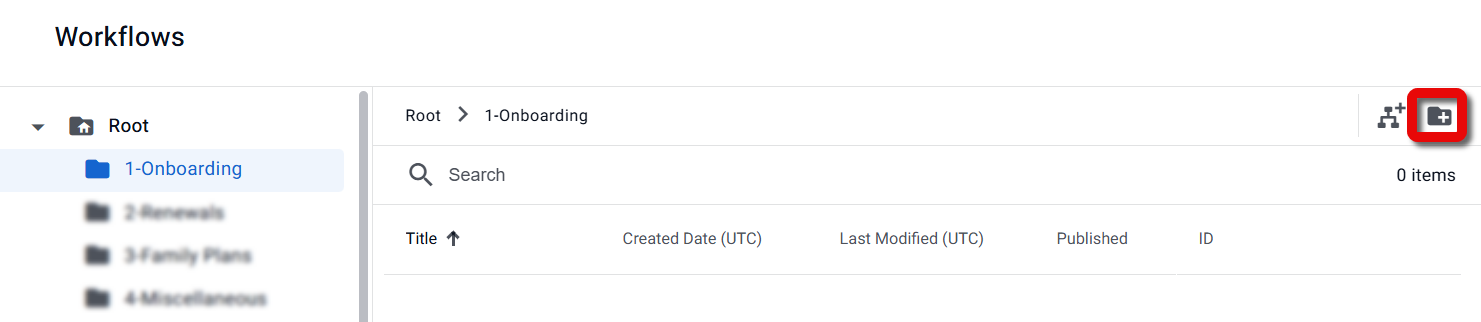
The sub-folder is created.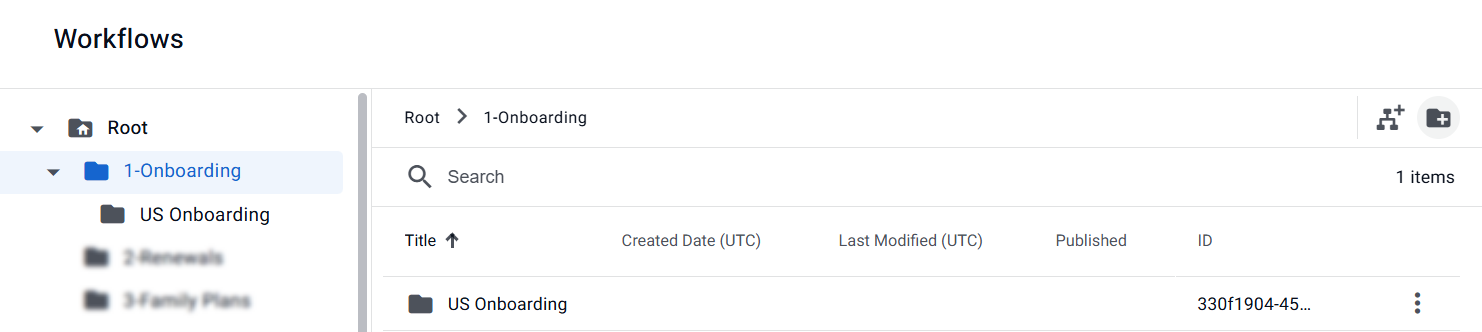
Defining Workflow visibility
Lightico enables you to control which Workflow folders an agent sees in a collaboration session. This is important for focusing and standardizing agent interactions with your customers by only showing the Workflows each agent needs.
Controlling Workflow visibility also allows you to hide Workflows that you are in the process of creating and perfecting, only making them available to agents when they are approved and ready. .png)
Visibility per team
You define Workflow folder visibility in team settings. This enables you to show only Workflows that are relevant to the team’s department. For example, the HR department would see onboarding and the Sales department would see only Workflows related to sales interactions
For more information about team settings, see Define unique team settings.
Show/hide a Workflow folder
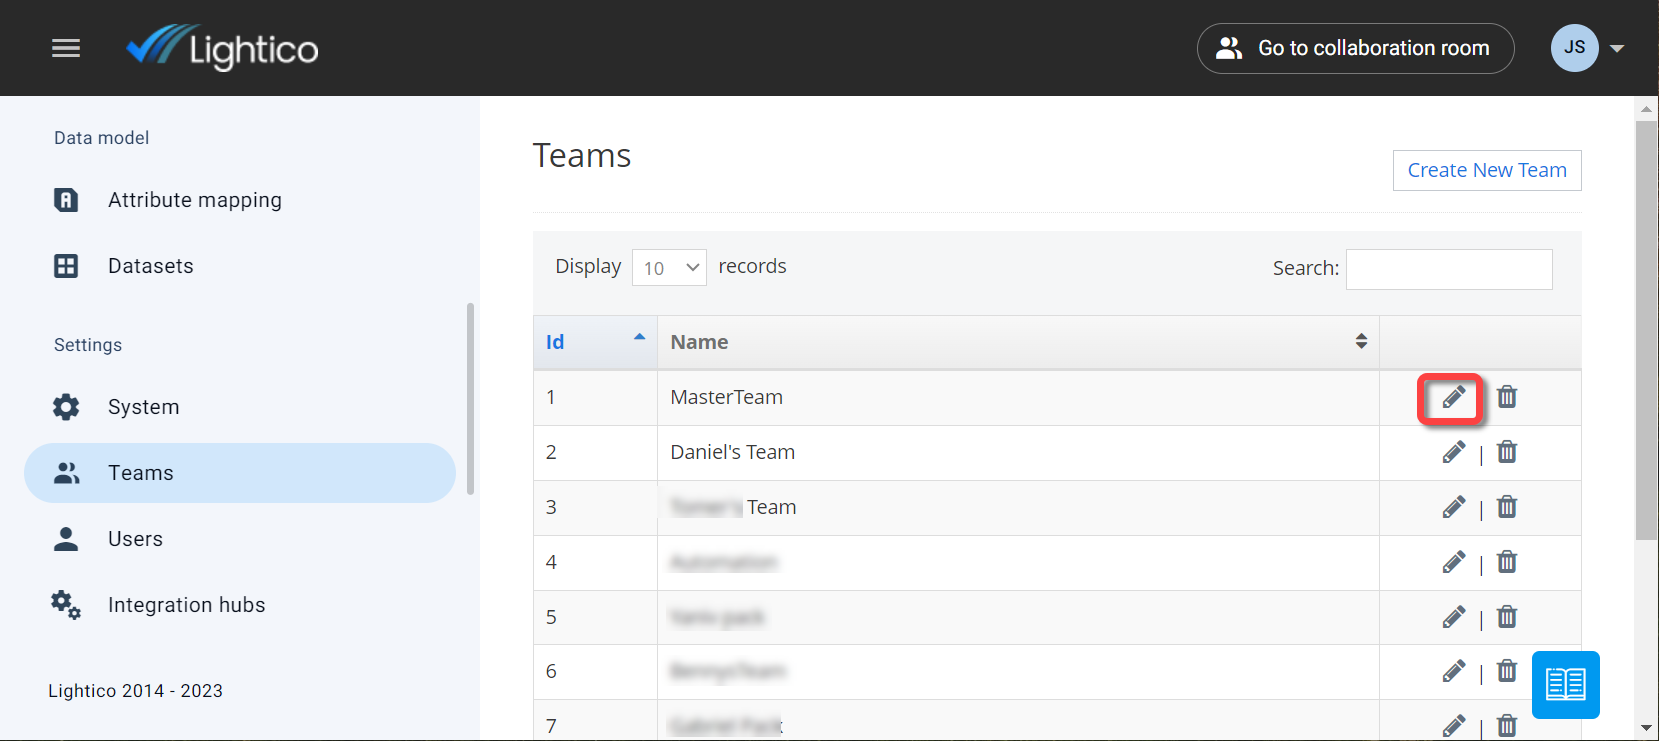
In the Admin Center home page, click Teams in the left navigation pane.
The Teams page opens.
Click the edit icon for the team for which you'd like to define Workflow visibility.
The Teams > Edit page opens.Click Associated Workflows.
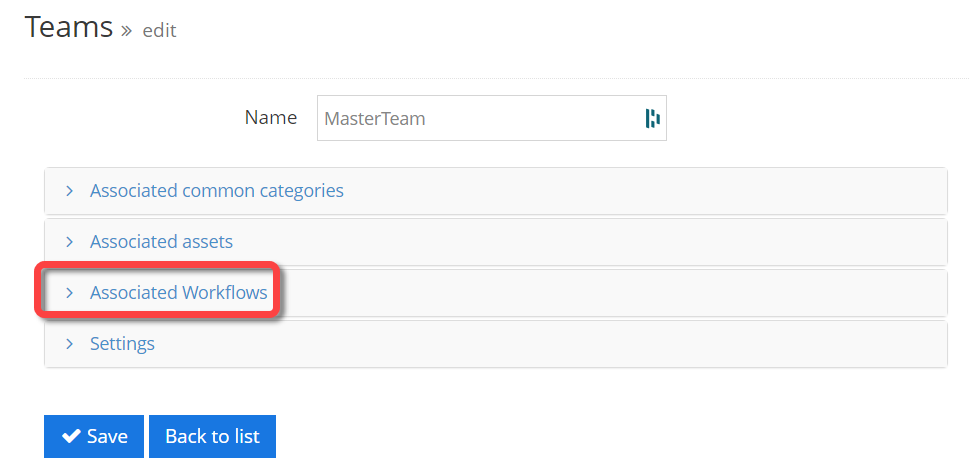
Associated Workflows expands to show all Workflow folders in the system.
Select the Workflows that you would like to show for this team and click Save.
.png)
Note
A newly created folder is not visible to agents until it is selected in team settings.
Move a Workflow or folder
Rearrange your directory by moving Workflows and folders to maintain an adaptable and up-to-date organizational structure.
To move a Workflow or folder:
In the Workflows directory page, select Move to from the options menu of the Workflow or file to be moved.
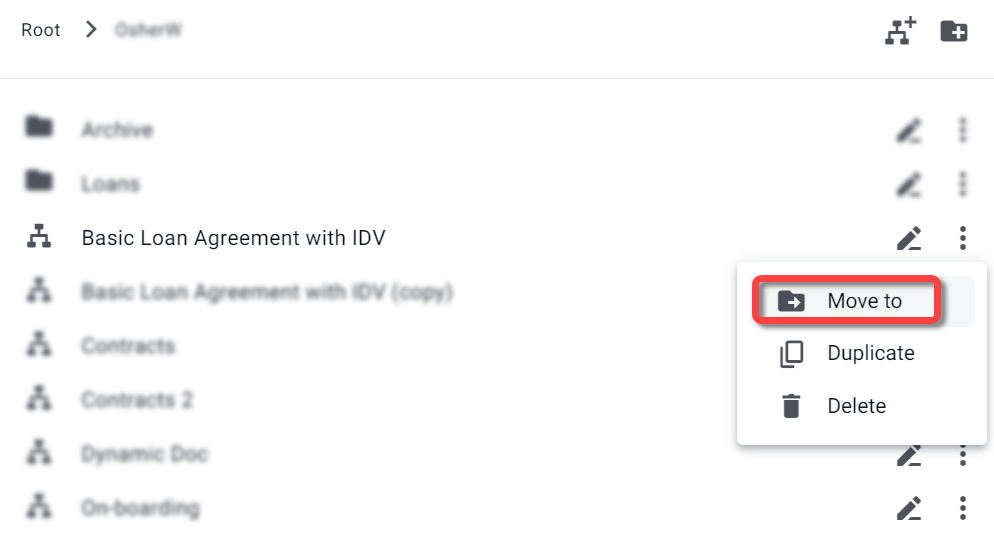
The Move Workflow window appears.From the left navigation panel, select the folder to which you would like to move the Workflow or folder and click Move.
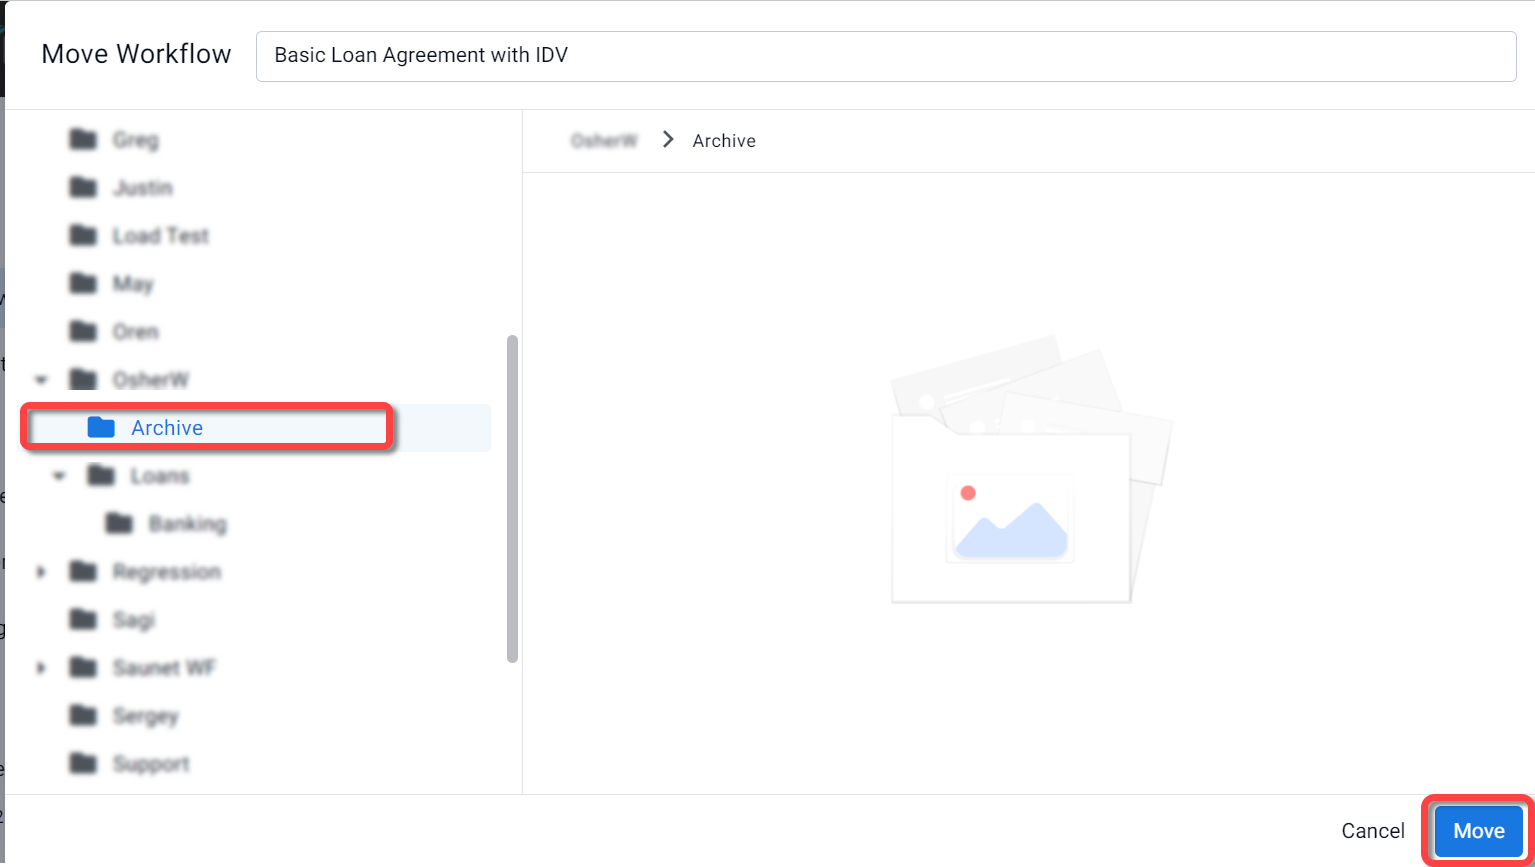
The Workflow/folder is moved to the selected folder.
Open a Workflow
Open a Workflow from the directory
To find and open an existing Workflow from the Workflow directory:
In the Admin Center navigation bar click Workflows
-OR-
from the Home page click Quick access > Workflows..png)
The Workflows directory page opens.Find the Workflow and double-click it.
.png)
The Workflow opens in the Workflow builder.
Open a recently edited Workflow
To open a recently edited Workflow:
From the Admin Center home page, under Recent Workflows, click the relevant Workflow.
