Introduction
This article explains how to create dataset Attributes.
🎦 Watch related video:
Predefined options
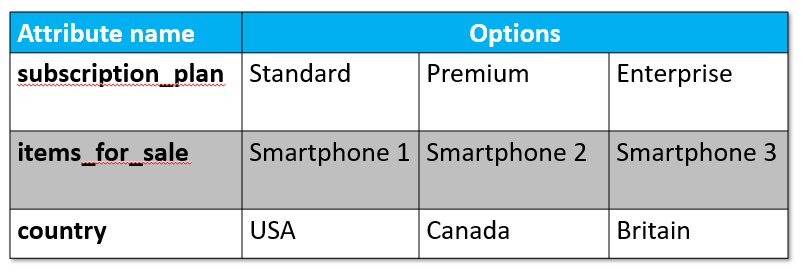
Unlike basic Attributes, dataset Attributes are predefined options that become options in a dropdown field or set of checkboxes. When the customer or agent selects one of the options, that becomes the value of the Attribute.
Dataset Attributes are used for managing data like which prescription plan a customer selects, which items they are purchasing, or what country they are from.
Associated properties
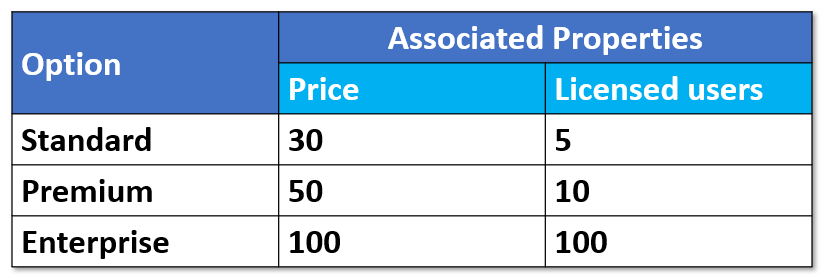
Another feature of dataset Attributes is that each option in a dataset Attributes can be associated with other values or properties, enabling you to collect more comprehensive data. For example, you can build a dropdown Attribute consisting of three subscription plan options. For each option you can associate properties such as the price of the plan and number of licensed users. Then, in addition to the name of the plan, you can also use it's properties to build conditions into your workflow.
Dataset sources
There are three ways to create a dataset source:
Upload a dataset CSV file to Lightico. See Create an Attribute from a CSV file.
Manually when you create the Attribute (does not allow associated properties), See Create a dataset manually.
Import from an external source. See Import a dataset from an external source.
Create an Attribute from a CSV file
Summary of steps
Creating a dataset Attribute from a CSV file involves the following 3 steps:
Create a dataset CSV file
First you'll need to create a CSV file and save it on your local drive.
To create a dataset CSV file:
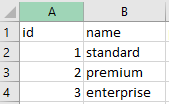
Create a CSV file and name the first column id (number or character to identify each option in the system) and the second column name (name of the option). The entries in the name column are the names of the values that will appear in the relevant field.
In the following example, we've created a dataset for a dropdown field that will contain 3 options: standard, premium, and enterprise.
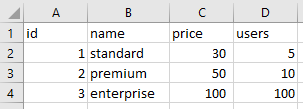
If you want to associate different properties with each of the values, add additional columns to the right of the name column and add the relevant properties. The column name should be unique and in lowercase. It should not include spaces or special characters other than underscore (_).
In the following example, we've associated 2 properties with each of the values in the name column: the price of each plan (price column) and the number of licensed users allowed in each plan (users column).
Note:
Do not include any empty rows in the CSV file.
Save the changes to your CSV file.
Upload a dataset
Once you have created the dataset as a CSV file, you can upload it to the Datasets page.
To upload a dataset:
In the Lightico Administration page, in the left pane, click Workflow > Datasets.
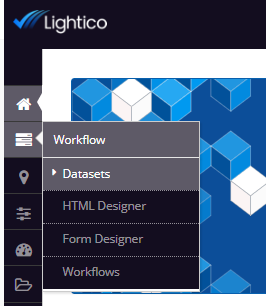
The Datasets page opens.
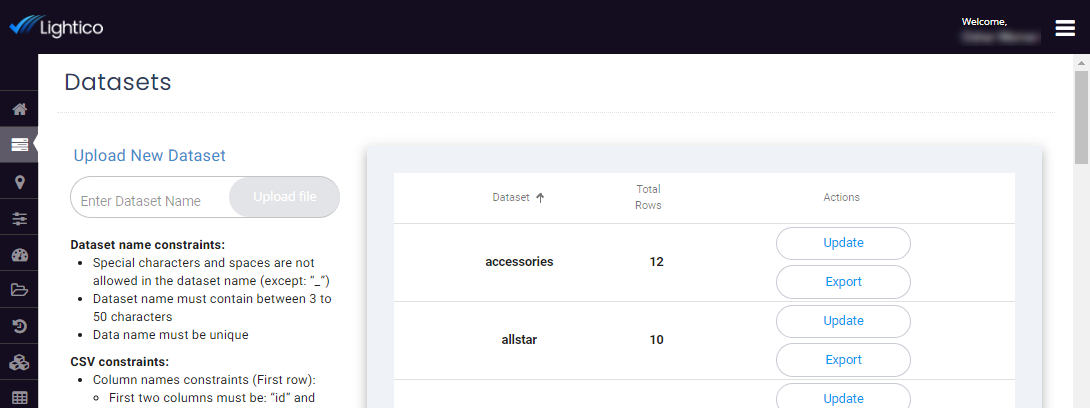
In the Upload New Dataset box, enter the name of your dataset using the following naming conventions:
Unique name between 3 and 50 lower case characters
No special characters other than underscore (_)
Click Upload file and upload the relevant CSV file you created earlier.

The new data set appears in the list of datasets in the right panel with an indication of how many rows are included. For example:

You can also update the file or export the data using the relevant buttons.
Add an Attribute from an existing dataset
After you have uploaded the dataset, you can use it to create an Attribute.
To add a dataset Attribute:
In the Lightico Administration page, in the left pane, click Attributes mapping.
The Attributes mapping page opens, displaying the existing Attributes.
On the top right corner of the page, click Add Custom Attribute.
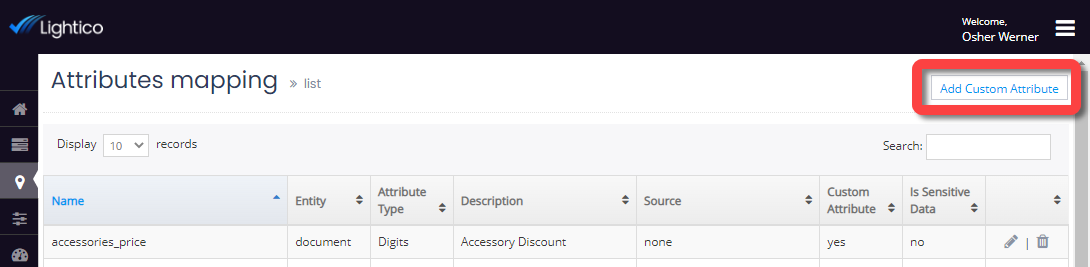
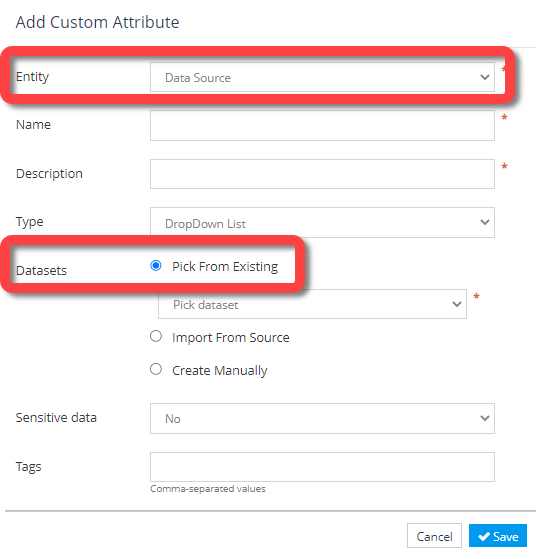
The Add Custom Attribute dialog opens.
In the Entity field, choose Data Source and under Datasets, select Pick From Existing.
Note:
To create a dataset manually or import a dataset from an external source, see the sections below.
From the dropdown, select the dataset you created.
Complete the remaining fields.
Field
Description
Name
The unique name of the Attribute.
Description
The description of the Attribute. This is the default label of the field that is visible to the customer in the document wizard.
Type
The type of Attribute.
Choose from the following types:Dropdown List
Radio Button Group
Checkbox group
Sensitive Data
Define this Attribute as "sensitive".
Fields containing sensitive Attribute data can be:Tags
You can assign a tag to the Attribute to categorize the Attributes and to make it easier to search for them.
Click Save.
Create a dataset manually
If you don't need your dataset to be related to associated properties, you can create it manually from the Attribute mapping page without creating a separate dataset CSV file.
To create a dataset manually:
In the Add custom Attribute dialog, under Entity select Data Source, and under Datasets select Create Manually.
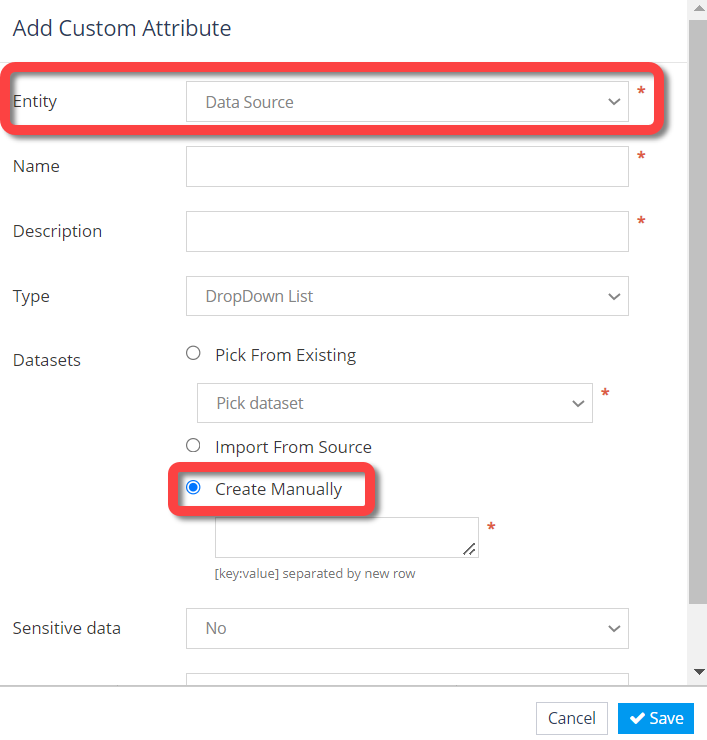
Enter the data options in the box as key:value pairs and press ENTER to start a new pair.

Complete all other fields (see above) and click Save.
Import a dataset from an external source
If you've created a Lightico integration for an external app or data source, you can import the dataset from there.
To import a dataset from an external source:
In the Add Custom Attribute dialog, under Entity select Data Source, and under Datasets select Import From Source.
The Add Source button appears.Click the Add Source button.
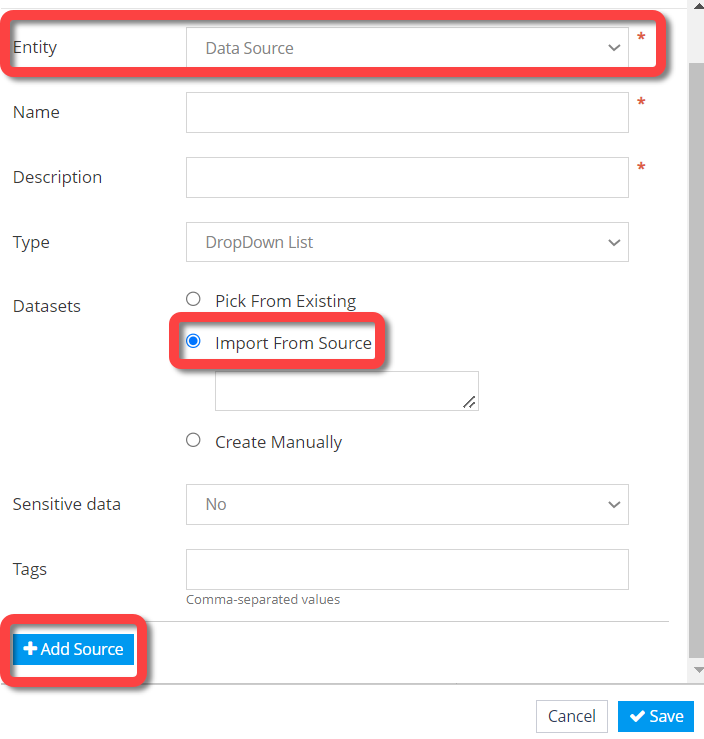
The import settings appear.
See Map Salesforce data to Lightico for an example of how to complete these settings.

Complete all other fields (see above) and click Save.