Advantages of mapping Salesforce data to Lightico
The power of integrating Lightico with Salesforce is when you can connect data from the two platforms. This enables you, on the one hand, to complete business with Lightico using your existing Salesforce data and, on the other hand, to receive new and changed data from a Lightico session straight into your Salesforce Objects.
Bidirectional flow of data
Below is an example of how the mapping enables the flow of data in both directions (see the image below):
Salesforce to Lightico - The name and address of the contact automatically gets filled into the Lightico Form.
Lightico to Salesforce - The date of birth (DOB) of the contact did not exist yet in Salesforce, so when the customer provides the information in the session, it migrates to Salesforce and appears in the Birthdate field.
.jpg)
This integration streamlines the customer completion process and ensures that you capture any customer information in your Salesforce system.
How to map Salesforce data to Lightico
In order to create this communication between the two systems, you'll need to create Lightico Attributes, and map them to Salesforce fields.
For an introduction to Lightico Attributes, see Understanding Attributes.
To map Salesforce data to Lightico:
Log in to Lightico using your Salesforce org username.
In the Lightico Administration screen navigation pane, click Attributes mapping.
The Attributes mapping page opens, displaying the existing Attributes.
Click the edit icon on an existing Attribute OR click Add Custom Attribute.
The Update/Add Custom Attribute dialog opens.Complete the required fields (see Create basic Attributes).
Click Add Source.
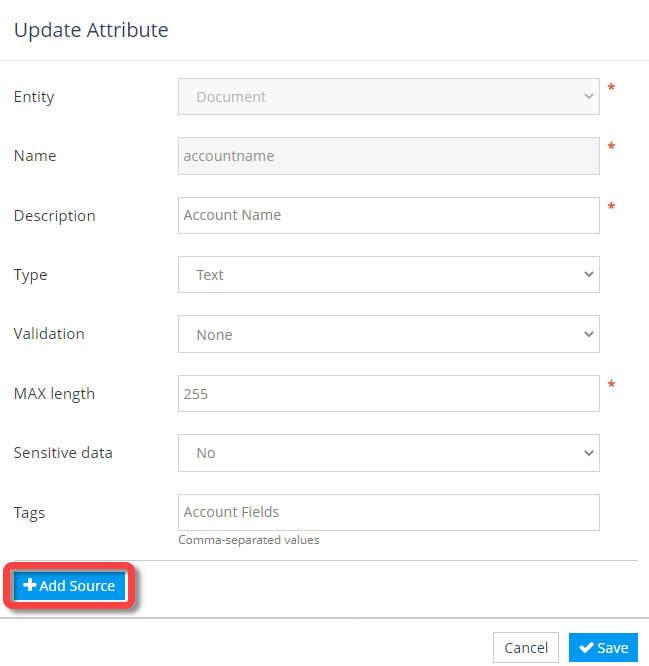
The additional source fields appear at the bottom of the window.
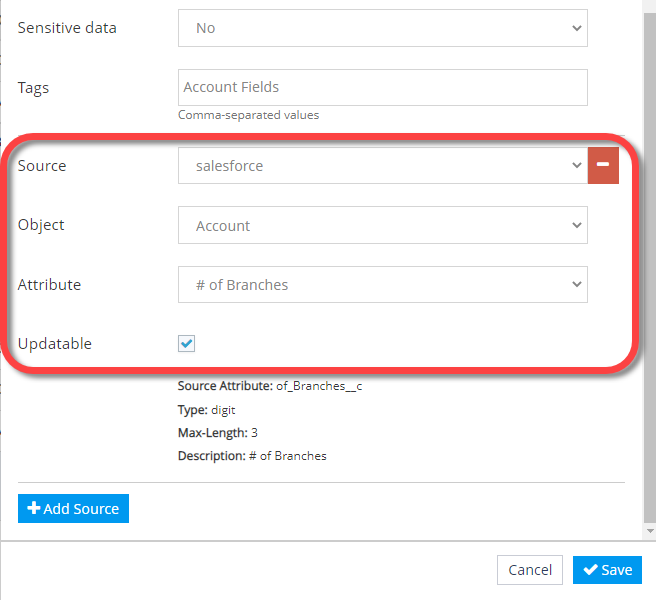
Define the following:
Source - Name that you gave to the Salesforce Integration Hub (see Configure the integration between Lightico and Salesforce).
Object - Salesforce object that contains the field you are mapping.
Attribute - Description of the Salesforce field you are mapping.
Updatable - Select this checkbox to integrate changes to this Attribute. For example, if the customer changes their email address during a Lightico session, the email field will be updated in Salesforce.
Click Save.
The Attribute is mapped to the Salesforce field.Repeat the steps for all relevant Salesforce fields.
You have completed mapping Salesforce data to Lightico.