This article explains how to set up an Innovis integration hub to enable adding a phone-based verification step to a workflow.
To add Innovis phone-based identity verification as a step in a workflow see Customer verification as a workflow step.
Configure an Innovis integration hub in Lightico
To configure an Innovis integration hub:
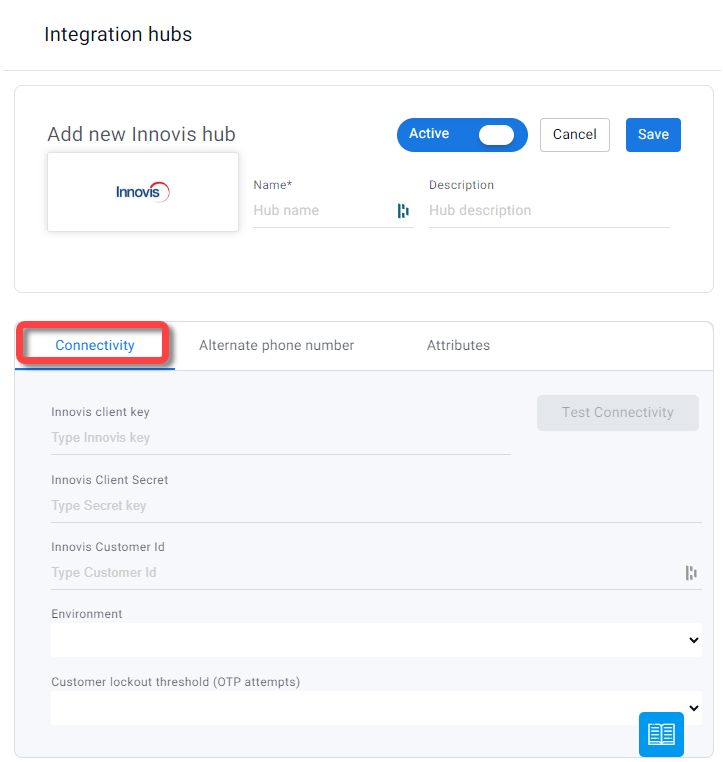
From the Lightico Administration page, go to Integration hubs and click the Innovis hub.

The Innovis Hub opens.
Enter a name and description for the hub and click Save.
On the Connectivity tab, enter your Innovis credentials.
Under Environment, select either Sandbox or Production.
Under Customer lockout threshold, enter the number of attempts that the customer has to enter the OTP that they receive by email.
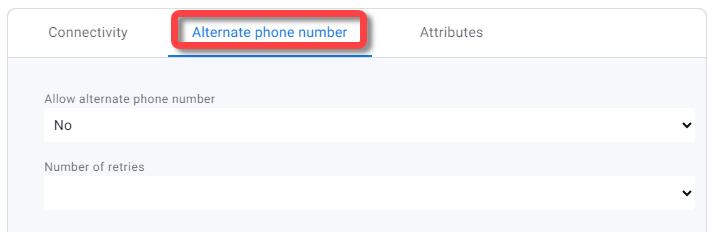
On the Alternate phone number tab, under Allow alternate phone number, select Yes to allow the customer to provide an alternate phone number during the authentication. In case the number provided does not match their associated credentials, they will then be able to provide another phone number. If the second phone number is verified, the authentication passes.
Under Number of retries, select the number of extra tries you would like to allow the customer if the first alternate phone number fails verification.
On the Attributes tab, click each Attribute dropdown to bind each of the items in the Field column to a Lightico attribute.
The first four attributes are mandatory to bind. This ensures that this customer information can be reused in the workflow.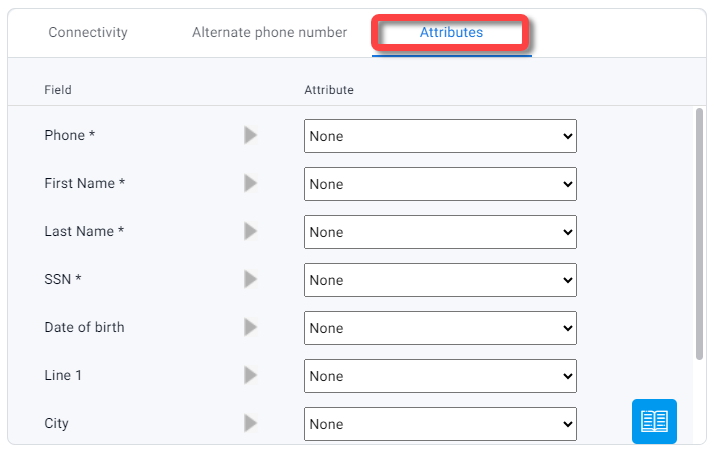
Click Save.
The Innovis integration hub is configured.