This article explains the settings found in the Configuration tab in Lightico settings. The settings define some aspects of running and managing a Lightico session.
To configure other Lightico settings, refer to articles on the core Lightico settings such as: General session preferences and General Security Settings.
To access Lightico settings:
In Salesforce, click the app icon and navigate to the Lightico Settings page
-OR-
Click Lightico Settings in the Salesforce Lightico app.
The Lightico Settings tab opens.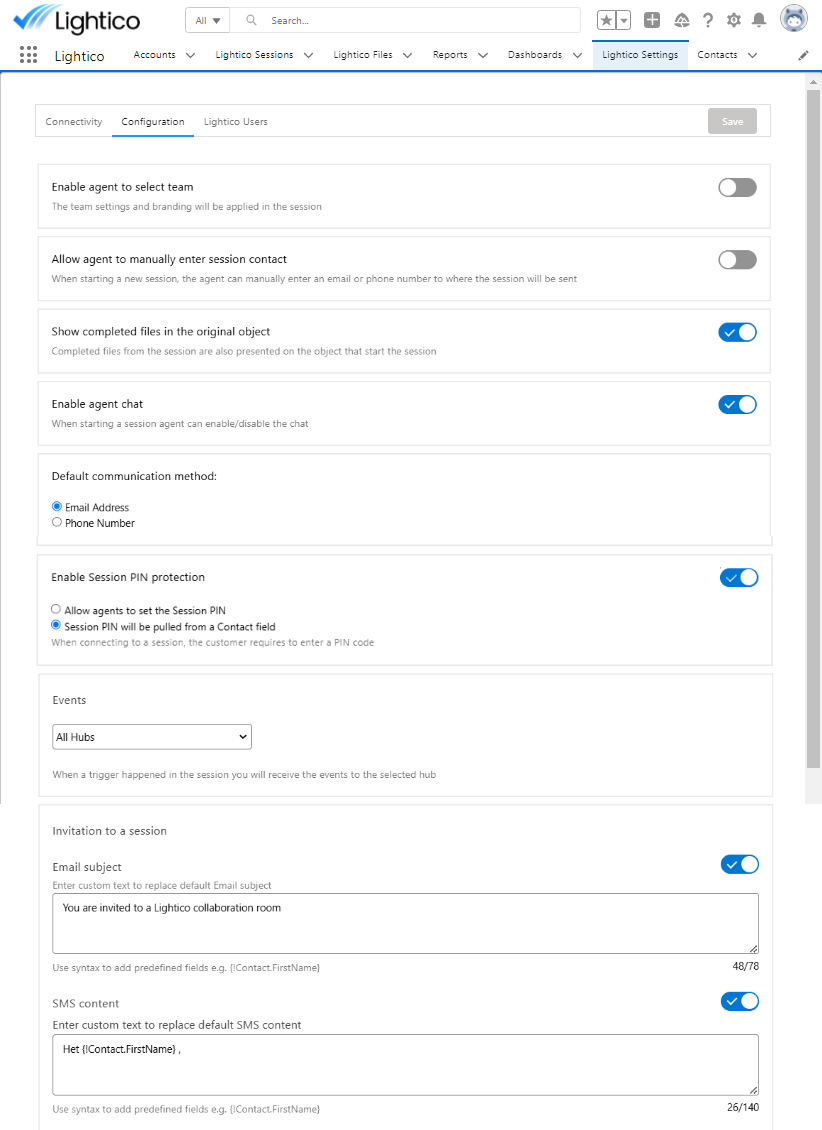
The Configuration tab in Lightico Settings includes the following settings:
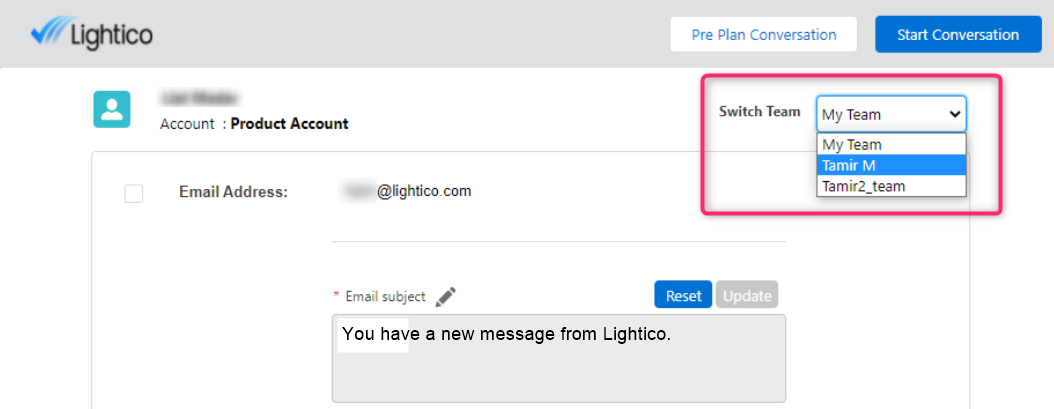
Enable agent to select team
When you enable this feature, a Teams dropdown appears on the agent screen that enables agents to select from which team to run the session. Each team can have a different set of assets, settings, and interface branding. To learn more about Lightico Teams, see User Management.
Allow agent to manually enter session contact
By default, when an agent starts a Lightico session from Salesforce, the customer contact information is automatically pulled from the Salesforce contact data. Enable this setting to allow the agent to enter contact information manually.
Show completed files in the original object
By default, completed files are only shown in the object in which the session ends. Enable this feature to show the completed files also in the object from which the session started.
Tip
You can customize the name of Lightico files, including adding customer name or account. In the Lightico platform UI, go to System Settings > Session > Document handling. For more information, see Customize file names for system use.
Enable agent chat
When you enable this feature, you provide agents with a toggle that hides/shows the customer chat during a Lightico session. To hide the chat, the agent turns off the Customer Chat toggle before starting the session. When the toggle is off, neither the customer cannot send text messages.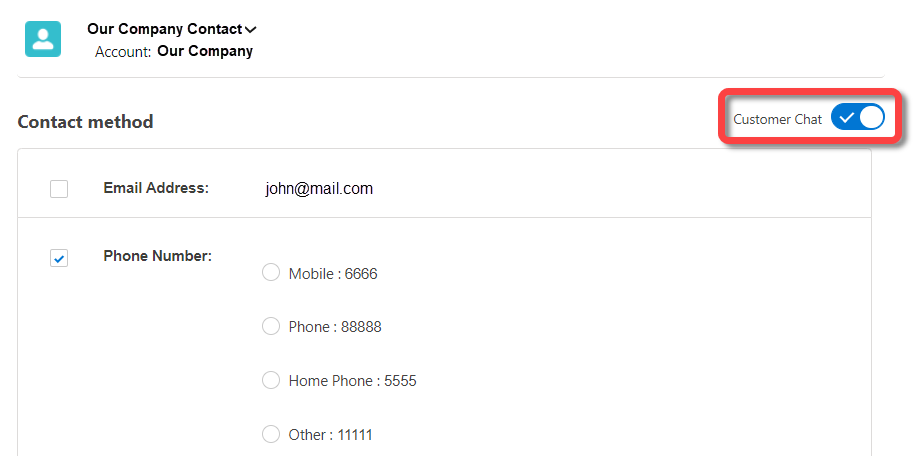
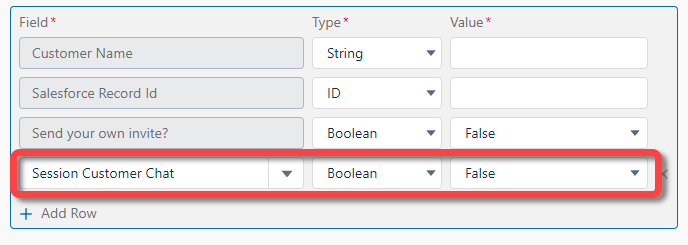
Note:
You can also hide the customer chat in the process builder. Set the “Session Customer Chat” parameter to False.
Default communication method
When an agent starts a Lightico session they have a choice of how to send the session invitation to the customer - by email or text message. This setting allows you to define which communication method is selected by default when the agent opens the window.
Enable session PIN protection
This setting allows you to require that the customer enter a PIN code before entering a session.
When you enable the session PIN, you have two options for how to set the PIN:
Allow agents to set the session PIN
Session PIN is pulled from a contact field
Events
Events in Lightico notify you when significant activities occur within your account and provide detailed information about those activities. You can configure webhooks for events through a Lightico custom integration hub. If you set up multiple custom hubs, each with different webhook locations, events are sent to each defined location.
In the Lightico Salesforce app, the Events setting allows you to define a single hub for event webhooks. Once a hub is selected, events will only be sent to the webhooks defined in that specific hub, ensuring no duplication or delivery to other locations.
Invitation to a session
When an agent starts a collaboration session, an email or SMS message is sent to the customer with a link for connecting to the session. You can customize the default message that appears in the email subject or SMS message and allow agents to customize their own message from the Agent screen before starting a session..jpg)
To customize the default invitation message:
In Lightico Settings, under Invitation to a Session, toggle the switch next to Email subject or SMS content to on and edit the text in the field.
Note:
Use Merge Fields to add predefined fields. For example, use {!Contact.FirstName} to automatically populate the message with the current contact’s first name.
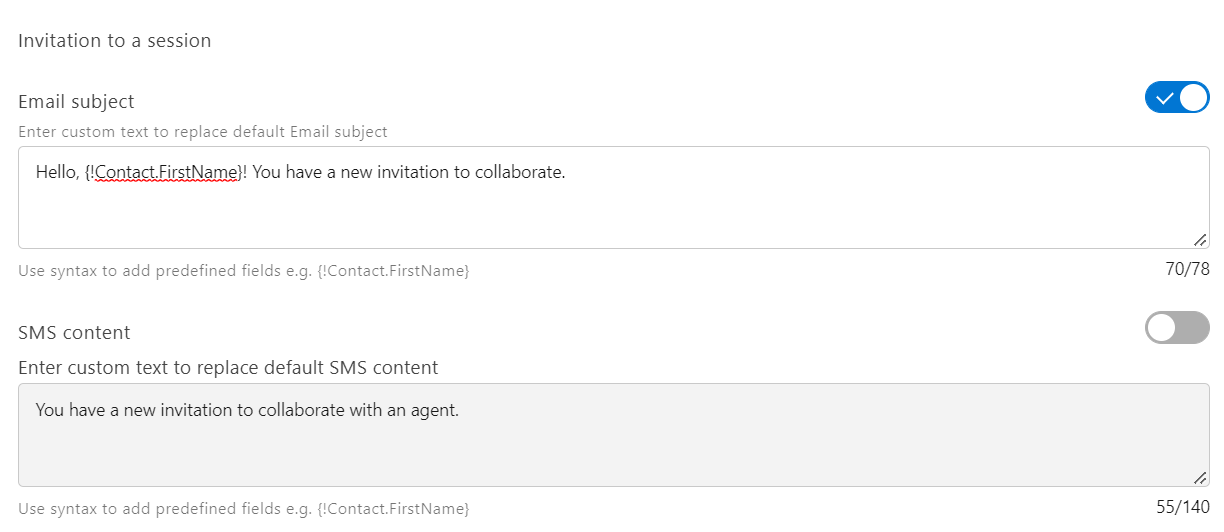
Leave the switch in the on position to allow agents to customize their own message from the Agent screen.
-OR-
Turn the switch off to lock the default message so that it cannot be changed by an agent.
Add a lightico session button
Some of the Standard objects (Account/Case/Contact/Lead/Opportunity) include a Lightico Start Session button as part of the package. This section explains how to add a button to other standard objects and to custom objects.
Note:
This settings adds the button to the object, but it will not show up on the object page until you add it to the page layout (see Add Lightico elements to page layout).
To add a start session button to a custom object:
In Lightico Settings, under Add Lightico button, click Create button.
The Start Session Button window appears.
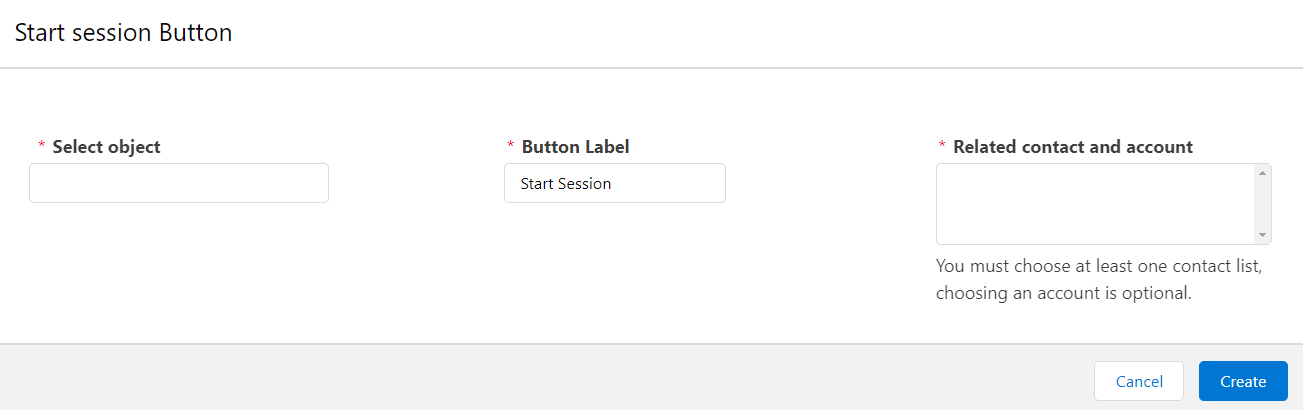
Define the following:
Select object - Name of the standard/custom object to which you want to add the button
Button Label - Text that appears on the button
Related contact and account - You must choose at least one contact lookup field; choosing an account is optional. Selecting an account will give the agent the option of starting the session with any of that account's elated Contacts.
Note:
You cannot add more than one account field.