Using Lightico Attributes, you can store customer information for the duration of a session. This article explains how to create basic Attributes that you can use inside PDF Templates and Workflows.
Not all basic Attributes (document entity) can be used in a Workflow. For information about which basic Attributes can be used in a Workflow, see Types of Attributes and when to use them.
Note:
For background information about Attributes, see Understanding Attributes.
For information about creating more comprehensive Attributes based on datasets, see Create dataset Attributes.
🎦 Watch related video:
To create basic Attributes:
In the Lightico Administration page, in the left pane, click Attributes mapping.
The Attributes mapping page opens, displaying the existing Attributes.
On the top right corner of the page, click Add Custom Attribute.

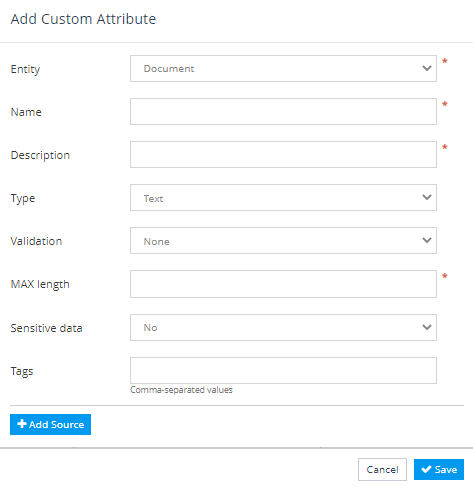
The Add Custom Attribute dialog opens.
In the Entity field, choose Document.

Complete the remaining fields as follows: (Depending on your selections, different fields will be displayed.)
Name - The unique name of the attribute
Note
There is a 50 character limit for Attribute names.
Description - The description of the attribute. This is the label of the field that the customer sees in the document wizard.
Type - The type of attribute. You can choose from the following types:
Text
Dropdown list
Digits
Date
Function
Radio button group
Checkbox group
Signature date
Boolean
Properties - Depending on the type of field, enter the following information:
For dropdown list, radio button group, or checkbox group, enter the values that you want the customers to select from in the format key:value with each value separated by a new row. For example, if the values are red, yellow and blue, enter them as follows:
Example
1:red
2:yellow
3:blue
For function, enter the relevant JavaScript code.
Validation - If necessary, select a method to validate the data that was entered into this field.
Max length - The maximum number of characters allowed for this field. (text, digit and date fields only)
Limited time range - Select one of the following options to limit the date that your customer can define (for date fields only):
None - unlimited
Absolute time range - specific start and end date
Relative to Attribute time range - start and end date relative to another date attribute
Relative time range - start and end date relative to the current date
Sensitive data - Define this attribute as "sensitive". Fields containing sensitive attribute data can be:
Tags - You can assign a tag to the attribute to categorize the Attributes and to make it easier to search for them.
Add source - If you are integrated with a CRM or other software platforms that store customer data, click Add source to map the Attributes to the relevant fields in your integrated platform.
For an example of how to integrate with a CRM, see Map fields to Attributes.
Click Save.