Lightico enables you to configure the way documents are handled, before, during, and after the customer completes them. For example, you can choose who is notified when the document is completed. This article describes how to configure the system settings under Session > Document handling.
Notifications for completed documents
It’s important to know when a customer has finished a document or a Workflow as it may require other steps in your business processes. You can configure the system to send email notifications to the agent and/or another email.
Use the following system or team settings under Notify on customer completion to configure completion notifications:
Agent - activate to send an email notification to the agent
Other email - activate and provide an email address to send a notification to someone other than the agent
Attachments - attach PDFs of the completed documents to the notification email
Email subject - enter the title for the notification email
Email body - replace the default HTML file to customize the body of the notification email
Tip
For information about how to compose an HTML file for the email, see Email template guidelines.
Click here to download and view the default email template..png "image(67).png")
Send completed Workflow documents to customer email
You can allow customers to send copies of completed Workflow documents to their email. This feature ensures that customers receive their completed documents for those times when they may overlook the manual download option in the collaboration UI.
When this feature is activated, in the closing screen of a Workflow, the customer is given the following options:
Select the checkbox to receive an email with all documents in the Workflow
Edit the email address to which the documents are sent
Note
This feature is supported only for the primary participant.
.png "image(134).png")
To activate this feature and customize the email message to which the documents will be attached:
In the Lightico administration pages, go to Session > Document handling > Notify on customer completion.
Turn on the Customer email toggle.
Under set email subject , edit the subject for the email or use the default one.
Under Choose custom HTML document for the email body, click Replace file and upload an HTML file. For guidelines for creating an email template, see Email template guidelines.
.png "image(132).png")
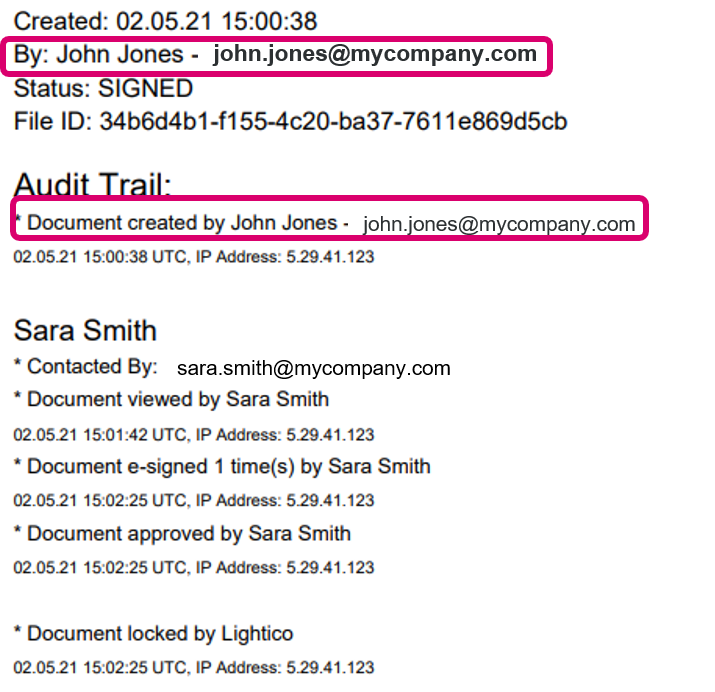
Define agent information in the audit trail
Lightico documents include an audit trail with additional information about the document, as in the example below. You can define how the agent information is displayed in this audit trail.
To define how the agent information is displayed in the audit trail:
In the Agent information in audit trail section, select one of the following:
Company Name
Agent User Name
Agent Full Name
Agent User Name and Full Name
Note:
To separate the audit trail from the completed document, see Separate Audit Trail.
Allow agents to download completed documents
Customers can always download completed documents.
To define whether to allow agents to also download completed documents:
Under Dowload complete documents, turn on the toggle.
Allow agents and customers to download incomplete documents
You can decide whether to allow both customers (including co-signers) and agents to download incomplete documents.
Configure the following settings under Download incomplete documents:
Download incomplete documents
To allow both customers and agents to download incomplete documents and Workflows, turn on the toggle.
Note
A visual cart Workflow cannot be downloaded until it is completed by the customer.
After enabling this setting, you can configure the following:
Blacked out signature
To black out the signature in the downloaded files, turn on the toggle.
Watermark
To add a watermark to the downloaded files, turn on the toggle.
Watermark text
If you added a watermark, enter the text for the watermark.
Watermark position
If you added a watermark, select the position of the watermark (Diagonal, Top, or Bottom).
Customize file names for system use
You can customize the file names of your documents for internal use. This allows an organization to use their own specific naming convention for these files. When agents download the document or when the document is sent internally by email, the customized file name will be used. However, when customers or cosigners download the document, they will still see the original name of the document.
The customized file name settings are divided into three categories:
eSigns and Workflows - All PDF Template and External Documents
Document requests - Copies of documentation provided by the customer like Photo ID or bank statement
Payment summary - Summary of customer payment during a session. This custom file name is only relevant for Lightico files that are saved in Salesforce (see Configure Lightico Settings)

Note:
Customized file names do not apply to images that the agent adds to a session.
For information about what text you can insert in the customized file name, see the guidelines below.
To customize file names for internal use:
Under Customize file name for system use, turn on the eSign and Workflows and/or the Document requests toggle.
Click Edit, and do any of the following:
Add free text
Click the Attribute icon to add an existing attribute
Click the hash tag icon to add a
.png)
Company Stamp on Audit
To define the company name for audit trails:
Turn on the Company stamp on audit toggle and enter the company name in the field.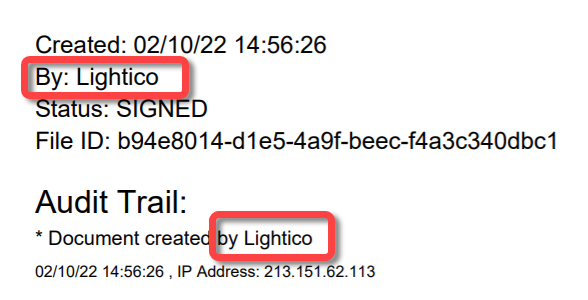
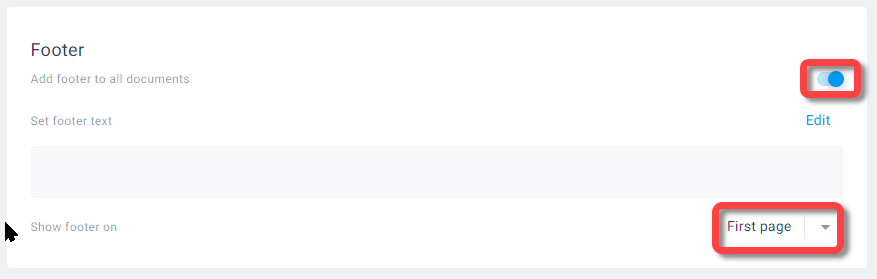
Insert a footer in documents
You can automatically insert a footer in all documents that you send to your customer. The footer appears at the bottom of the page on either the first page or on all pages.
For information about what text you can insert in the footer, see the guidelines.
To insert a footer in documents:
Under Footer, turn on the Add footer to all documents toggle.
Click Edit, and do any of the following:
Add free text
Click the Attribute icon to add an existing attribute
Click the hash tag icon to add a system value
Under Show footer on, select whether the footer will appear on the First page only or on All pages.
Agent preview
You can allow agents to preview documents before the customer completes them. This lets agents see the document as the customer will see it and guide them through the completion process.
Agent preview is supported for both PDF Templates and Dynamic Documents (HTML) with the follow differences:
PDF - Preview is available as soon as the Workflow is added to the session.
Dynamic Document - Preview is available only after the customer reaches the document step in the Workflow.
To allow agent preview:
Under Agent preview, turn on the Preview documents toggle.
Guidelines for customized file name and footer text
Follow these guidelines when creating a customized file name or footer text.
Allowed attribute types
When defining the customized file name or footer, you can use the following types of attributes:
text
date
digit
Text limitations
Customized file names and footer texts cannot include hashtags (#) other than those used to enclose system value names (for example, #CUSTOMER_NAME#).
The following limitations apply to customized file names only:
Free text in the file name cannot exceed 250 characters
The file name cannot be empty or include white characters (space, tab etc.)
The file name cannot include any of the following characters: < > : ” / \ | ? *