Introduction
Lightico enables you to create a Workflow that includes one or more documents with multiple signers and/or approvers. You can also define a label for each participant to replace the default labels.
By default, the signers of each document in a Workflow are numbered in order of their appearance in the document. This number is their label, like the example below.
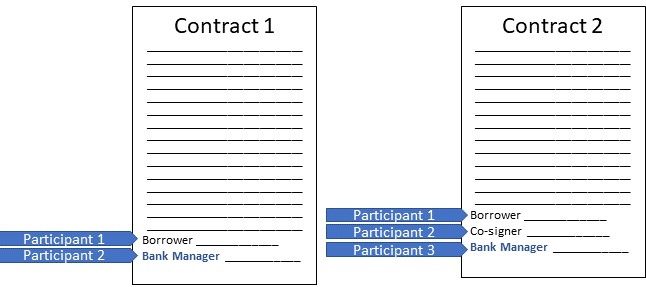
In this example, the Bank Manager is Participant 2 in Contract 1, but she is Participant 3 in Contract 2. You can define a new label called "Bank Manager" and use it to replace these two labels. So, now the bank manager has the same label for both documents, simplifying this Workflow.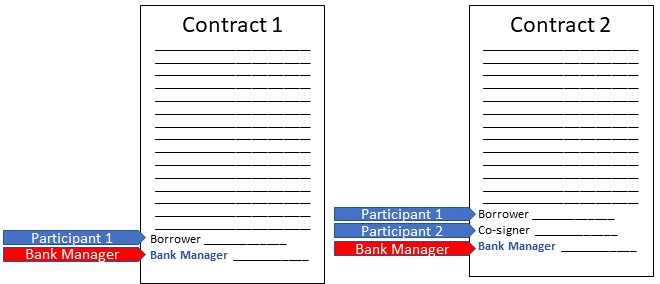
Create the Workflow
To create a Workflow with multi-signer documents:
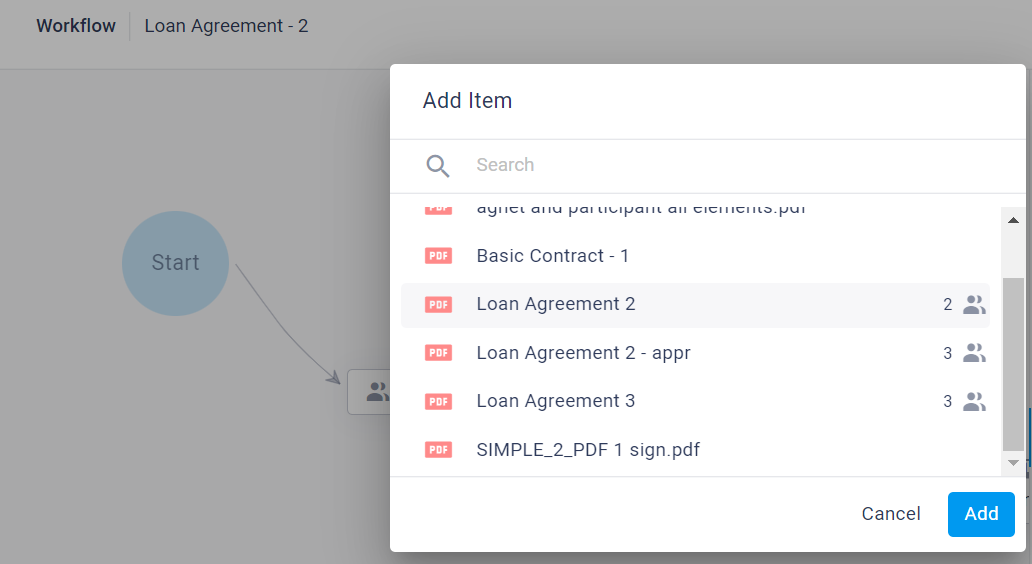
Create a Workflow with one or more multi-signer documents (see Create Workflows).
Note:
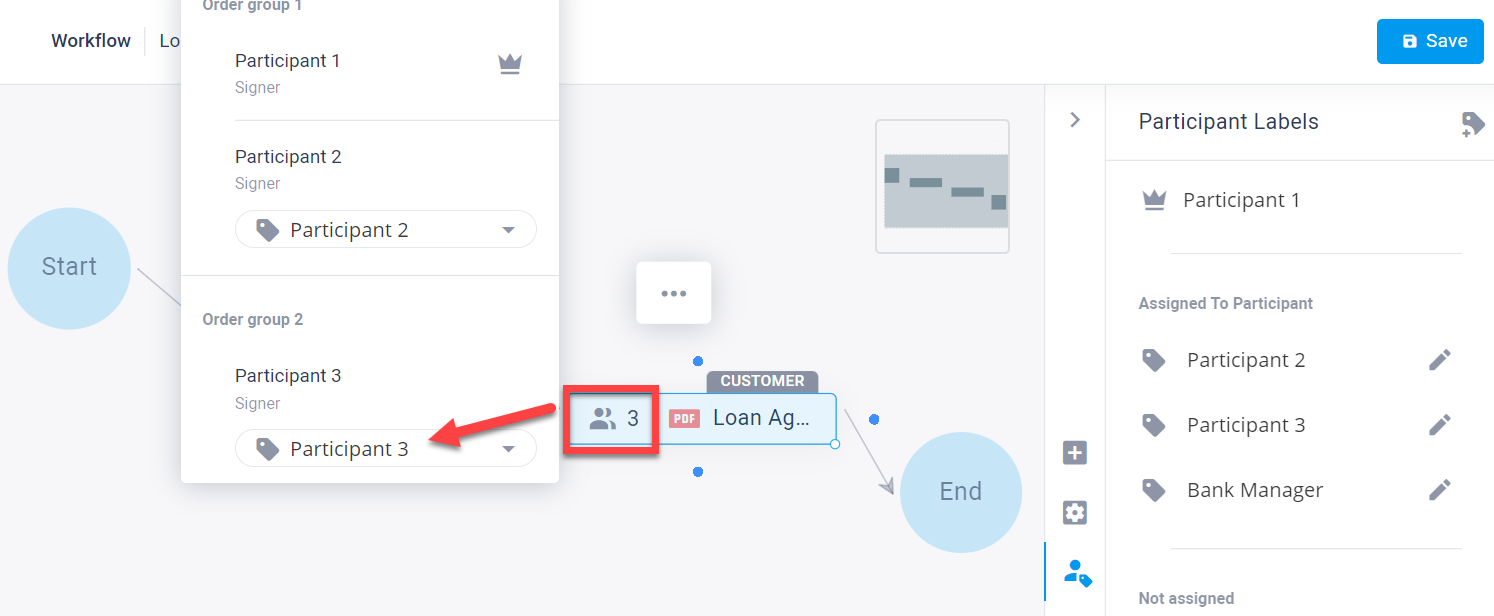
The participants icon next to each document shows how many participants are defined for each document.
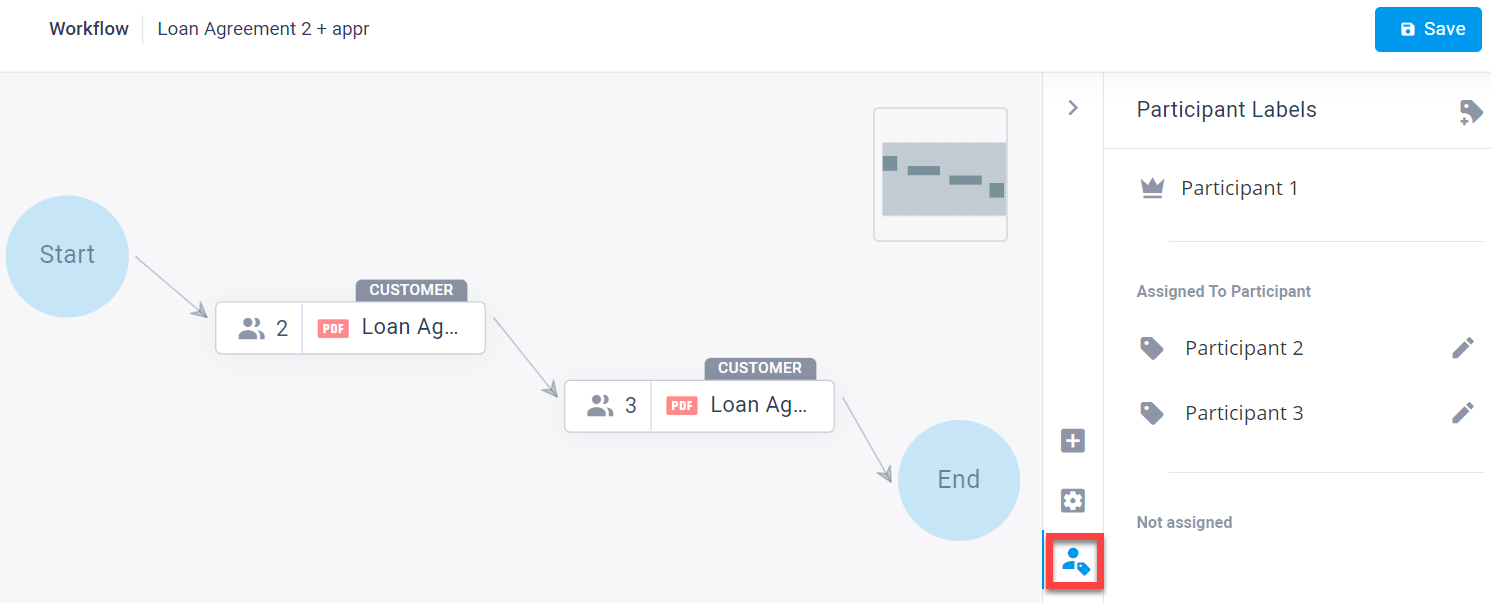
Click the labels icon to the right of the Workflow canvas.
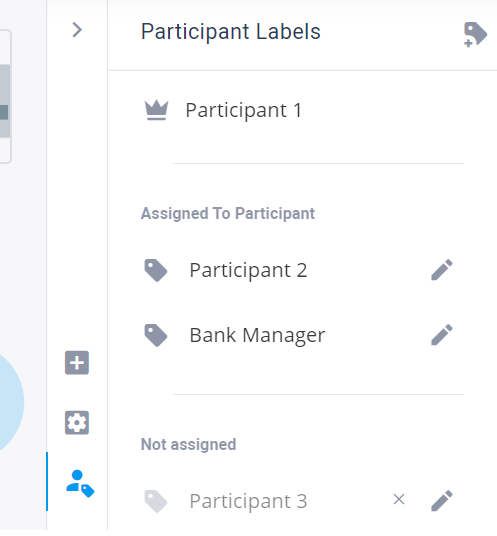
The Participant Labels pane appears.
Click the add label icon
 in the top right corner.
The Add new label box appears.
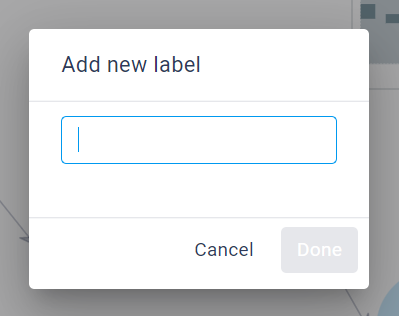
Enter a name for the new label and click Done. For example, Bank Manager.
The Bank Manager label appears in the Participant Labels pane under Not assigned.
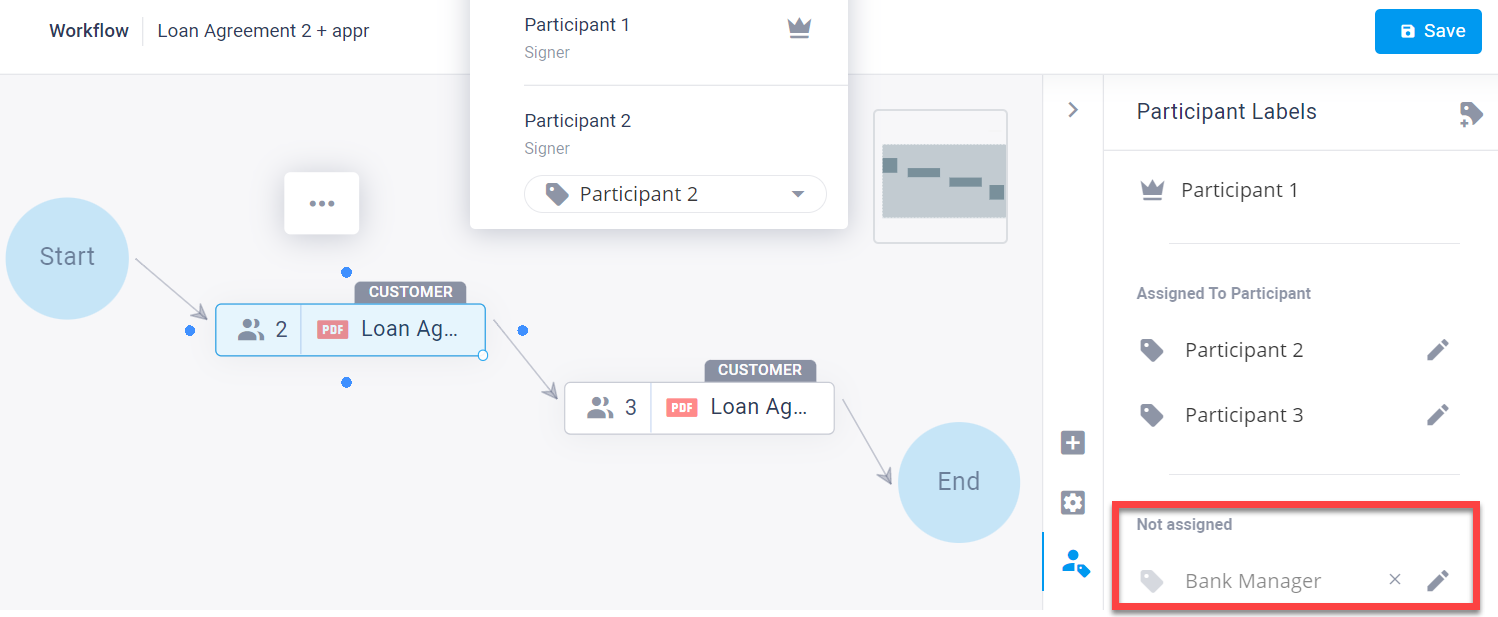
Click the participants icon on the first document.
The participants window for the document appears.
Click the label dropdown for Participant 2 and select Bank Manager.
Note:
Participant 1 is always the primary participant and its label cannot be changed.
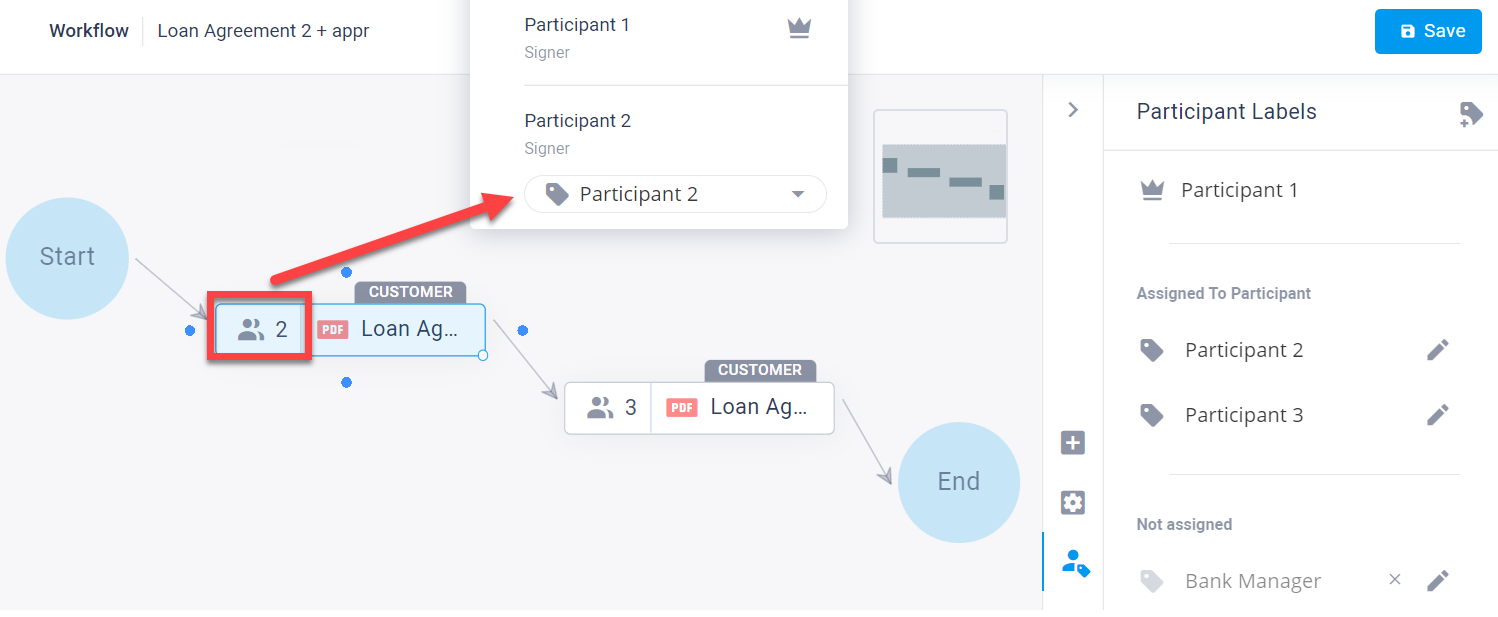
Click the participants icon on the second document.
The participants window for the second document appears.
Click the label dropdown for Participant 3 and select Bank Manager.
In the Participant Labels pane, there are now three active participants:
Participant 1 - primary participant and signer on both documents
Participant 2 - co-signer on the second document
Bank Manager - signer on both the first and second documents; when this Workflow is sent the two signatures are requested from the same participant.
Note:
The Participant 3 label is no longer needed, so it is listed under Not assigned.
Creating a Workflow with multi-signer documents is completed.
Co-signers invitations
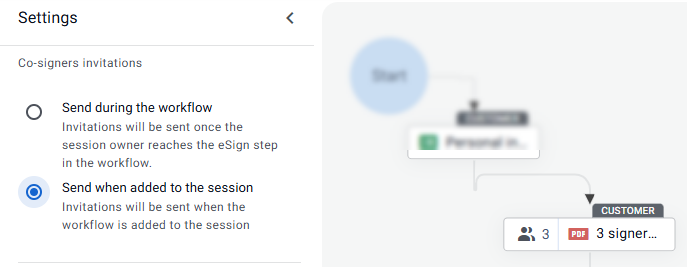
By default, invitations to participate in a Workflow are sent to additional participants only after the primary participant reaches the multi-sign PDF step.
Using the Co-signers invitations settings, you can send invitations to all participants as soon as the Workflow is added to the session.
Note
If there is a condition in the Workflow that determines the inclusion of a participant, the invitation is sent only when the primary participant completes the condition step.
Consequently, once a condition step is completed determining the inclusion of an additional participant, you cannot update the session data to change the outcome.
To send co-signer invitations when the Workflow is added to the session:
In the settings tab, under Co-signers invitations, select Send when added to the session.
Note
Co-signers invitations settings only become enabled after you add a multi-sign PDF to the Workflow.
Tip
This setting is particularly helpful if you have a deadline for the customer to complete the Workflow.
By selecting Send when added to the session, all participants can complete their part in the PDF document without waiting for the primary participant who might not open the Workflow until close to the deadline.
In addition, if the PDF requires only one of the participants to sign for completion, you can configure the PDF to accept the signature of any one of the participants, instead or requiring them all.
This setting is configured in the PDF builder.
For more information, see Add multiple participants to a PDF Template.
Send the Workflow via agent
When an agent sends a multi-signer Workflow, a pop-up appears and the agent must provide all participant contact information before the Workflow goes out.
Note:
If the agent does not have the contact information for a participant, she can allow the primary participant to provide it. For more information, see Send a Workflow that requires agent input.
Participants are shown according to the labels that you created.
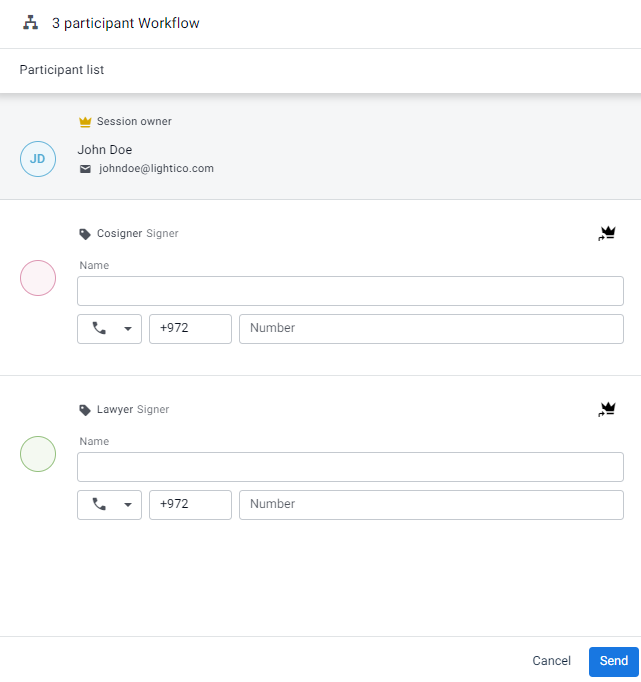
Participant contact information form shown in the agent UI
Send the Workflow via the API
To send a Workflow to a customer via the API:
Use the Retrieve Workflow participant labels command to get the labels for the Workflow.
Use the Add Workflow command to send the Workflow.
For more information about the API, see Lightico API.