Add a payment item to your Workflow to seamlessly collect payments within the context of your customer journeys.
Payment actions in a Lightico session require integration with a third-party payment gateway provider. For more information, see Set Up Payment Gateway Integration.
Summary
In this article you’ll learn the following about adding a payment step to a Workflow:
Binding payment results to Attributes
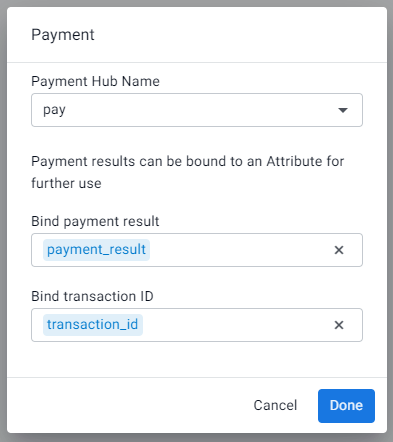
The payment produces two pieces of data, the payment result (Approved, Declined, or Canceled) and a transaction ID. You have an option to bind each of these to an Attribute so that they can be used in a conditional element in the Workflow, Dynamic Document condition or saved in a document or CRM.
For example, you could do the following:
Create a dynamic document for the Workflow that shows one text if the payment was approved and another text if it was declined. For more information, see Create Dynamic Documents.
You can add a field in your contract that shows the transaction ID. For more information, see Bind fields to Attributes.
Connecting payment results
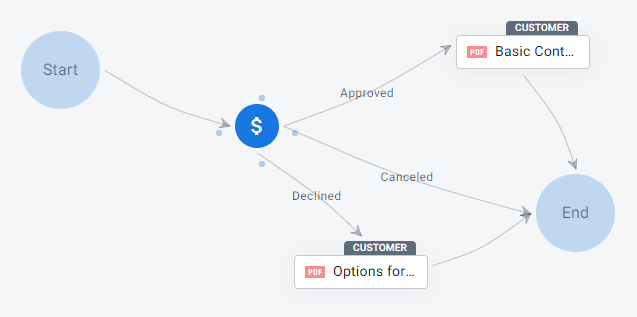
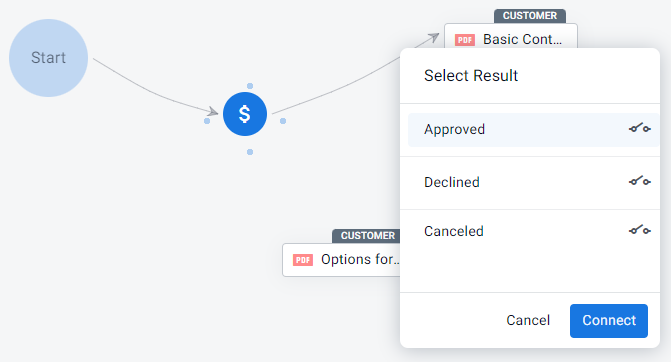
There are three possible outcomes to a payment step in a Workflow: Approved, Declined, and Canceled. In order to complete the Workflow, you’ll have to connect a Workflow step for each possible outcome.
For example:
Approved - customer is presented with a contract
Declined - customer is presented with a list of other possible payment options
Canceled - Workflow ends and customer is taken back to the collaboration room

How to add a payment step to a Workflow
To add a payment item into your Workflow:
Drag the Payment item from the right pane.
The Payment dialog box opens.
Select the name of the payment integration hub that you are using for this interaction.
Optionally, select an Attribute to bind to the payment result and transaction ID for this payment.
Click Done.

Drag a connector from the payment step to the next step in the Workflow.
The Select Result window appears.Select the payment result for which you the customer will continue to this step and click Connect.

Repeat the last two steps for the other 2 results.
Adding a payment step is completed.