This article explains the options for adding a customer verification step to a Workflow.
At any point in your Workflow, you can include a step that verifies the identity of the customer and determines whether the customer is qualified to proceed with the steps that follow.
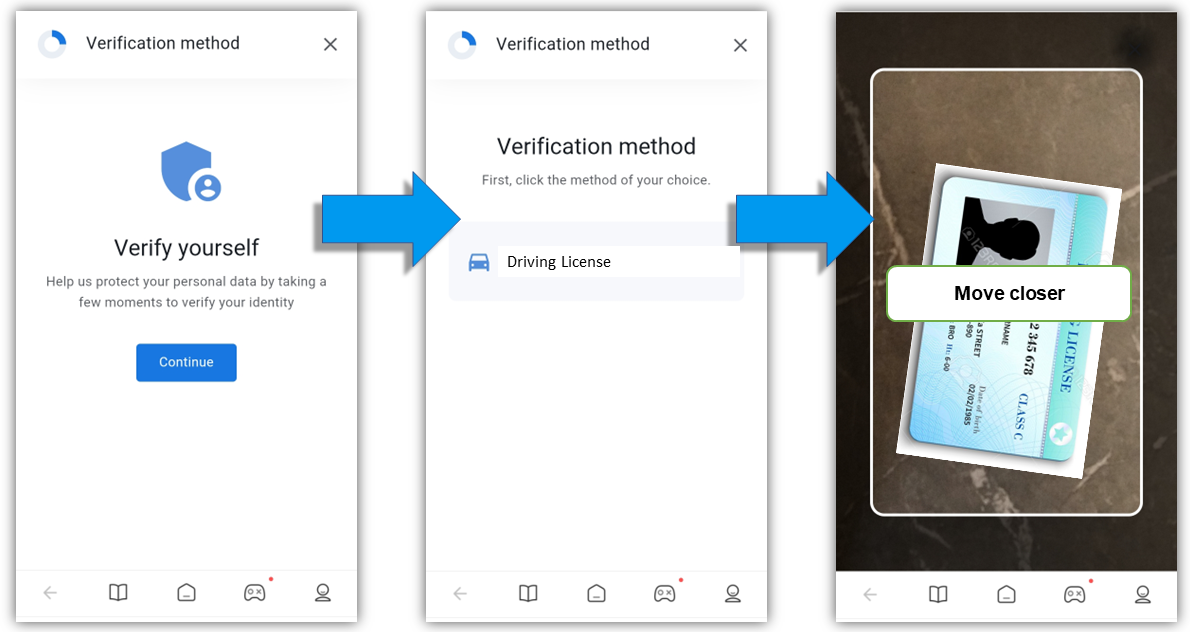
Illustration of Photo IDV on a customer mobile device
Results of the verification
All customer verification Workflow steps contain the possibility for a result of pass or fail. In this way, verification steps work like conditional switches that take the customer down a path according to the result of the verification. The way you do this is by connecting the verification step to two different elements, one for a Pass result and the other for a Fail result.
For example, if the customer passes the verification they advance to an eSign step and if they fail, the Workflow ends.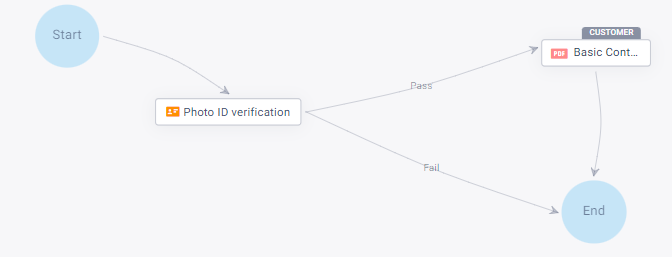
Supported types of IDV Workflow steps
Lightico supports the following types of identity verification:
Photo ID verification - see the Add photo ID verification to a Workflow article
OTP verification
The OTP (one-time password) Workflow step verifies the customer through an alternate method of communication other than the one used to enter the session. This step can be used multiple times in a Workflow and is helpful for verifying the customer before a document signing or any other important Workflow action.
Notes
Campaigns - Workflows with an OTP step are not supported for campaigns.
Self-service - A customer that enters a self-service Workflow will receive the OTP at the same email address used for the session invitation.
How it works
When the customer reaches the OTP step, they receive a one-time password. If the session invitation was sent to their email, they will receive the OTP via SMS and vice versa. Like all verification steps, business configurators can choose what happens if they pass the verification and what happens if they don’t (see above).
Note
When a Workflow with an OTP verification step is added to a session, the OTP communication channel must be provided in one of the following ways:
Agent initiated session - Agent provides it, see Send a Workflow that requires agent input
API session - Provided in the otpCommunicationValue parameter, see v21.3 Add Workflow template endpoint
Add an OTP verification step to a Workflow
Drag the OTP verification item onto the canvas from the left pane.
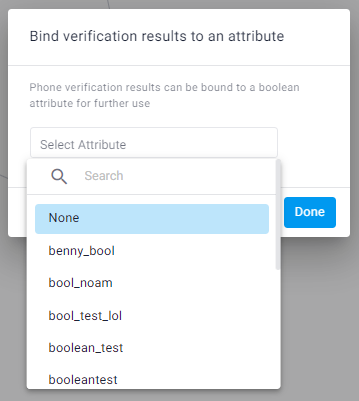
The Bind verification... dialog box appears.
Optionally, select a Boolean (true/false) Attribute or select None from the dropdown and click Done.
.png)
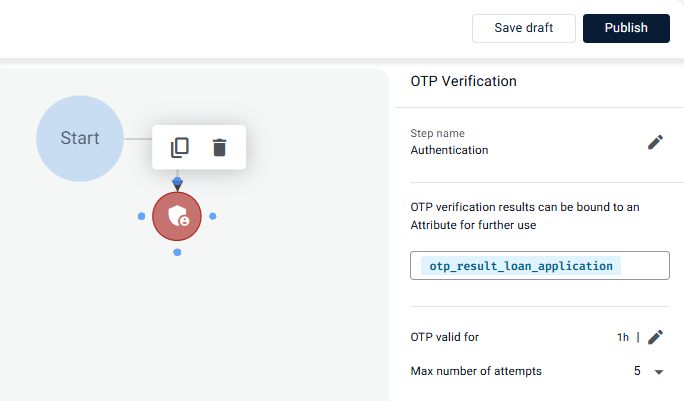
The OTP verification element is added to the Workflow.
Define the OTP setting in the right panel:
Set a duration for how long the OTP code is valid after it has been sent.
Set a maximum number of attempts to enter the correct code before the verification receives a status of Fail.
Connect the OTP verification element to one item for when the verification passes and to another one for when it fails.
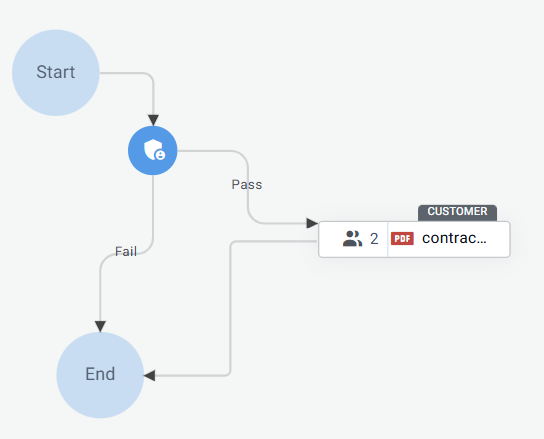
OTP verification has been added to the Workflow.
Tip
Alternatively, you can connect to the same element for pass and fail - then use the bound Boolean Attribute to define how the verification result affects the Workflow. For example, you can use the pass/fail result in a switch element further on in the Workflow or create a condition in a dynamic document.
Phone-based verification
You can use phone-based identity verification in a Workflow to authenticate the customer before entering the Workflow or before performing a specific step in the Workflow. You can also define what happens if the verification fails and bind the pass/fail result to an Attribute for use in some other part of the Workflow. For example, you can use the pass/fail result in a switch element further on in the Workflow or create a condition in a dynamic document.
To add a phone-based verification step to a Workflow:
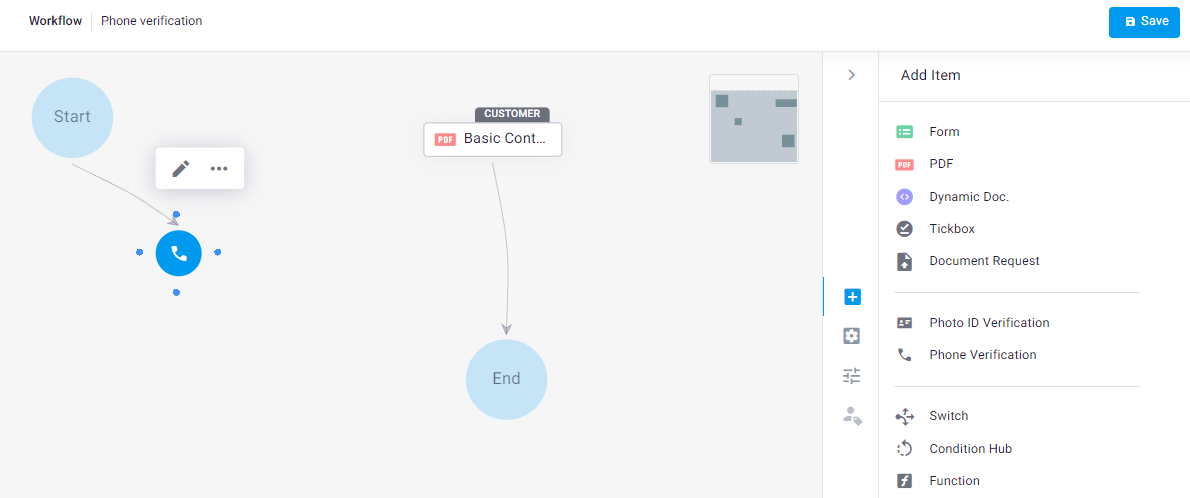
Add the Phone Verification element from the left pane.
The Bind verification... dialog box appears.
Optionally, select a Boolean (true/false) Attribute or select None from the dropdown and click Done.
The Phone verification element is added and connected to the start of the Workflow.
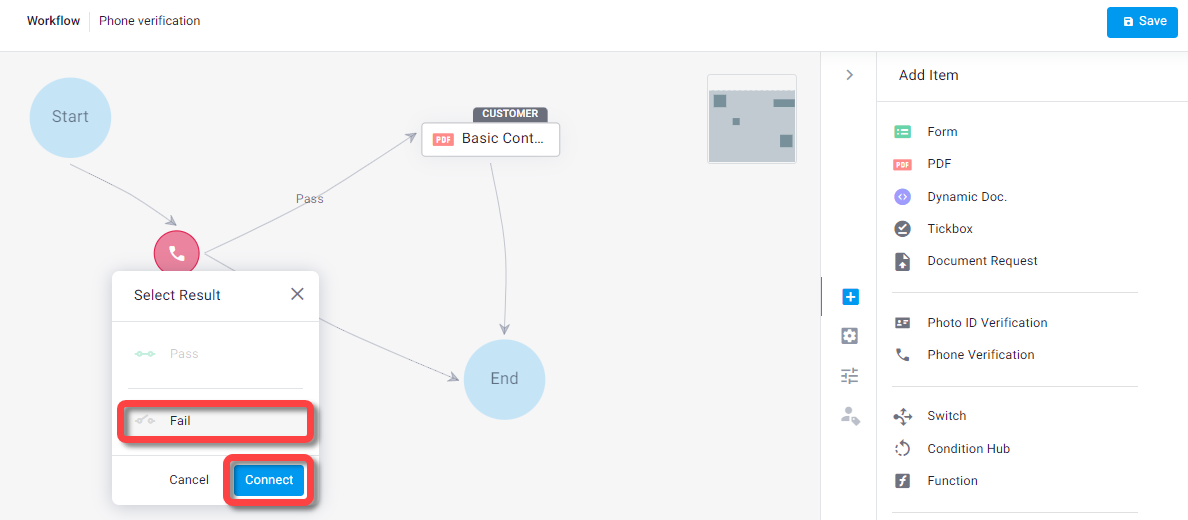
Connect the Phone Verification element to one element for when the customer passes the verification and to another one for when they fail.
Pass = phone number is valid and the customer entered the correct OTP; Fail = phone number is not valid OR phone number is valid but the customer entered the wrong OTP (number of tries is defined in the integration hub.)
Tip
Alternatively, you can connect to the same element for pass and fail - then use the Boolean Attribute from the previous step to define how the verification result affects the Workflow.
Phone-based verification has been added to the Workflow.