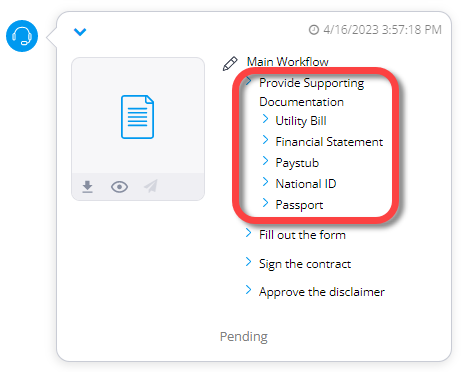
A Document Request step enables you to obtain essential supporting documentation from customers. Whether it’s financial statements, legal forms, or personal ID documents, this step ensures that the required materials are promptly submitted.
Preparing to add a Document Request to a Workflow
Before adding a Document Request step to a Workflow, make sure the required Document Requests are already configured in the Document Request configuration page.
Create the relevant Document Request types you plan to use in the Workflow (for example, a US driver’s license, passport, utility bill, bank statement, or other document type). For instructions, see Create Document Requests.
Configure advanced processing for any Document Requests that require classification validation, data extraction, or photo ID authentication. For more information, see Advanced processing.
How to add a Document Request step
Drag the Document Request item from the left pane.
The Document request dialog box opens.In the left pane, select the category of Document Requests to filter the list of document types or select All.
In the middle pane, select documents that you want to request from the customer.

Tip
If the document includes data extraction, an icon is displayed next to the document. You can click on the icon to see which Attributes are bound to the extraction results.
.png)
The selected items appear in the right panel.
Click the x next to any of the selected items to remove them from this step.
Click Done.

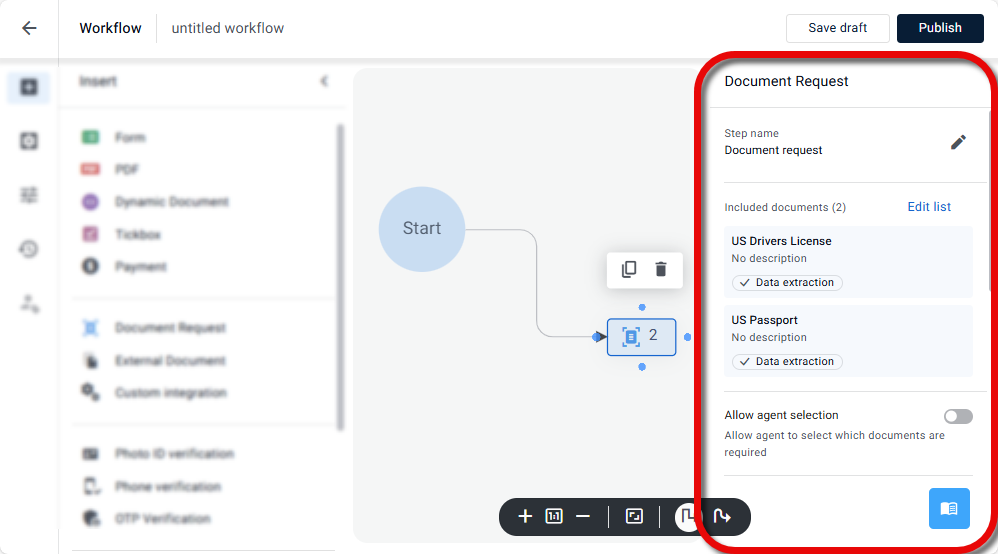
The Document Request item is added to the canvas and displays the number of documents you included in that step.
.png")
Edit the Document Request step
After adding the Document Request item to the Workflow canvas, you can select it, and, in the right panel, edit it as follows:
Step name - Click the edit icon and change the name that appears for this step in the collaboration session.
Included documents - Shows which documents are being requested:
Click Edit list to add or remove documents
Click one of the documents to do any of the following:
Description - Add a description that clarifies what is required.
For example, if the required document is a bank statement, include the following description:
Please upload 3 months of statements.A description can also be added or edited by the agent in the session, see Send a Workflow that requires agent input.
Extract data - Enable data extraction from this document and bind the data to Attributes for use in the session. See below.
Validate classification - Enable validating the document before the customer continues (see below). Optionally, select a Boolean Attribute to which to bind the result.
Additional checks - Enable checking optional factors (see below). Optionally, select a Boolean Attribute to which to bind the result.
Allow minimum required - Allow the customer to select from the list of documents as long as they provide the minimum number.
Turn on the toggle and, under Documents required, set the minimum number of documents required.
See below for more information about this setting.Allow agent selection - Allow agents to select which documents from the defined list are required - enabling this setting reveals the following additional settings (see below for a full explanation of these settings and how to use them):
Agent instructions - (optional) Provide an explanation of this step for the agent to help them understand what documents are required
Allow custom documents - Allow agents to add custom documents to the required list
Allow agent to set minimum required - Allow agents to set the minimum number of documents from the list that they are required to upload
Capture-only mode - Limits customer to scanning a document and does not allow them to upload a file of the document. This ensures that customers submit real-time, authentic document captures. See below.
Send step data to email - Turn on the toggle and select an email connector hub to have session sent to a predefined email at the completion of this step. For more information, see Configure general Workflow settings.
Use the context menu above the selected item to do the following:
Duplicate this step
Delete this step
.png "image(52).png")
Empowering agents to configure a Document Request step
The documents included in a Document Request step are defined by the BC who builds the Workflow. However, you can give agents flexibility to tailor the step to each customer's situation.
For an explanation of the agent view of these features, see Send a Workflow with a Document Request step.
Define the following settings:
Note
Enable Allow agent selection to reveal the other agent related settings.
Allow agent selection - does two things:
Allows agents to add or subtract from the list of required documents and edit the description of each document
Reveals the additional agent related settings below
Agent instructions — Provide an optional explanation of the step to help the agent understand what documents are required.
Allow custom documents — Agents can add document types to the required list that aren't in the predefined set.
Allow agent to set minimum required — Agents can set how many documents from the list the customer must upload before the step is complete. For example, a mortgage advisor might lower the minimum for a returning customer who has already provided some documents or set it to 0 and exclude the step entirely when no documents are needed at that stage.
Minimum required documents
By default, a customer is required to provide all documents defined in a Document Request step to continue the Workflow. However, the Minimum required documents setting lets you define a threshold instead — customers can upload any combination of documents from the predefined list, as long as they meet the required number.
This is useful in scenarios where multiple document types can serve the same purpose, such as proof of income or identity verification.
See above to enable the agent to set the minimum number of documents before sending a Workflow.
How it works
To set the minimum required documents in a Document Request step:
Select the Document Request step to reveal the step properties panel on the right.
Turn on the Allow minimum required toggle.
The Documents required setting is revealed.Define the number documents required.
Tip
To enable the agent to set the minimum required, see above: Empowering agents to configure a Document Request step.
Customer experience
During the session:
The customer sees the full list of available document options
If a minimum is defined, guidance indicates how many documents must be uploaded
The Next button is enabled only after the requirement is met
A validation message confirms when enough documents have been uploaded
Customers can upload more documents than the minimum if needed
Making the step optional
If you set the minimum to 0:
The step becomes optional
A Skip option is available to the customer
If skipped, the step is marked as completed without any uploads
Note
Even when the minimum is set to 0, the agent must select at least one document before sending the step.
Example use case
A banking Workflow includes an income verification step. Instead of requiring specific documents, the business configurator defines a list that includes payslips, bank statements, and tax documents, with a minimum of two.
Customers can upload any two of these documents based on what they have available. This reduces back-and-forth and allows the process to move forward without delays.
Advanced processing options
Advanced processing options are configured when you create a Document Request (see Advanced processing for Document Requests) and are then enabled in the Workflow builder.
Each Document Request Workflow step can include multiple documents, and advanced processing settings are configured per document. So, you can choose which documents in the step are enabled for advanced processing options.
The following advanced processing options are supported in a Document Request Workflow step.
To perform Photo ID authentication in a Workflow, see Customer verification as a Workflow step.
Data extraction
When data extraction is enabled, the system analyzes the uploaded document and extracts structured data.
Extracted data is:
Bound to Attributes for use within the session (for example, conditions and content personalization)
Included in the Workflow step element completed event, making it available to downstream systems in real time
Classification validation
Classification validation verifies that the document uploaded by the customer matches the expected document type for the Document Request (for example, confirming that a driver’s license was uploaded when a driver’s license was requested).
When classification validation is enabled, you must connect the Workflow step to separate paths for pass and fail results, allowing you to control how the Workflow continues in each case. If the uploaded document does not match the expected type, the Workflow follows the configured fail path.
Tip
When one of the included Document Requests includes classification validation we recommend not including any other documents in the step. A validation failure of one document will cause the customer to go down the fail path even if the other documents passed.
Additional checks
Additional checks include optional validation mechanisms that evaluate the uploaded document beyond classification.
Currently, the available additional check is:
Risk indicators
When Risk indicators is selected, the system evaluates the uploaded document for predefined signals that may indicate potential issues requiring closer review.
If such indicators are detected, the document is flagged as failing the check. You can use this result to route the Workflow differently—for example, by directing the session to a manual review step or applying additional verification steps.
As with classification validation, you must configure separate paths in the Workflow builder to determine how the process continues when a risk indicator is triggered.
Capture-only mode
Capture only mode is a setting that requires the customer to capture documents using their device camera only. This ensures that documents are captured in real time, rather than uploaded from their device.
When capture-only mode is enabled (see above), customers who enter the Document Request step using a desktop or laptop will see a message explaining that a mobile device is required to continue. Since desktops or laptops may not support real-time image capture for document scanning, the message gives them the option to request a new session invite—allowing them to switch to a mobile device and complete the step successfully..png)