You can create a Workflow that includes documents that are uploaded on the fly during a Lightico session. The External Document item provides a designated space for the required PDF documents in the Workflow. Agents are prompted to upload the necessary documents before sending the Workflow to customers.
Example of using an External Document
One scenario where uploading an External Document during a session becomes necessary is when a company uses a third-party service to generate and manage their documents. In such cases, the External Document element creates a placeholder so that the document can be obtained from the service and the agent can insert it into the Workflow before sending the Workflow to the customer .
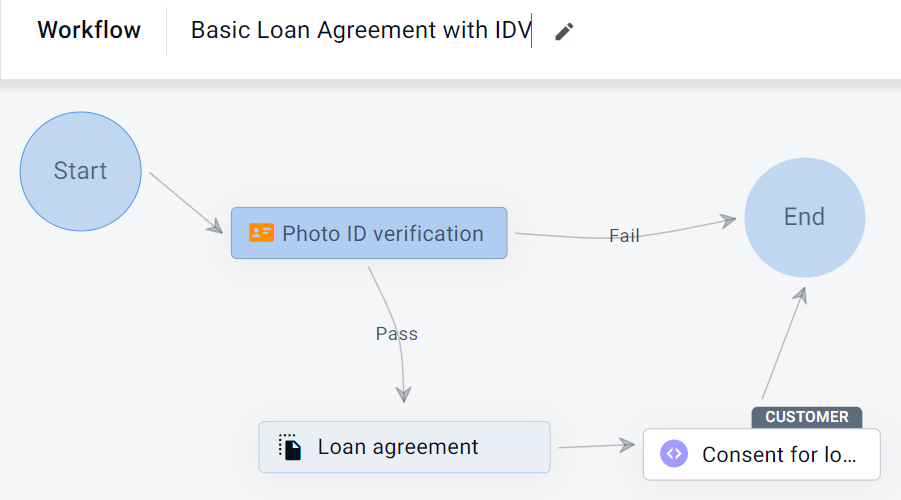
Workflow with loan agreement doc to be uploaded in the session
Guiding the agent to upload the correct file
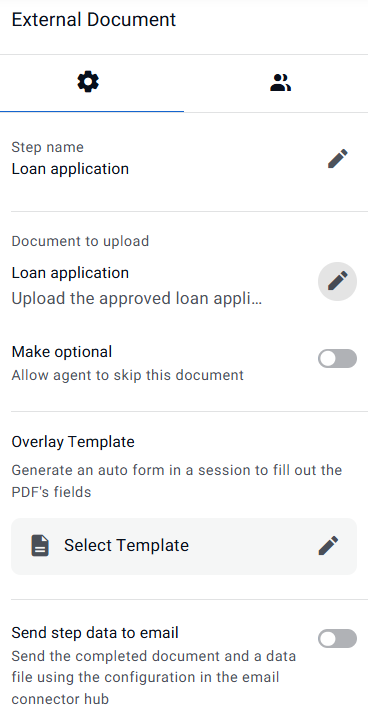
When you add the External Document to the Workflow, you can define a name (A) and description (B) for each document that guides agents to upload the correct files.
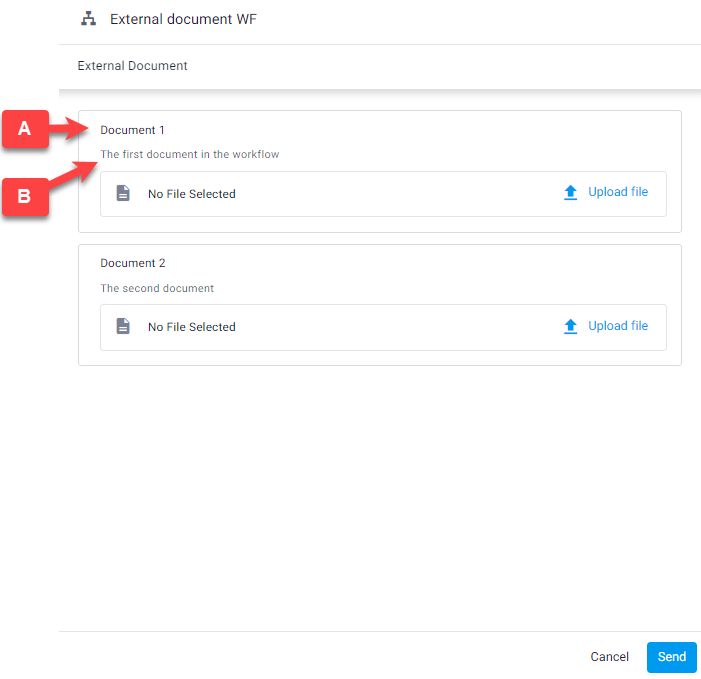
Agent Interface for Uploading External Document
Additional agent actions
When the agent uploads the Workflow, in addition to uploading the correct External Document, they may also be required to do the following:
Provide customer contact information for additional participants
Place signature or initials fields
Enter additional text onto the document
For more information about how an agent sends a Workflow with an External Document step, see Send a Workflow that requires agent input.
How to add an External Document to a Workflow
To add an External Document to your Workflow:
Drag the External Document element from the right pane.
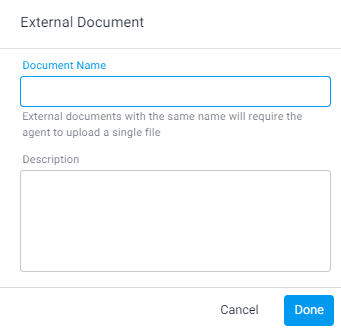
The External Document dialog box opens.Enter the following:
Document Name - Appears in the agent UI when they are asked to upload the document. Use a name that will make it clear to the agent which document to upload.
Description - (optional) Additional information to help the agent understand which document to upload and any additional information like what fields need to be added to it before sending.
Click Done.
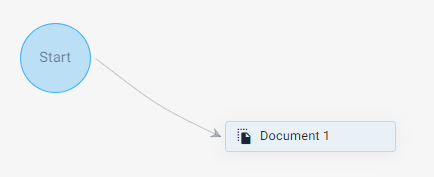
The External Document element is added to the canvas. By default, the Workflow step name becomes the Document Name that you created above. You can rename the step (see below).
Note
To include the same External Document in more than one step of the Workflow, either duplicate this step (see below), or create a new External Document with the same Document Name. The agent uploads only one PDF for all External Documents with the same name.
Edit the External Document step
After adding the External Document item to the Workflow canvas, you can select it, and, in the right panel, define any of the following:
Step name - the name that appears in the interaction bubble for the agent and customer
Document to upload - the name and description that appears for the agent when they are uploading the External Document
Make optional - Allow the agent to skip this External Document step when they add the Workflow to the session
Overlay template - see below
Send step data to email - Turn on the toggle and select an email connector hub to have session sent to a predefined email at the completion of this step. For more information, see Configure general Workflow settings.
External Document step properties panel
Use the icons above the selected item to do the following:
Duplicate this step - the agent uploads a single document for both the original step and this new one
Delete this step

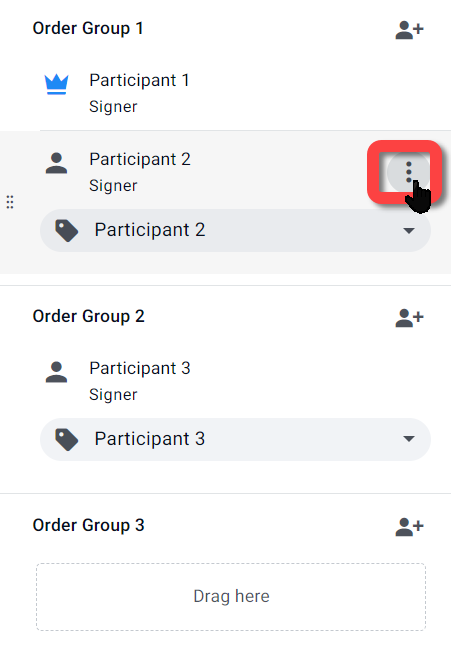
Add additional participants to the External Document step
By default, an External Document step in a Workflow includes the agent and the primary participant. This section explains how to add additional participants to the step for either signing or approving the document.
For an explanation of additional participants in a document, see Add multiple participants to a PDF template.
To add additional participants to an External Document step:
Select the External Document element and, in the right panel, click the participants icon.
In the context menu, click the add participant icon for the relevant group(s).
.PNG "2024-05-27_16-00-00(1).PNG")
The additional participants are added.
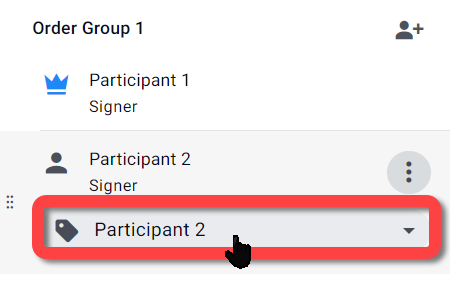
Hover over a participant and click the menu.
In the context menu, set any of the following:
Define whether the participant is a Signer, Approver, or Viewer.
Turn on the toggle to define this participant as Optional - the agent decides whether to include this participant.
Delete the participant.
.png)
Click the participant label to change the label of the participant (for more information about participant labels, see Create multi-signer Workflow).
Participant viewer role
The Viewer role allows you to include additional participants in a Workflow step so they can view a document without being required to take any action.
Participants assigned as viewers:
Can open and view the document
Are not required to sign, approve, or complete any task
Do not affect the progress of the Workflow
This role is useful when you need to share a document with stakeholders—such as a spouse, colleague, or manager—who need visibility but are not part of the approval or signing process.
Note
The Viewer role is different from the Reviewer role. The Reviewer role is limited to the primary participant and requires them to open the document before the Workflow can continue.
Add an Overlay Template to the External Document step
An Overlay Template is a file that includes all the settings and fields of a PDF Template. When added to an External Document, these settings and fields are applied to it.
For information about creating an Overlay Template, see Configure PDF template settings.
Advantages of an Overlay Template
The advantages of using an Overlay Template with the External Document are:
Defining document settings
Using customer information fields as well as signature fields
Including additional participants
Pre-positioning fields and not leaving it up to the agent
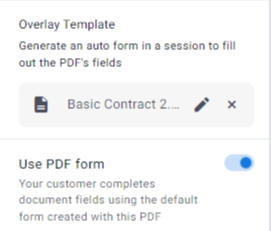
Overlay Template Form
Adding an Overlay Template automatically generates a digital Form for collecting all information contained in the overlay fields. The form is inserted into the Workflow before the External Document is presented to the customer.
Tip
To replace the auto-generated form with a customized form, turn off the Use PDF form toggle (see Replace the PDF or Overlay Template form in a Workflow).
How to add the Overlay Template
Attention
The overlay must match the document purpose (see above). For example, if the purpose is Sign, you will only be able to select overlays with signature fields.
To add an Overlay Template to the External Document:
Select the External Document element, and click the menu.
In the context menu, under Overlay Template, click Select Template.
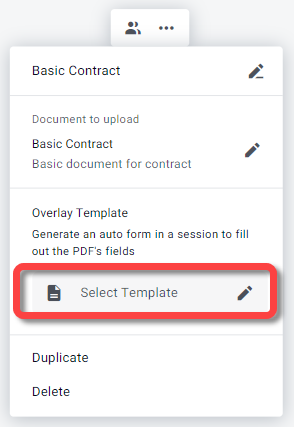
The Select Overlay Template window appears.
Select the relevant template and click Select Template.
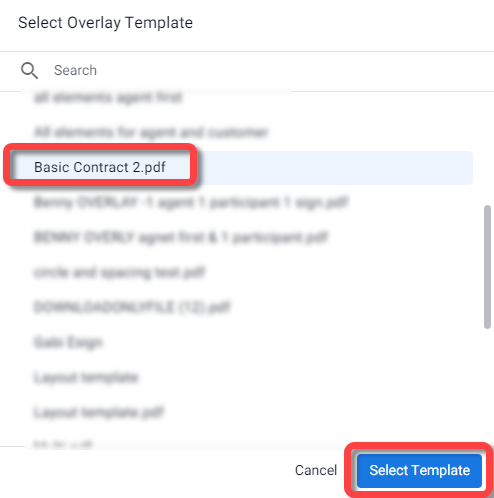
The Overlay Template is added to the External Document step.
Q and A
Can I make a participant in an External Document step optional?
Yes. When configuring participants for an External Document step, you can mark individual participants as optional. The agent decides at runtime whether to include that participant in the session.
What's the difference between the Reviewer and Viewer roles?
The Reviewer role applies to the primary participant and requires them to open the document before the Workflow can continue. The Viewer role is for additional participants who need visibility into the document but are not required to take any action — their status does not affect Workflow progress.
Can the same External Document step appear more than once in a Workflow?
Yes. You can duplicate an External Document step to replicate it — including all its settings — in a different part of the Workflow. This is useful when different paths in a conditional Workflow require the same document. The customer only ever encounters the step on the path they're routed through, and the agent only needs to upload the PDF once, regardless of how many times the step appears in the Workflow.
Why don't I see the Document purpose setting anymore?
The Document purpose setting has been replaced by the role assigned to each participant in the External Document step. Since External Documents now support multiple participants, each participant is configured with an individual role — Sign, Approve, Review, or Download — rather than a single purpose applying to the whole document.