This article describes how to create template-based documents in the Lightico Administration page. Agents can access these documents in the Agent console and send them to customers during Lightico sessions.
Upload a PDF to Shared items
Template-based documents are stored in the Shared items page. The first step in creating a new template based document is to upload the PDF you want to edit to the Shared items.
To upload a PDF to shared items:
- In the Lightico Administration screen navigation pane, click Shared Items.
The Shared items page opens displaying the existing documents organized by categories..png)
Click the upload icon next to the relevant category and upload the relevant PDF document from your local directory.
The template editing page opens displaying the PDF that you uploaded.
Understanding the template editing page
Use the template editing page to design and edit your PDF template.

The template editing page consists of the following:
- 1) Template Name (editable) and Unique ID
- 2) Home Tab - Add and configure participants and interactive fields
- 3) Wizard Tab - Customize the design and behavior of the document wizard
- 4) Settings Tab - Template settings and advanced configuration
- 5) Template Canvas - Enables you to position fields in the document
- 6) Field Properties Pane - Settings for each field that you add
Rename template
To rename the template, click inside the name of the template, enter the new name, and click Save Draft.
Copy unique template ID
You can copy the unique ID of the template for use in the API and integrations. To copy the ID, click the Copy icon next to the unique ID.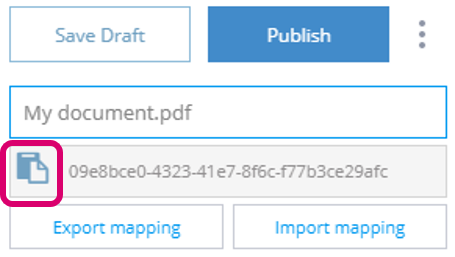
Add fields to your document
After you have uploaded your PDF to the Shared items page, you can add fields to your document. You can add e-sign fields (such as signature or initials), text fields, selection fields (such as checkboxes or radio buttons), and more.
For a full list of the types of fields you can add and how to configure them, see Field types.
To add fields to your document:
In the Add fields pane, select the checkbox next to the field that you want to add to your document, for example signature.
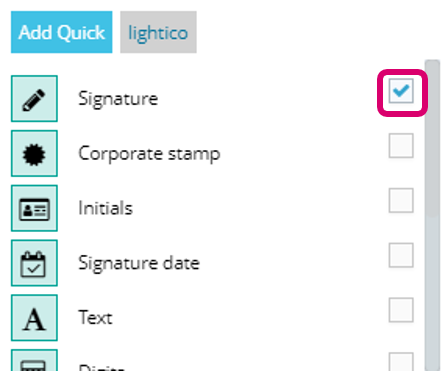
Click your mouse in the area that you want to place the field. The field appears in the area that you clicked.
Note:Instead of selecting the checkbox, you can also click on the field itself. In this case, the field appears at the top left corner of your document.
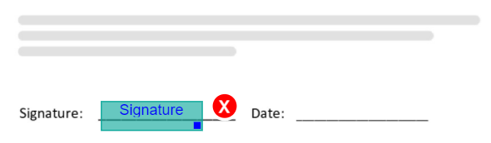
Drag the field to the exact place you want it in your document and resize it accordingly.
 Note:
Note:Line up the text of the field box where you want the input text to appear on the final document.
Configure the field properties.
- Click the relevant field. The Field properties pane opens on the right.
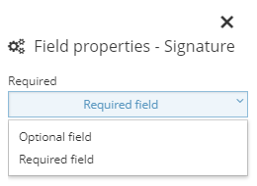
- Define the relevant properties. For example, select whether the signature field should be required or optional.
For a full list of the types of fields you can add and how to configure them, see Field types.
- Click the relevant field. The Field properties pane opens on the right.
Click Save Draft in the settings pane.
Customize the document wizard
You customize the look and feel of the document wizard using the Document wizard pane. For more information, see Customize the document wizard.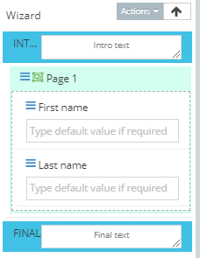
Add multiple participants
You can configure the document to be sent to multiple participants. You add and configure participants in the Participants pane. For more information, see Add multiple participants to a document.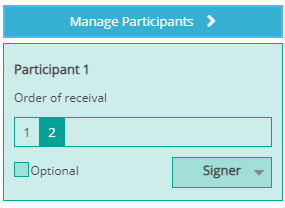
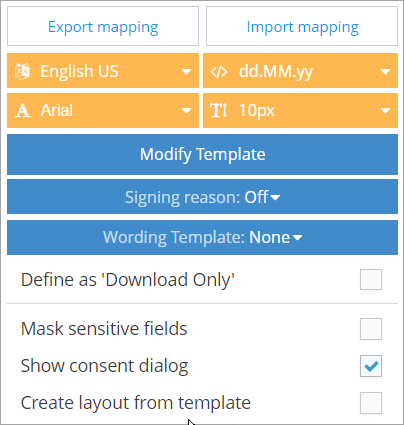
Configure template settings
In the Settings pane, you configure template settings and advanced configuration. For more information, see Configure template settings.
Field types
This section describes the types of fields you can add to your document and how to configure the field properties for each one.
- Signature
- Corporate stamp
- Initials
- Signature date
- Text
- Digits
- Date
- Dropdown list
- Checkbox group
- Radio button group
- Boolean
Signature
You can add a signature field to your document, allowing the customer to digitally sign the document. You can configure the following properties:
| Property | Description |
|---|---|
| Required field | Whether or not the field is required |
Corporate stamp
You can add a corporate stamp field to your document. The corporate stamp is a combination of 3 fields that the customer completes: corporate name, corporate file number, and signature. You can configure the following properties:
| Property | Description |
|---|---|
| Required field | Whether or not the field is required |
Initials
You can add an Initials field to your document, allowing the customer to digitally initial the document. You can configure the following properties:
| Property | Description |
|---|---|
| Required field | Whether or not the field is required |
Signature Date
You can add a Signature date field to your document. This field is automatically populated with the date on which the customer enters a signature or initials. You can configure the following properties:
| Property | Description |
|---|---|
| Date Format | The format of the date as it appears inside the final document |
| Time Format | The format of the time as it appears inside the final document. You can choose to not display a time at all or you can select a particular format. |
| Font size | The font size of the date inside the final document |
| Bind to attribute | When you bind a field to an attribute, the attribute is saved for the duration of the session and any field sharing the same attribute is automatically populated with this information. For more information, see Bind a document field to an attribute. |
Text
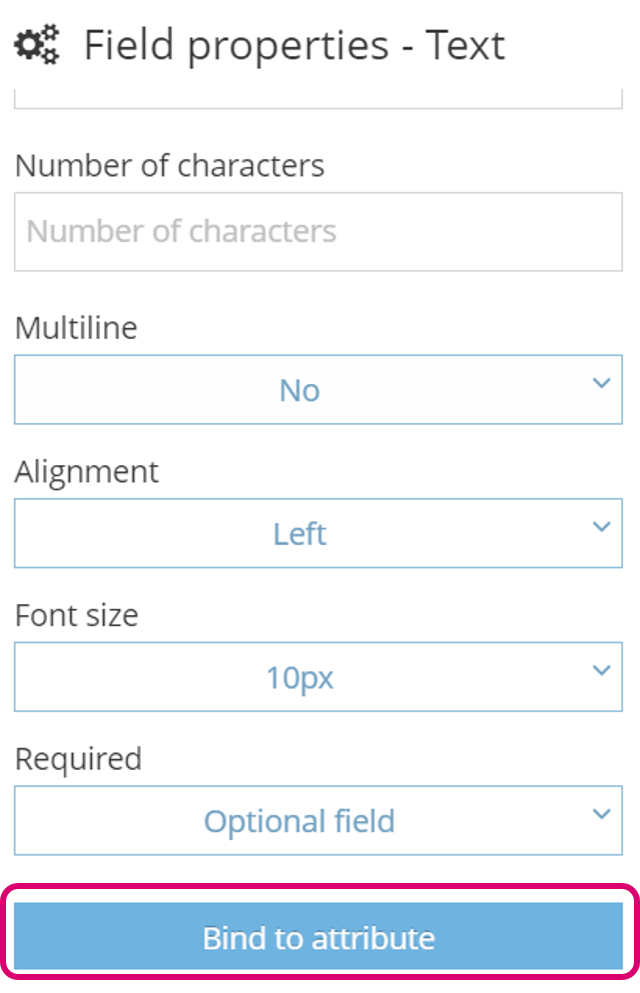
You can add a text field to your document, allowing the customer to enter free text into the document such as full name or address. You can configure the following properties:
| Property | Description |
|---|---|
| Field name | The name of the field Note: You can put the same field (for example, last name) in multiple places in a document while only requiring the customer to enter the information once. To do this, define the same field name and field label properties for the relevant fields. |
| Field label | The label of the field that is visible to the customer in the wizard |
| Number of characters | Enter the maximum number of characters allowed for this field. Select Enable spacing to evenly space the characters in the final document. |
| Multiline | Whether or not the text can span multiple lines |
| Alignment | The alignment of the text input inside the final document |
| Font size | The font size of the text input inside the final document |
| Required | Whether or not the text is required |
| Show in customer wizard (agent fields only) | For Agent fields only, you can choose whether or not to display the field as read-only in the customer wizard. |
| Bind to attribute | When you bind a field to an attribute, the attribute is saved for the duration of the session and any field sharing the same attribute is automatically populated with this information. For more information, see Bind a document field to an attribute. |
Digits
You can add a digits field to your document, allowing the customer to enter numbers into the document. You can configure the following properties:
| Property | Description |
|---|---|
| Field name | The name of the field Note: You can put the same field (for example, last name) in multiple places in a document while only requiring the customer to enter the information once. To do this, define the same field name and field label properties for the relevant fields. |
| Field label | The label of the field that is visible to the customer in the wizard |
| Number of characters | Enter the maximum number of characters allowed for this field. Select Enable spacing to evenly space the characters in the final document. |
| Font size | The font size of the digits inside the final document |
| Required | Whether or not the field is required |
| Show in customer wizard (agent fields only) | For Agent fields only, you can choose whether or not to display the field as read-only in the customer wizard. |
| Bind to attribute | When you bind a field to an attribute, the attribute is saved for the duration of the session and any field sharing the same attribute is automatically populated with this information. For more information, see Bind a document field to an attribute. |
Date
You can add a date field to your document, allowing the customer to enter a date into the document. You can configure the following properties:
| Property | Description |
|---|---|
| Field name | The name of the field Note: You can put the same field (for example, last name) in multiple places in a document while only requiring the customer to enter the information once. To do this, define the same field name and field label properties for the relevant fields. |
| Field label | The label of the field that is visible to the customer in the wizard |
| Date Format | The format of the date as it appears inside the final document |
| Font size | The font size of the date inside the final document |
| Required | Whether or not the field is required |
| Show in customer wizard (agent fields only) | For Agent fields only, you can choose whether or not to display the field as read-only in the customer wizard. |
| Bind to attribute | When you bind a field to an attribute, the attribute is saved for the duration of the session and any field sharing the same attribute is automatically populated with this information. For more information, see Bind a document field to an attribute. |
Dropdown list
You can add a dropdown list to your document, allowing customers to select one of the dropdown options.
To add options to the dropdown list, go to the Field properties pane and click the + button next to the Options box.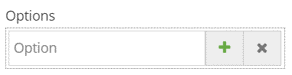
You can configure the following properties:
| Property | Description |
|---|---|
| Field name | The name of the field |
| Field label | The label of the field that is visible to the customer in the wizard |
| Alignment | The alignment of the selected option inside the final document |
| Font size | The font size of the selected option inside the final document |
| Required | Whether or not the dropdown is required |
| Options | Add or remove dropdown options. |
| Show in customer wizard (agent fields only) | For Agent fields only, you can choose whether or not to display the field as read-only in the customer wizard. |
| Bind to attribute | When you bind a field to an attribute, the attribute is saved for the duration of the session and any field sharing the same attribute is automatically populated with this information. For more information, see Bind a document field to an attribute. |
Checkbox group
You can add a checkbox group to your document, allowing customers to select multiple checkbox options. Each checkbox option appears as a small square that you can place in your document.
To add a checkbox group:
In the Add fields pane, click Checkbox group. The first checkbox appears in the top left corner of your document.
In the Field properties pane, select the selection symbol for the checkbox. This is the way the checkbox will appear in the final document when it is selected.
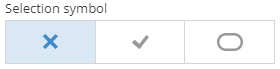
You can either display an X or a ✓ inside the checkbox, or you can choose to circle the selected options.
Drag the checkbox to the appropriate place in your document.
In the Field properties pane, enter the name of the first option in the Options box.
To add additional options, click the + button next to the Options box. A new checkbox appears in the top left corner of your document. Drag the checkbox to the appropriate place in your document and enter the name.
You can configure the following checkbox field properties:
| Property | Description |
|---|---|
| Group Name | The name of the checkbox group |
| Required | Whether or not the checkbox group is required |
| Options | Add or remove checkbox options to your document. |
| Show in customer wizard (agent fields only) | For Agent fields only, you can choose whether or not to display the field as read-only in the customer wizard. |
| Bind to attribute | When you bind a field to an attribute, the attribute is saved for the duration of the session and any field sharing the same attribute is automatically populated with this information. For more information, see Bind a document field to an attribute. Note: To bind an attribute to a checkbox group, ensure that the number of checkbox options you define matches the number of options in the attribute. |
Radio button group
You can add a radio button group to your document, allowing customers to select one of the radio button options. Each checkbox option appears as a small circle that you can place in your document.
To add a radio button group:
In the Add fields pane, click Radiobutton group. The first radio button appears in the top left corner of your document.
In the Field properties pane, select the selection symbol for the radio button. This is the way the radio button will appear in the final document when it is selected.
You can either display an X or a ✓ inside the radio button, or you can choose to circle the selected options.
Drag the radio button to the appropriate place in your document.
In the Field properties pane, enter the name of the first option in the Options box.
To add additional options, click the + button next to the Options box. A new radio button appears in the top left corner of your document. Drag the radio button to the appropriate place in your document and enter the name.
You can configure the following radio button field properties:
| Property | Description |
|---|---|
| Group Name | The name of the radio button group |
| Required | Whether or not the radio button group is required |
| Options | Add or remove checkbox options to your document |
| Show in customer wizard (agent fields only) | For Agent fields only, you can choose whether or not to display the field as read-only in the customer wizard. |
| Bind to attribute | When you bind a field to an attribute, the attribute is saved for the duration of the session and any field sharing the same attribute is automatically populated with this information. For more information, see Bind a document field to an attribute. Note: To bind an attribute to a radio button group, ensure that the number of radio button options you define matches the number of options in the attribute. |
Boolean
You can add a boolean field to your document. The boolean field is a simple checkbox that returns a value of true if it is selected and false if it is left blank.
To add a boolean:
In the Add fields pane, click Boolean. The boolean appears in the top left corner of your document.
In the Field properties pane, select the selection symbol for the boolean. This is the way the boolean will appear in the final document when it is selected.
You can either display an X or a ✓ inside the boolean, or you can choose to circle the selected option.
Drag the boolean to the appropriate place in your document.
You can configure the following properties:
| Property | Description |
|---|---|
| Field name | The name of the field |
| Field label | The label of the field that is visible to the customer in the wizard |
| Default State | Whether or not the checkbox is selected by default |
| Required | Whether or not the boolean is required |
| Show in customer wizard (agent fields only) | For Agent fields only, you can choose whether or not to display the field as read-only in the customer wizard. |
| Bind to attribute | When you bind a field to an attribute, the attribute is saved for the duration of the session and any field sharing the same attribute is automatically populated with this information. For more information, see Bind a document field to an attribute. |
Bind a document field to an attribute
Using Lightico Attributes, you can store customer information for the duration of a session. This section describes how to bind a field to an attribute. For more information about creating attributes and how they work, see Understanding Attributes.
To bind a field to an attribute:
In the Lightico Administration page, in the left pane, click Shared Items.
Open the document you want to edit or upload a new document.
Select the field in the document that you want to bind.
Note:If you are binding a checkbox group or a radio button group to an attribute, ensure that the number of selection options you define in the document, matches the number of options in the attribute. For example, if you have inserted 4 checkboxes in the checkbox group, you can only bind the checkbox group to an existing attribute that has 4 options.In the Field properties pane, click Bind to attribute.
The Bind Field to Attribute dialog box opens.
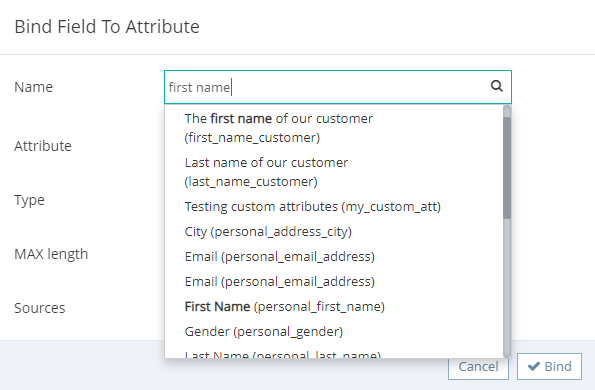
In the Name box, search for the relevant attribute and select it.
Note:You can only search for attributes that match the field type you are binding. For example, if you are binding a text field, you will only see text attributes in the search.The remaining fields are populated with the properties of the selected attribute:
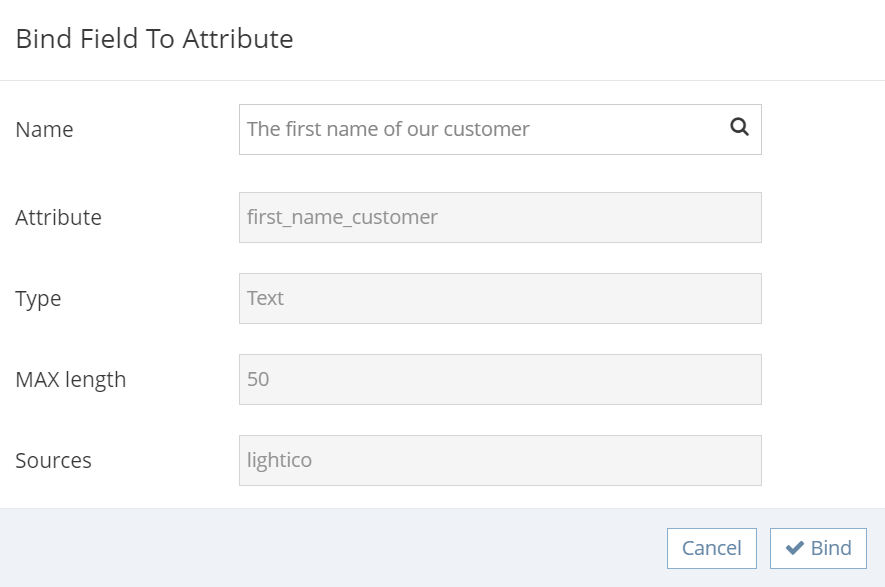
Click Bind.
The field properties pane displays the properties of the attributes: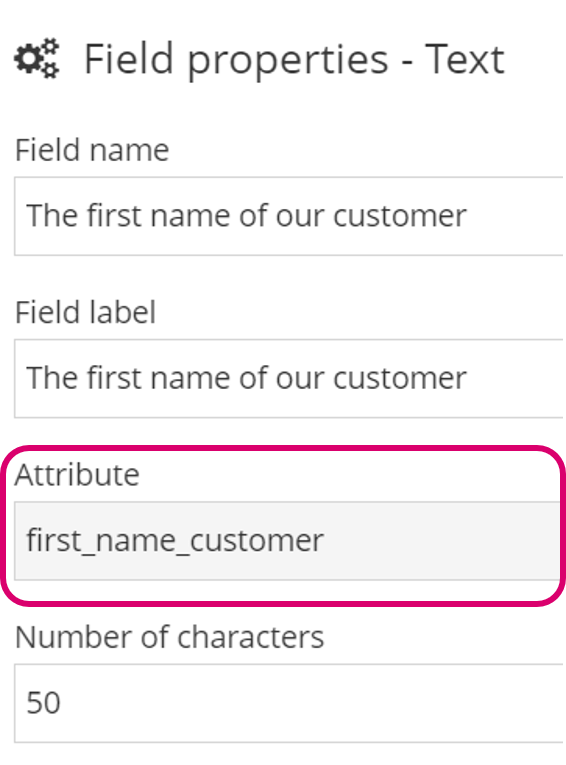
Unbind a field
To unbind a field from an attribute:
Select the relevant field and in the Field properties pane, click Bind to attribute.
In the Bind Field to Attribute dialog box, clear the name from the Name box.
Click Bind.