Business administrators can create template-based documents that agents can use during Lightico sessions. This article describes how to configure the settings of these documents in the Settings tab of the PDF editor.
To open the PDF editor:
On the Shared Resources page, open an existing document or create a new document as described in Create template-based documents.
Import design from another template
You can import the design of a different template into your current template. When you import the design, it includes the layout of the fields, the field properties, and the design of the document wizard.
To import the design from another template:
Go to the template that contains the design you want to use and click Export mapping.
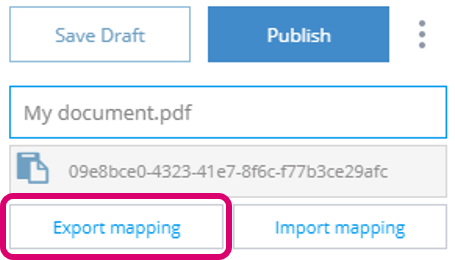 The template design file (.txt) is downloaded to your local drive
Go to the template into which you want to import the design. Click Import mapping and navigate to the template design file (.txt) that you downloaded earlier.
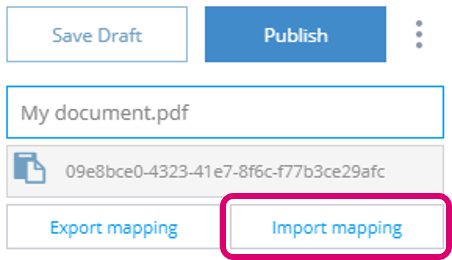 The template design is imported into your document and overwrites any previous design.
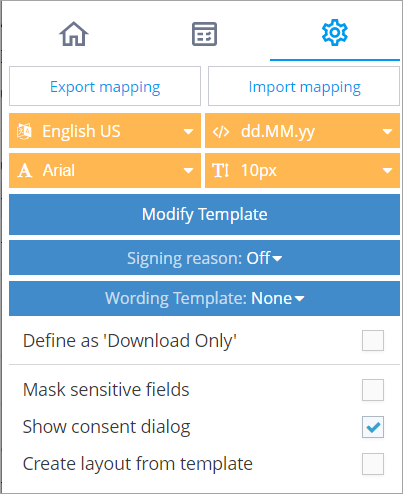
Change default formats
You can change the default font, font size and date format of the template.
Changing the default formats only affects the default value of new fields that you add from this point on. It does not affect the current formats used in your document.
To change the default font size, select the font from the font size list.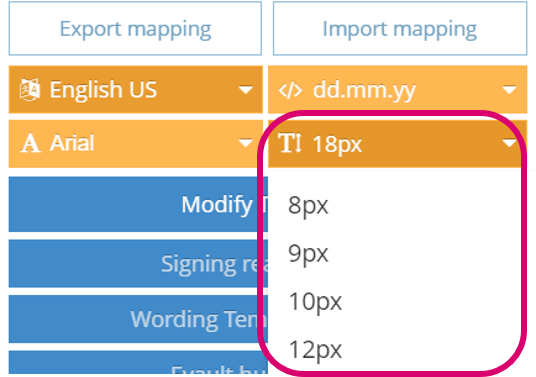
To change the default font, select the relevant font from the font list.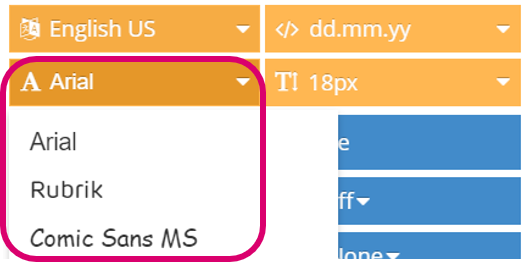
To change the default date format, select the relevant format from the date format list.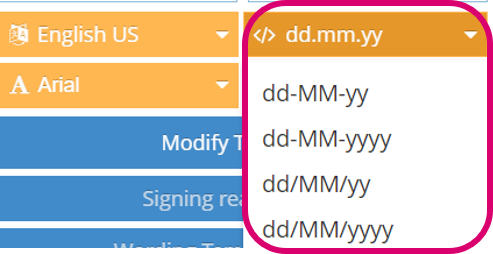
Change the base PDF
You can change the base PDF of the document template. For example, if you already designed the template, including the different field placements, and you need to change the PDF because your terms and conditions were updated, you can upload a new PDF without affecting the design of the template. The design is fully preserved, including the field properties and placement, and only the base PDF itself is changed.
To change the base PDF, click Modify Template and navigate to the relevant PDF.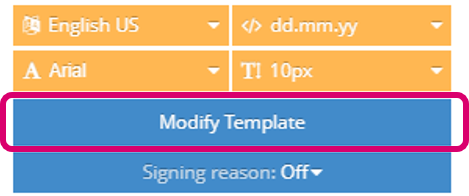
Ensure that the new base PDF you import has the same number of pages as the original PDF. If the new PDF has fewer pages, the fields on the missing pages are removed.
Include a signing reason with the signature
You can configure the document to include a signing reason, such as “I have read this document”, that customers select when they sign the document. For example, in the health industry, a signing reason is one of the requirements of HIPAA (Health Insurance Portability and Accountability Act).
To include a signing reason, select Optional or Mandatory from the Signing reason list.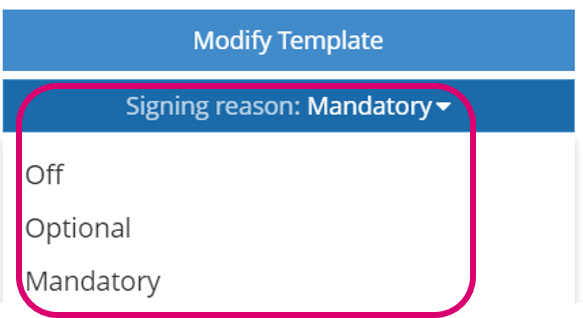 If you choose Optional, the customer can select the reason but it is not required. If you choose required, the reason is included under the signature and the customer cannot deselect it.
You edit the actual signing reason in the system settings. For more information, see Configure session behavior.
When you include a signing reason, the customer sees the reason below the signature.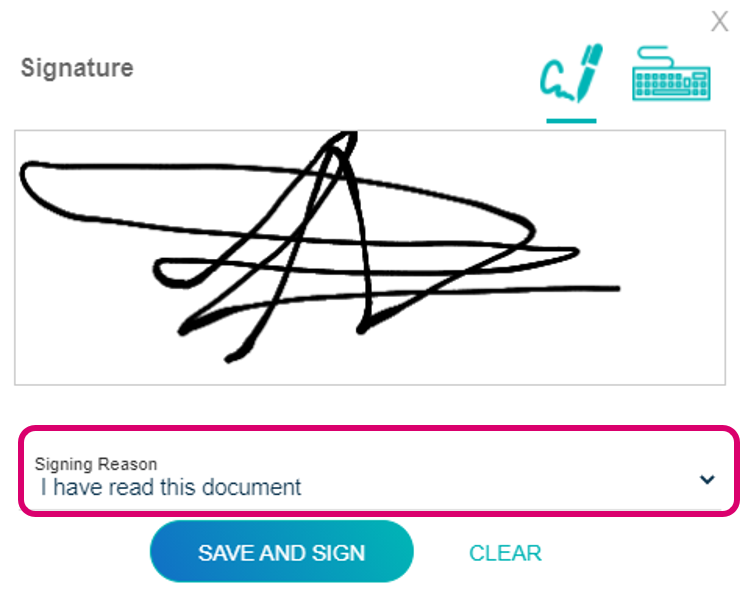
Change the wording of the customer interaction
In the system settings you can define resource templates to change the default wording that the customer sees when an agent sends a document. For example, you can change the word “Approve” to “I agree”.
For each document template, you can select a wording template with its own unique wording. To change the wording of the interaction when this document is sent, select the relevant wording template from the Wording template list.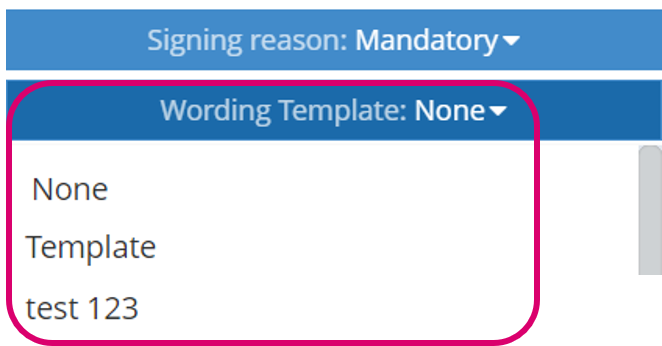
Save customer document in an Evault hub
If you are integrated with an eVault hub, you can select a hub from the Evault Hub list.
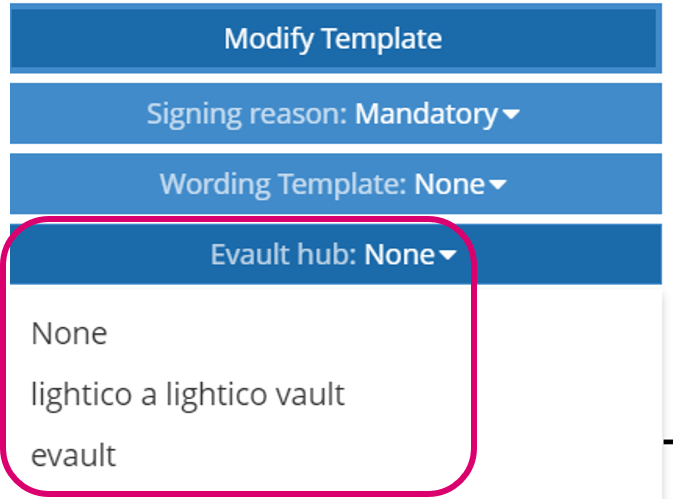
After the document is completed by the customer, the authoritative copy of this document is saved in the eVault hub.
Include a consent message before signing or approving
Before the customer signs or approves a document, you can require customer consent. For more information about configuring consent messages in the system settings, see Configure customer consent.
For each document, you can overwrite the system settings and choose whether to include a consent message before the customer signs or approves this particular document. To do this, select or deselect the Show consent dialog box.
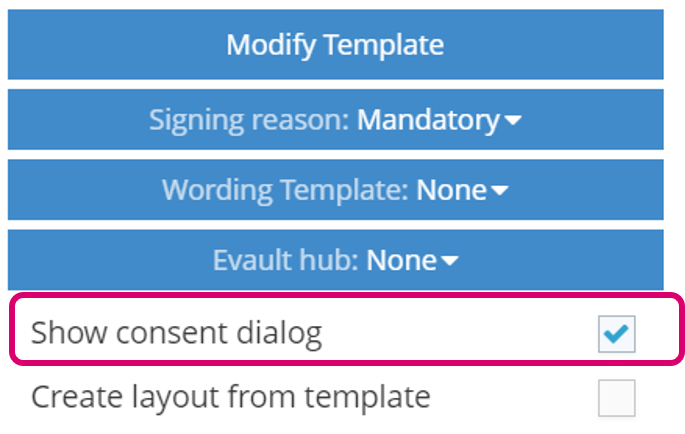
When you include a consent message, the customer sees the message before they sign or approve.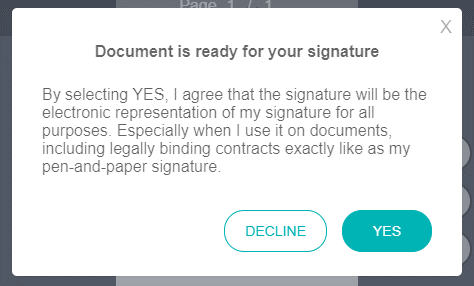
Save as template for ad-hoc documents
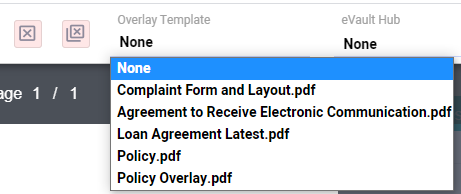
During a Lightico sessopm, agents can send ad hoc documents that they modify during the session. The agent can also apply an overlay template to the ad hoc document that contains pre-configured fields and settings.
To enable agents to use your template-based document as an overlay template, select the Create layout from template box.
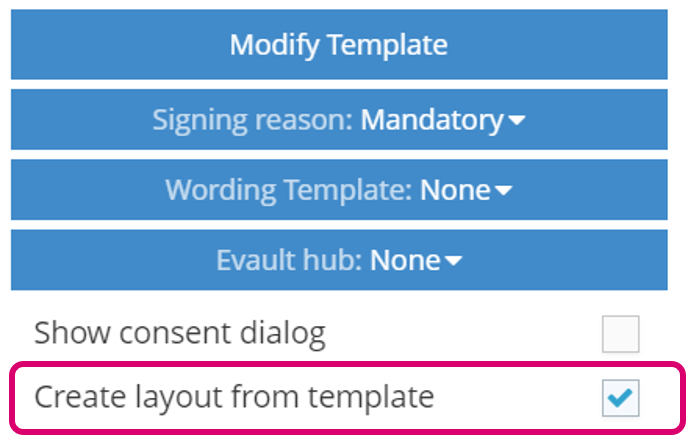
When the document is saved as an overlay template, the agent sees this template as one of the options in the Overlay Template menu in the Agent console.