This article explains how to build a Workflow that enables an agent to create an itemized summary of a sales call. This type of Workflow is a called a visual cart because it present the customer with a visual summary of their order.
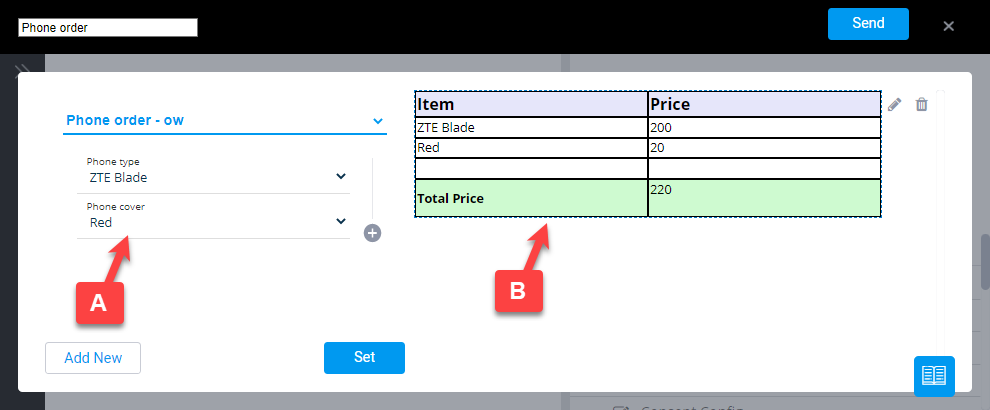
For example, an agent can conduct a sales session with a customer who is interested in purchasing a phone and a cover. The agent fills out the options chosen by the customer (A) and a summary of the sale is automatically created (B) and made available to the customer in the form of a PDF.
You can also add further conditions to your Workflow based on the choices made in the visual cart. For example, you can create a condition that if the customer ordered a certain type of phone, they need to sign a specific agreement.
Note
You can add PDF Template documents to a visual cart Workflow as long as the documents do not contain multiple participants or an agent signature.
🎦 Watch related video:
How to create a visual cart
To create a visual cart, you need to build multiple Workflow elements that will function together as a visual cart.
Step 1: Create a Journey using a Form
In this step, you’ll create a Form that includes the questions you want the agent to complete, called a Journey. For example you can create a Form that includes 2 simple dropdown questions about the type of phone that the customer wants to order and the type of cover.
To create a Journey using a Form:
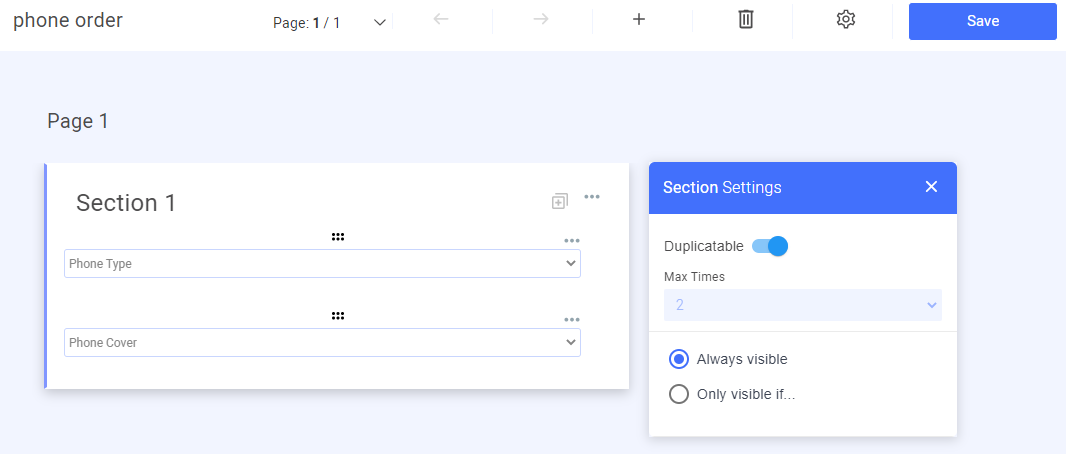
When you build the Form you can make a section duplicatable. This allows you to ask the same set of questions, multiple times during the same journey. To do this, click in the section and turn on the Repeatable in visual cart toggle in the Section settings properties and enter the maximum amount of times that these questions can be repeated.
You can create multiple Forms that will represent different journeys in the visual cart.
For additional information about how to build a Form, see Create Forms.
Step 2: Create the output using a Dynamic Document
In this step, you create the output for the visual cart by building a Dynamic Document. Each section in the document represents the output for a different journey.
To connect the section in the document with the journey that you created in the Form, you bind the section to that Form. To do this, click the Bind to Form button in the top right corner of the section and select the relevant Form.

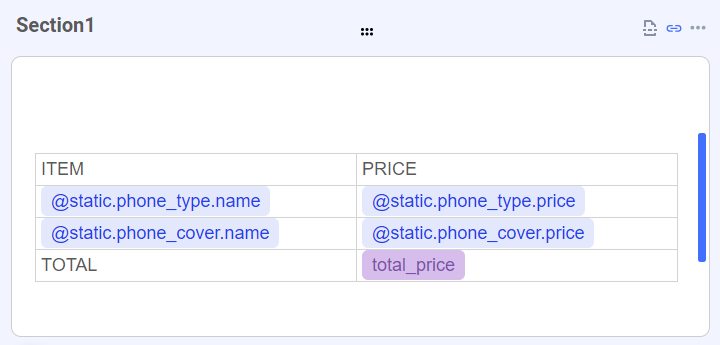
Once you have bound the section to a Form, you can build your output in the section using different attributes and functions that are based on the information entered in the journey. For example, you can create a table with attributes representing the names and prices of the phones and phone covers that are selected in the journey and you can use a function to display the total price of the customer basket.
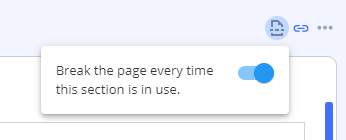
In some cases, the agent fills out the same journey multiple times (For example, a customer buys multiple phones). If you want the output of each journey to appear on a new page in the final PDF, click the Break Page button and turn on the toggle.
You can also create sections that are not bound to any Form. These sections will appear in the output regardless of the input from the journeys. For example, you can include a footer that will always appear in the output.
For more information about creating Dynamic Documents, see Create Dynamic Documents.
For more information about adding functions to Dynamic Documents and limitations to using functions in bound and unbound sections, see Add functions
Step 3: Create a Workflow that includes the Dynamic Document
In this step you add the visual cart to a Workflow.
Add the Dynamic Document you created above as the first step in the Workflow.
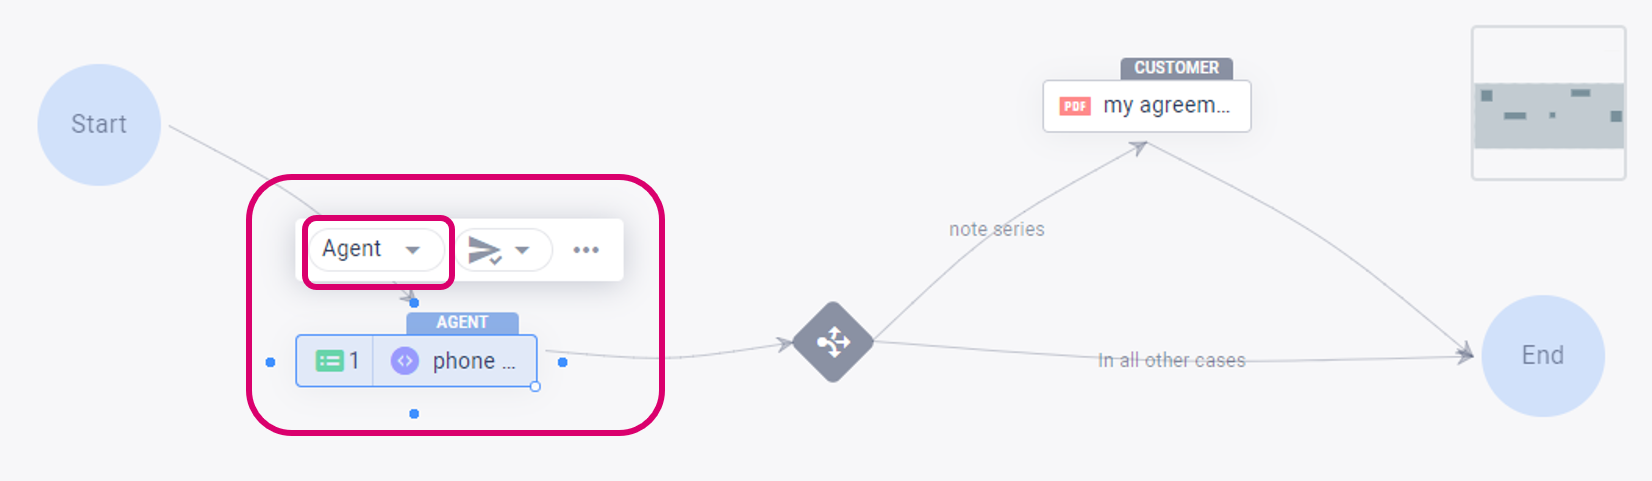
Define this step as an Agent step by selecting Agent in the Agent / Customer dropdown above the element.
Note:
This step needs to be first in the Workflow because the agent needs to complete the questions in the visual cart before the customer can continue with the rest of the Workflow.
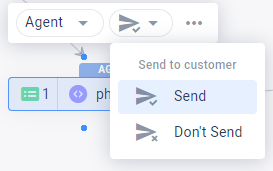
If you want the output of the visual cart to be sent as a PDF to the customer, select Send in the the Send to customer dropdown above the element.
You can add additional steps to the Workflow based on the results of the visual cart.
For example, you can use a switch element and a PDF element and set a condition that if the customer ordered a certain type of phone in the visual cart, they need to sign the PDF agreement.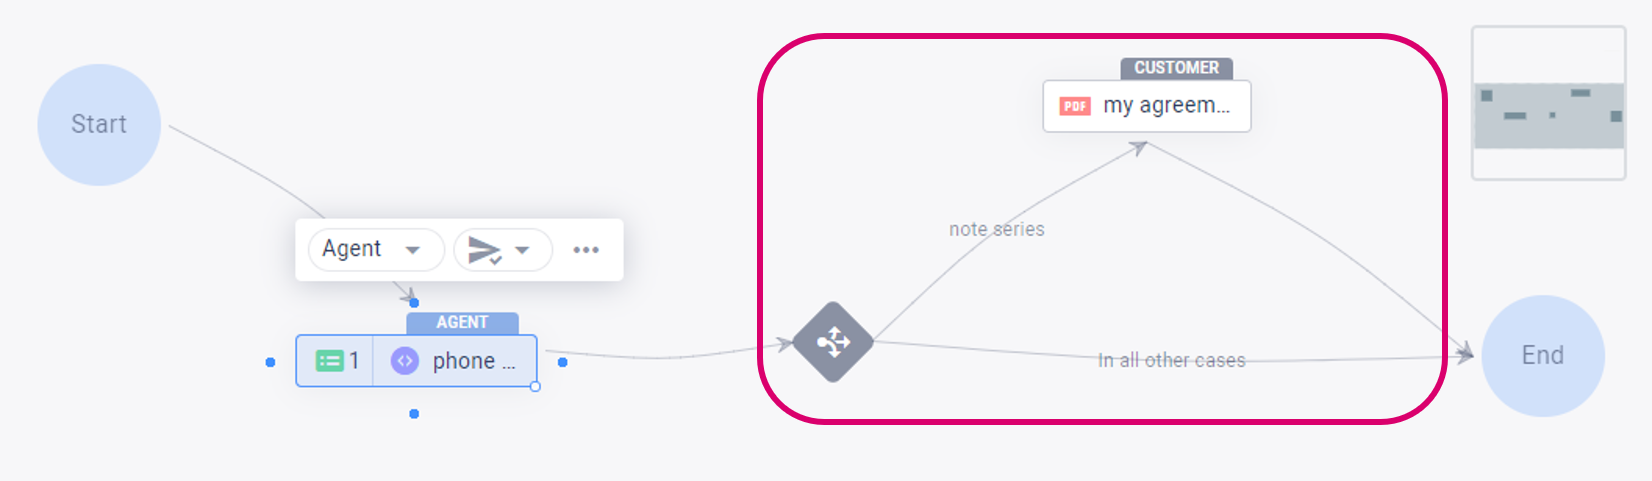
Set a condition based on journey selection
You can set a condition in a visual cart Workflow based on selecting a specific journey. For example, if the customer chooses to buy a phone plan along with their phone, they would need to sign a contract.
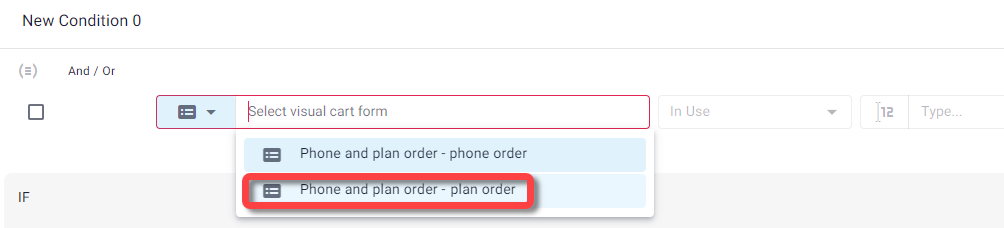
To set a condition based on journey selection:
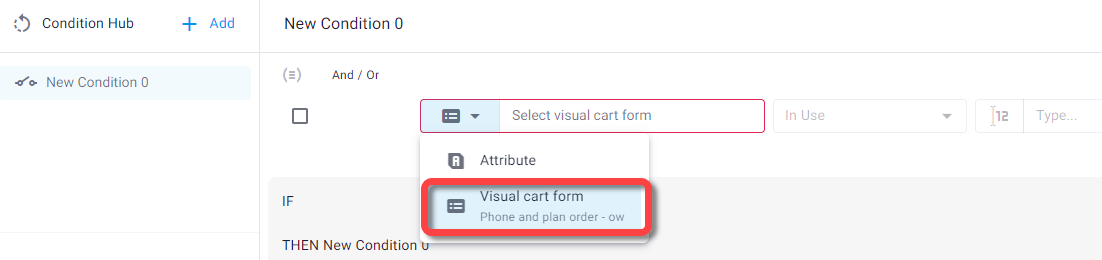
Add a switch or condition hub to the visual cart Workflow.
Select Visual cart Form in the condition.
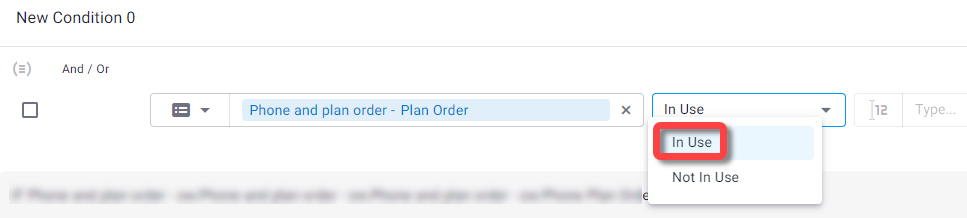
Select the journey.
Select In Use or Not In Use for the condition.
For more information about creating a Workflow, see Create Workflows.
For information about sending a visual cart during a session, from the agent perspective, see Send a visual cart.