Introduction
You can create templates that change the default wording of button labels and messages that appear in the customer UI when completing a PDF form. Wording templates apply to PDF Templates and External Documents with an overlay template.
Note
Wording templates are supported only when the Format and design > Language setting is defined as English.
For example, you can change the label on the Approve button to read I approve.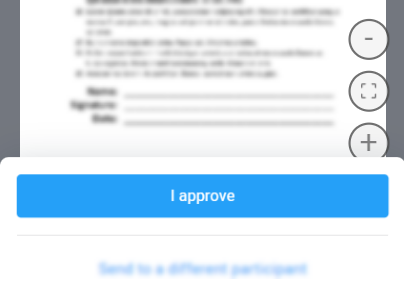
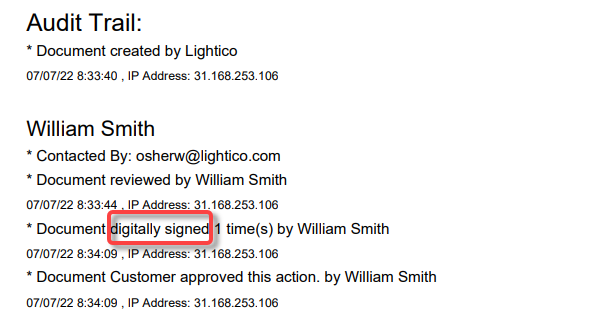
You can also customize some of the wording on the audit trail. For example, you can change "esigned" to "digitally signed".
In the Customizations > Wording page you'll find a table of all wording that can be changed in the UI and audit trail.
Outline
Here is an outline of the steps for customizing wording of the customer UI for a template-based document:
Create a custom wording template
- In the Administration screen, go to Customizations > Wording and click New Template.
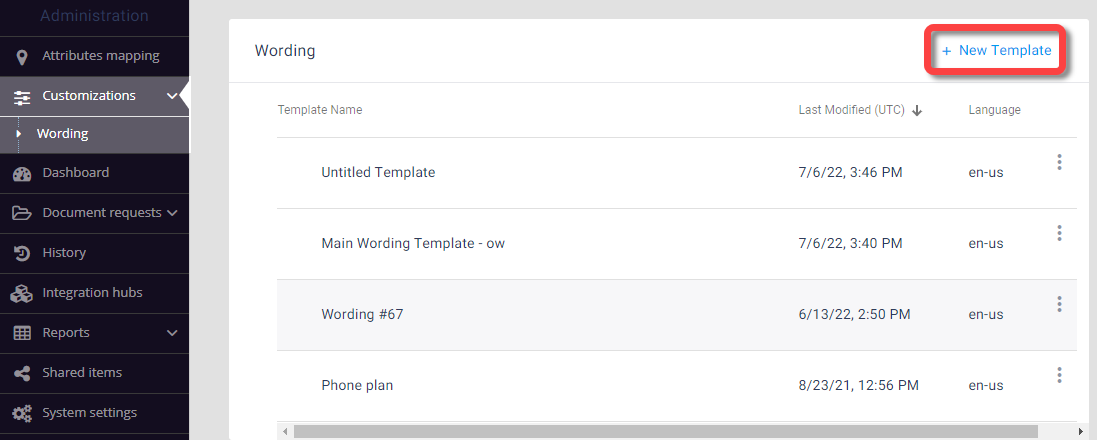
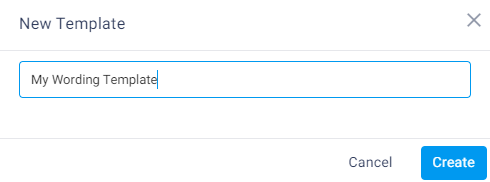
- Name the template and click Create.
The template configuration page opens with a table of all customizable UI and audit trail elements. - Add custom text to a field in the Value column.
- Delete the custom text to return to the System Default text.
- Click Reset to return to the last saved version of the text.
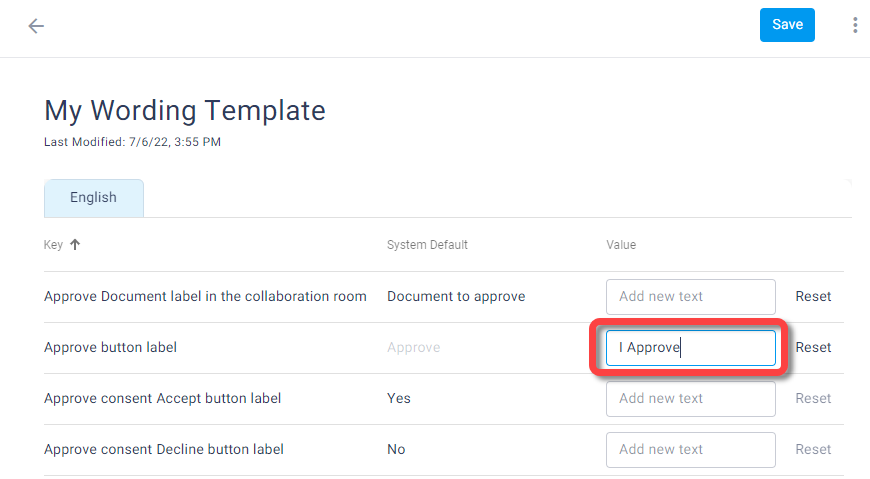
- After making all your changes, click Save.
The wording template is saved.
Associate the wording template to a document
For each PDF Template, you can select a wording template with its own unique wording. This wording template defines wording of the UI elements when this PDF Template is sent.
To associate the wording template to a PDF Template:
- In the PDF Builder formatting tab for the relevant document, turn on the Wording template toggle and select the template from the pop-up that appears.
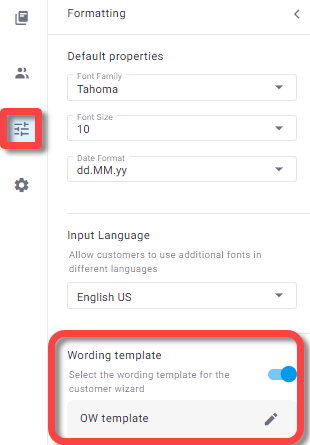
Table of Wording Changes
Below is a table of all the UI and audit trail elements that can be defined in a wording template. The same table (without the screenshots) appears in the wording template editing page (see above).
Document Approval
| Name of UI element | Default text | Screenshot |
|---|---|---|
| A) Approve Document label in the collaboration room | Document to approve | 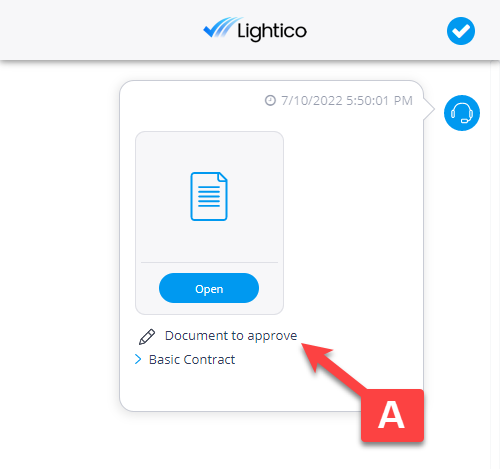 |
| B) Approve button label | Approve | (1).png) |
| C) Approve consent Accept button label | Yes | (1).png) |
| D) Approve consent Decline button label | No | |
| E) Approve consent text | By selecting YES, I agree that my approval will be the electronic representation of my signature for all purposes. Especially when I use it on documents, including legally binding contracts exactly like my pen-and-paper signature. | |
| F) Approve title | Approval |
Audit Trail
| Name of audit trail element | Default Text | Screenshot |
|---|---|---|
| A) Audit action approved | approved | .png) |
| B) Audit action e-signed | e-signed | |
| C) Audit action locked | locked | |
| D) Audit action viewed | viewed | |
| E) Audit approved status | APPROVED | |
| F) Audit signed status | SIGNED |
Download only document
| Name of UI element | Default text | Screenshot |
|---|---|---|
| A) Download button label | Download | 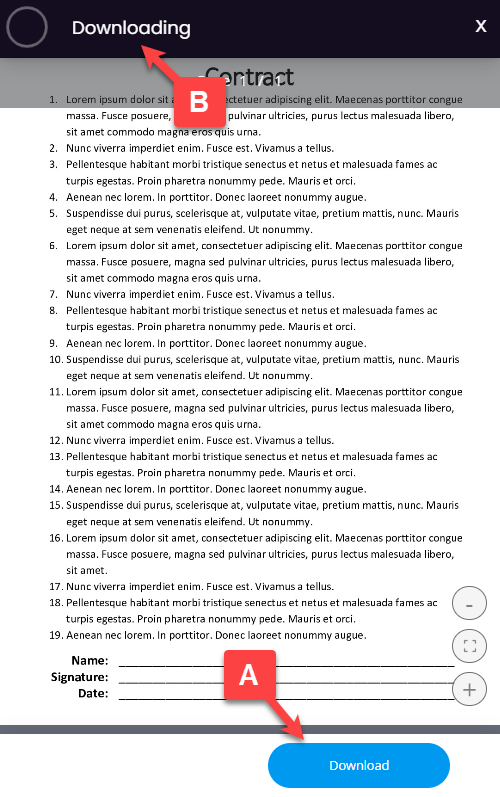 |
| B) Download only title | Downloading |
Esign document (for template-based and ad hoc documents with overlay)
| Name of UI element | Default Text | Screenshot |
|---|---|---|
| A) Esign opening screen title | Please review and sign the following document | .png) |
| B) eSign opening screen subtitle | NA | |
| A) Esign closing screen title | Your documents have been submitted | .png) |
| B) eSign closing screen subtitle | NA | |
| A) Sign button label | Sign | .png) |
| B) Sign title | Review | |
| C) Sign consent Accept button label | Yes | .png) |
| D) Sign consent Decline button label | Decline | |
| E) Sign consent text | By selecting YES, I agree that the signature will be the electronic representation of my signature for all purposes. Especially when I use it on documents, including legally binding contracts exactly like as my pen-and-paper signature. |