Automated Workflows are the backbone of a customer journey. Lightico provides tools for all the important elements of a customer journey, but these tools are only the building blocks. The goal is to lead your customer to complete all elements of their journey in a clear, effective way that prevents anything from being missed or forgotten. This is the purpose of the Lightico Workflow.
Benefits and features of automated Workflows
Responsive and dynamic in real-time
Workflows can be built to respond and change according to inputs from the agent or customer.
What happens if your customer fails to verify their identity?
How can you present different contracts according to age?
How about adding or removing disclaimers and conditions in a contract based on place of residence?
By building business logic and conditions into Workflows, the journey adjusts to the specific situations like these as it progresses, in real-time.
Standardize How You Do Business
By pre-building a series of interactions, customer journeys become more predictable and consistent. Workflows ensure that your processes are followed the same way every time, reducing human error, improving compliance, and enhancing customer satisfaction.
Code-Free Configuration
The Workflow designer is a user-friendly interface. No coding is necessary, empowering business users to create, edit, and optimize Workflows without relying on technical teams.
Save Time and Increase Efficiency
Automated Workflows eliminate manual processes, reducing repetitive tasks for agents. This allows teams to handle more customers and focus on delivering a better experience.
Reduce Errors and Rework
By automating steps and enforcing required actions, Workflows reduce the chance of missed information, incomplete documents, or invalid submissions—saving time for both the customer and the business.
Enhance Compliance
Workflows ensure that critical steps, disclosures, and verifications are consistently completed, making it easier to meet regulatory and company requirements.
Workflow example
Let's say you are creating a Workflow to help agents close a deal with their customers. In this example, customers first need to authenticate themselves by submitting a photo ID. They then fill out some personal details in a Form including the state in which they live. Due to state law, if they live in California, they need to agree to the terms and conditions. In the last step, they sign the final agreement.
The following example in the Workflow designer, incorporates all of these steps:
Customer authentication
Conditions based on the authentication results
Customer fills out a loan form
Condition based on customer address
If the customer stated in the form that they live in California they are taken to a terms and conditions page
All customers sign business the agreement contract
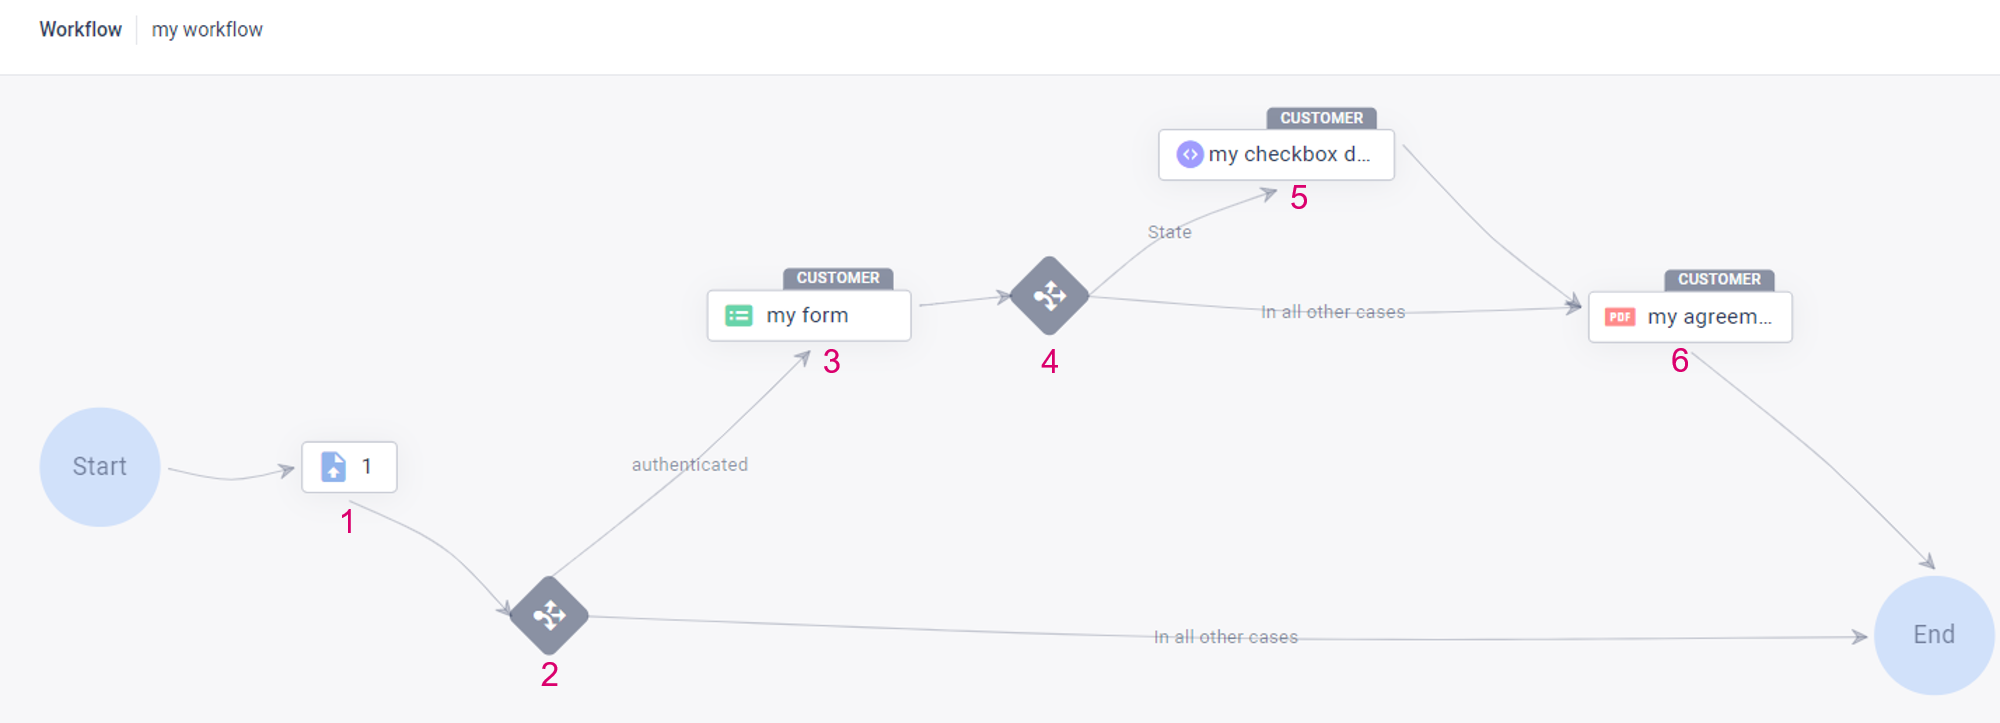
An example Workflow as seen in the Workflow designer
Workflow elements
Before building a Workflow, you'll want to understand the main elements that are the building blocks of a Workflow. Each element needs to be created and properly configured so that all the elements can work together to create an effective sequence.
The following are the types of elements that can be added to a Workflow:
Form - Capture information from the customer or the agent in an interactive Form. Each field in the Form associates the information with an identifying label called an Attribute, enabling you to use this captured data to populate document fields and determine outcomes in conditional elements. See Create Forms.
Dynamic Document - Build a document entirely in the user-friendly HTML builder. Incorporate conditions and business logic to determine what content in the document is included for each customer. After completion , the final document is converted to PDF format for saving and downloading. See Create dynamic Documents.
PDF Template - Obtain signatures and/or approvals and populate fields in your own PDF documents. Using the PDF Template builder, add interactive signature elements and fields that are overlaid on a static PDF. Add multiple signers/apporvals to the documents. See New PDF Builder: Getting started with the PDF Builder.
External document - A placeholder that requires that a PDF file is uploaded just before the Workflow is sent out. The agent or API can add signature elements or a PDF Template overlay with interactive fields before sending. See Add External Documents in a Workflow.
Document request - Guide your customer to scan and/or upload supporting documentation required for the journey. See Create Document Requests.
Photo ID verification - Verify a photo ID and the identity of the customer. The results of the IDV can be used to determine the next steps of the customer in the Workflow or if they should continue. See Customer verification as a Workflow step.
Phone verification - Verify the identity of the customer through their phone. As in photo ID verification, results of the phone verification can be used to determine the next steps of the customer in the Workflow or if they should continue. See Customer verification as a Workflow step.
Tick-box document - Present a message to customers and require them to indicate that they have read it. See Create tick-box documents.
Tip
Follow the links to learn about each of these Workflow elements and then see Create Workflows to learn how to assemble the elements into a Workflow.